Programming & IT Tricks . Theme images by MichaelJay. Powered by Blogger.

Copyright

Facebook

Post Top Ad

Search This Blog

Post Top Ad

Responsive Ads Here

Archive

Post Top Ad

Contact


Editors Picks

Follow us

Post Top Ad

Fashion

Music

News

Sports

Food

Technology

Featured

Videos

Fashion

Technology

Fashion

Label

Translate

About

Translate

Sponsor

test

Weekly

Comments

Recent

Connect With us

Over 600,000+ Readers Get fresh content from FastBlog

About

Showing posts with label 4G. Show all posts

Friday, January 12, 2018

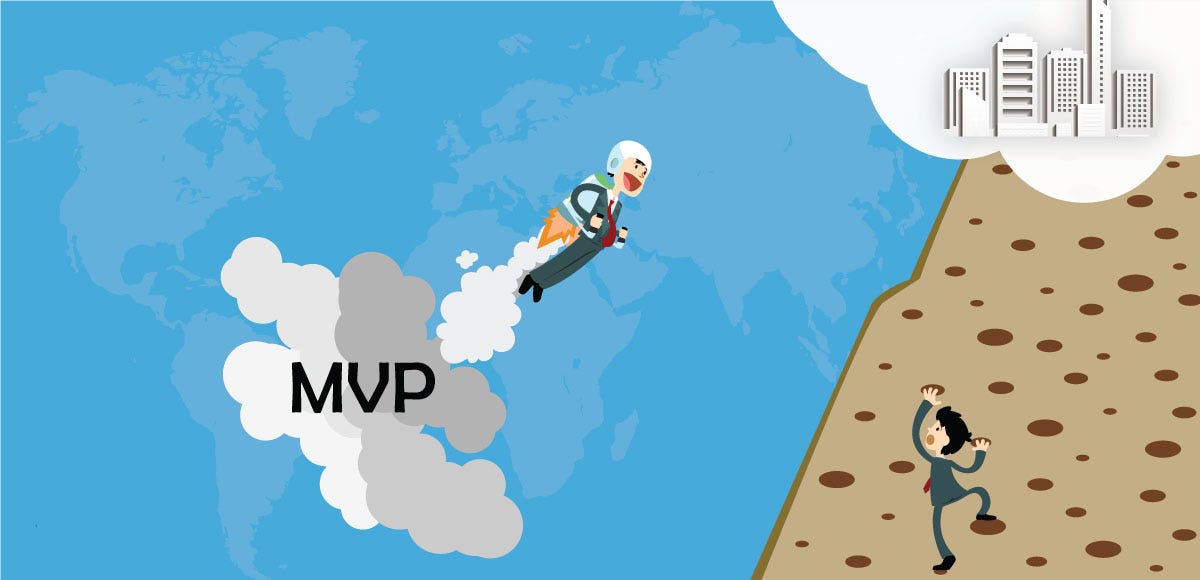
How much will MVP app design cost in 2018


MVP is a great way for your app to find its early adopters, investors and even customers. But, experience has shown that raw MVP without, at least, tolerable UI and UX fails miserably. OK, but how much will MVP app design cost me? Spoiler: not much. And you will be surprised with the result.
What is the point of an MVP? To show off the core features of your app to a target audience and investors before even starting the development. In other words, to test the waters.
However, it doesn’t mean at all that you have to produce an ugly monster with absent UI. As one more crucial goal of MVP is to find your customers. Great UI in pair with convenient UX is your key to success.
But what is the cost of MVP app design? How much resources you have to spare on design purposes? Let’s find it out.

Preparations

To get more or less decent design of your MVP you can’t just draw some lines and boxes on a napkin and give it to a design company or freelancers. Actually, you can do that, but it will cost you, and a lot. We’ll talk about that further on. Now let’s get back to the point.
If you want to save time and, consequently, money it is a good idea to get prepared, prior meeting with a design agency. Wireframe and some mockups are pretty much everything you might need.
Moreover, by presenting comprehensive app wireframe and mockups, you can be sure that there won’t be any unpleasant surprises. As a hired freelancers or guys from a contracted agency will know for sure what end-result they are ought to provide.

Wireframe of the app

A skeleton of your app. That is a rough, or even drawn on a napkin (yes-yes), layout of the navigation, screens and elements in your app. It also outlines the core features of it. And the best thing is that you finally have a, more or less, complete idea of your app.
Sure thing, making a wireframe is more than DIY-appropriate. Tools like Bootstrap may come in handy here. The coolest part is, that almost none programming skills are required. Only basic knowledge of HTML and CSS. And, probably, some video guides. :)
With available templates, you’ll be capable of building a rough layout within hours. Plus it is completely free. Unless you’ll require some advanced templates. But you can always look out for those on the other platforms.
Needless to say, it will help a lot for the initial pitching session. Even if you decide to entrust all this job to an agency — some minimum wireframe would be very helpful prior approaching them.
On the average, wireframe might take 10–30 hours in development. It might cost you nothing if you’ll do it by yourself. But if you’re going to ask an agency — $500 — $3.000 would be a fair price, depending on the complexity of the app.
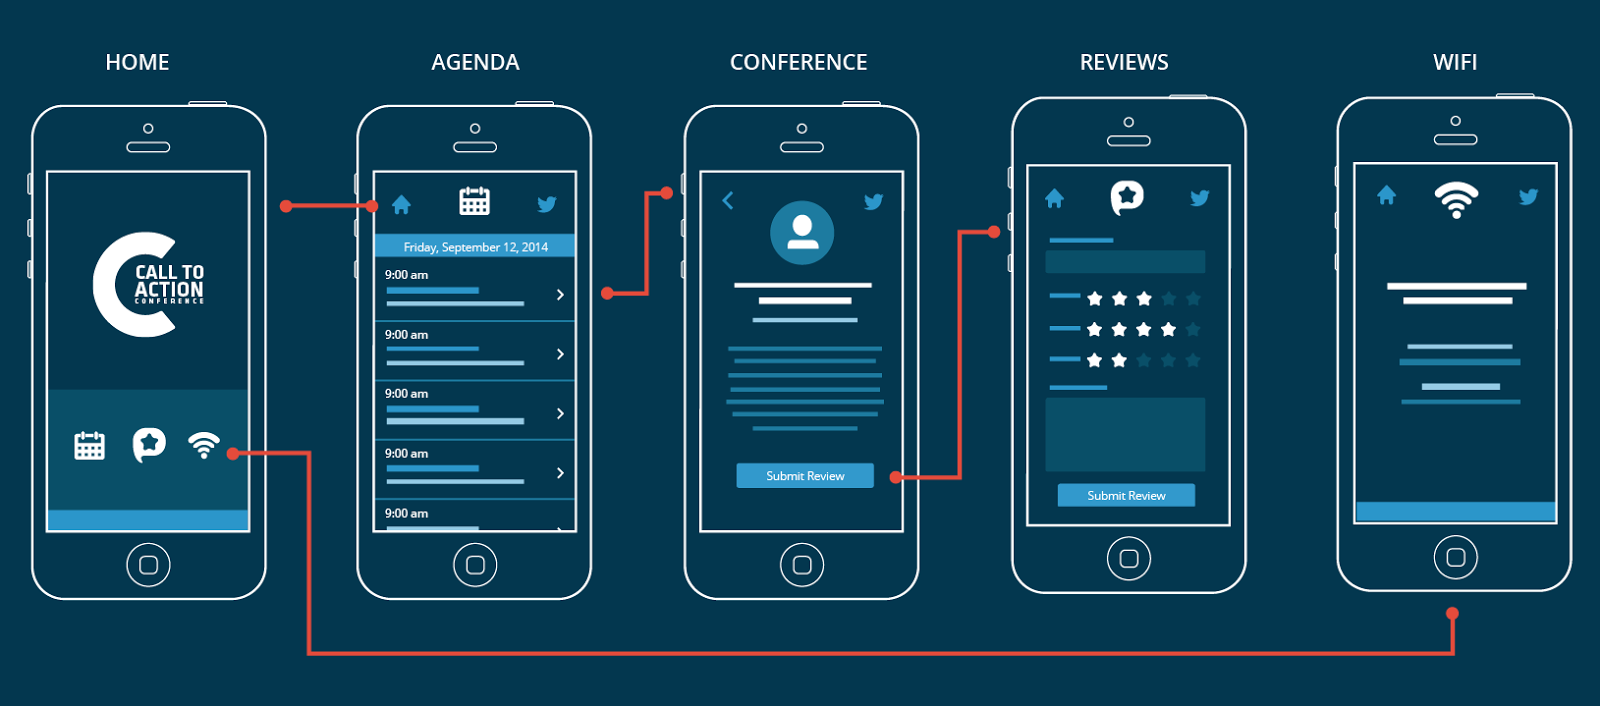
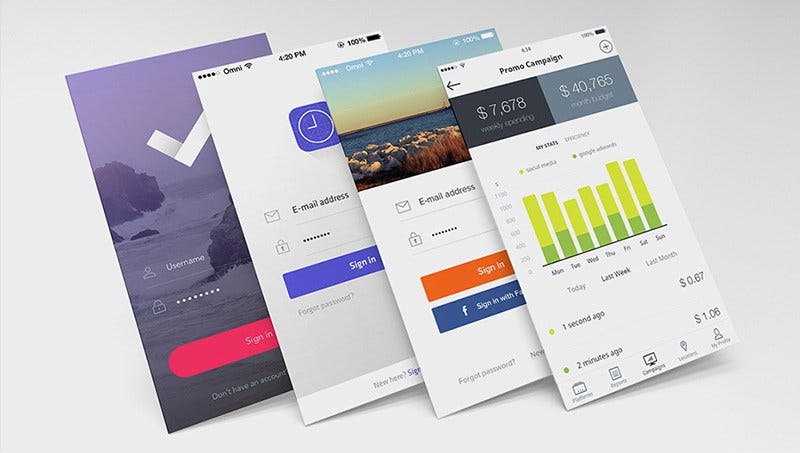
Mockup of the app

Mockup is what your customers and investors will see. It can make them fall in love with your app or drive them away. In a nutshell, that is an approximate final look of your app.
There is a good rule for mockup estimation. Landing page will cost you around $500. And every additional screen will, usually, cost about $50–70. Count the number of screens you are going to have. Simply add everything to get the total price. That is the most common practice how companies and freelancers usually charge for their services.
But what about DIY? Of course, if you are familiar with such great tools like Adobe Photoshop and Adobe Experience Design it won’t be a problem for you to make a simple (or brilliant, depending on your skills) mockup. Those are the most common and handy tools. And while Photoshop will cost you $10-$20 (depending on the plan), Experience Design is completely free.

Interactive mockup

Speaking of simple mockups, there is a great way to improve those — interactivity.
Interactive mockup  — is a good chance for you to improve client engagement. Customers or investors would better prefer interactive solution over a static image. One more big plus — those are easy to spread over various devices.
Tools like Framer and inVision are your best helpers here. They work pretty much like usual app building platforms. Take your mockups, drag-and-drop different elements, adjust navigation and features, et voila! Now you have it.
Interactive mockups cost just a slightly more than the usual ones. You’ll just need your usual mockups and subscription for one of those tools. Or you can give this job to the designers you’ve hired. Anyway, additional expenses won’t exceed $100-$500. But potential profit may be a lot bigger.

Total price

Those blessed ones, who chose DIY way, might pay from complete nothing to a few hundred bucks (subscriptions, paid content, etc.).
And those who decide to hire somebody, might receive a bill on $1000-$10.000. Price varies drastically because of:
  • complexity of your app
  • desired features
  • region where you hire
One more good advice. Design agencies, usually, take fixed (and pretty high) price. Freelancers or outsource companies, on the other hand, often, charge on per hour basis. So hiring few freelancers in India for $10/hour might be a good idea for your wallet. But is it so when it comes to the quality?

Friday, January 5, 2018

How we recreated Amazon Go in 36 hours


John Choi, me, our project apparatus, Ruslan Nikolaev, and Soheil Hamidi at our demo!
My colleagues and I wanted to create something that would make people go “wow” at our latest hackathon.
Because imitation is the sincerest form of flattery and IoT is incredibly fun to work with, we decided to create our own version of Amazon Go.
Before I explain what it took to make this, here’s the 3 minute demo of what we built!
There were four of us. Ruslan, a great full-stack developer who had experience working with Python. John, an amazing iOS developer. Soheil, another great full-stack developer who had experience with Raspberry Pi. And finally, there was me, on the tail end of an Android developer internship.
I quickly realized that there were a lot of moving parts to this project. Amazon Go works on the basis of real-time proximity sensors in conjunction with a real-time database of customers and their carts.
We also wanted to take things a step further and make the entry/exit experience seamless. We wanted to let people enter and exit the store without needing to tap their phones.
In order to engage users as a consumer-facing product, our app would need a well-crafted user interface, like the real Amazon Go.
On the day before the hackathon, I put together a pseudo-design doc outlining what we needed to do within the 36 hour deadline. I incorporated the strengths of our team and the equipment at hand. The full hastily assembled design doc can be seen below.

There were six main components to EZShop, our version of Amazon Go.
A quick diagram I whipped up visualizing the components of this project

The Kairos Facial Recognition API

The Kairos facial recognition API was a fundamental component for us. It abstracted the ability to identify and store unique faces. It had two APIs that we used: /enroll and /verify.
/enroll is described as:
Takes a photo, finds the faces within it, and stores the faces into a gallery you create.
We enrolled all new customers into a single “EZShop” gallery. A unique face_id attribute would be returned and stored with the customer’s registered name in our real-time database.
When we wanted to verify a potential customer’s image, we would POST it to the /verify endpoint. This would return the face_id with the highest probability of a match.
In a real-world implementation, it probably would have been a better idea to use a natively implemented facial recognition pipeline with TensorFlow instead of a network API. But given our time constraints, the API served us very well.

The Realtime Firebase Database

The Firebase database was another fundamental piece to our puzzle. Every other component interacted with it in real time. Firebase allows customized change listeners to be created upon any data within the database. That feature, coupled with the easy set-up process, made it a no brainer to use.
The schema was incredibly simple. The database stored an array of items and an array of users. The following is an example JSON skeleton of our database:
{
  "items": [
    {
      "item_id": 1,
      "item_name": "Soylent",
      "item_stock": 1,
      "price": 10
    }
  ],
  "users": [
    {
      "face_id": 1,
      "name": "Subhan Nadeem",
      "in_store": false,
      "cart": [
        1
      ]
    }
  ]
}
New users would be added to the array of users in our database after registering with the Kairos API. Upon entry or exit, the customer’s boolean in_store attribute would be updated, which would be reflected in the manager and personal app UIs.
Customers picking up an item would result in an updated item stock. Upon recognizing which customer picked up what item, the item’s ID would be added to the customer’s items_picked_up array.
I had planned for a cloud-hosted Node/Flask server that would route all activity from one device to another, but the team decided that it was much more efficient (although more hacky) for everybody to work directly upon the Firebase database.

The Manager and Personal Customer Apps

John, being the iOS wizard that he is, finished these applications in the first 12 hours of the hackathon! He really excelled at designing user-friendly and accessible apps.

The Manager App


This iPad application registered new customers into our Kairos API and Firebase database. It also displayed all customers in the store and the inventory of store items. The ability to interact directly with the Firebase database and observe changes made to it (e.g. when a customer’s in_store attribute changes from true to false) made this a relatively painless process. The app was a great customer-facing addition to our demo.

The Personal Shopping App


Once the customer was registered, we would hand a phone with this app installed to the customer. They would log in with their face (Kairos would recognize and authenticate). Any updates to their cart would be shown on the phone instantly. Upon exiting the store, the customer would also receive a push notification on this phone stating the total amount they spent.

The Item Rack, Sensors, and Camera

Soheil and Ruslan worked tirelessly for hours to perfect the design of the item shelf apparatus and the underlying Pi Python scripts.
The item rack apparatus. Three items positioned in rows, a tower for the security camera, and ultrasonic sensors positioned at the rear
There were three items positioned in rows. At the end of two rows, an ultrasonic proximity sensor was attached. We only had two ultrasonic sensors, so the third row had a light sensor under the items, which did not work as seamlessly. The ultrasonic sensors were connected to the Raspberry Pi that processed the readings of the distance from the next closest object via simple Python scripts (either the closest item or the end of the rack). The light sensor detected a “dark” or “light” state (dark if the item was on top of it, light otherwise).
When an item was lifted, the sensor’s reading would change and trigger an update to the item’s stock in the database. The camera (Android phone) positioned at the top of the tower would detect this change and attempt to recognize the customer picking up the item. The item would then instantly be added to that customer’s cart.

Entrance and Exit Cameras

I opted to use Android phones as our facial recognition cameras, due to my relative expertise with Android and the easy coupling phones provide when taking images and processing them.
The phones were rigged on both sides of a camera tripod, one side at the store’s entrance, and the other at the store exit.
A camera tripod, two phones, and lots of tape
Google has an incredibly useful Face API that implements a native pipeline for detecting human faces and other related useful attributes. I used this API to handle the heavy lifting for facial recognition.
In particular, the API provided an approximate distance of a detected face from the camera. Once a customer’s face was within a close distance, I would take a snapshot of the customer, verify it against the Kairos API to ensure the customer existed in our database, and then update the Firebase database with the customer’s in-store status.
I also added a personalized text-to-speech greeting upon recognizing the customer. That really ended up wowing everybody who used it.
The result of this implementation can be seen here:
Once the customer left the store, the exit-detection state of the Android application was responsible for retrieving the items the customer picked up from the database, calculating the total amount the customer spent, and then sending a push notification to the customer’s personal app via Firebase Cloud Messaging.

Of the 36 hours, we slept for about 6. We spent our entire time confined to a classroom in the middle of downtown Toronto. There were countless frustrating bugs and implementation roadblocks we had to overcome. There were some bugs in our demo that you probably noticed, such as the cameras failing to recognize several people in the same shot.
We would have also liked to implement additional features, such as detecting customers putting items back on the rack and adding a wider variety of items.
Our project ended up winning first place at the hackathon. We set up an interactive booth for an hour (the Chipotle box castle that can be seen in the title picture) and had over a hundred people walk through our shop. People would sign up with a picture, log into the shopping app, walk into the store, pick up an item, walk out, and get notified of their bill instantly. No cashiers, no lines, no receipts, and a very enjoyable user experience.
Walking a customer through our shop
I was proud of the way our team played to each individual’s strengths and created a well put-together full-stack IoT project in the span of a few hours. It was an incredibly rewarding feeling for everybody, and it’s something I hope to replicate in my career in the future.
I hope this gave you some insight into what goes on behind the scenes of a large, rapidly prototyped, and hacky hackathon project such as EZShop.

Tuesday, January 2, 2018

Jio remains in the 4G download speeds

  • Jio remains in the 4G download speeds

According to the data released by the telecom regulator TRAI MySpace App, in November, Gio's average 4G download speed was 21.8Mbps in November. Also, the download speed in October was less than 21.8Mbps. Vodafone is second in the 4G download speed in MySpace App, which has twice the speed of 9.9Mbps. Geo continues to be number one in the TRAI App Download Chart.
TRAI had launched the app last year, apart from that, four major telecom companies have also increased in the 4G upload speed last month. Airtel's 9.3Mbps speed was at third place after Geoan's 21.8Mbps and Vodafone's 9.9Mbps speed. After that, Idea's speed was 8.1Mbps. This month's change was seen compared to the previous month, before Idea was in third place and Airtel was at number four.
Apart from that, Geo has provided two new plans in his portfolio. This new plan is priced at Rs 199 and Rs 299. In this plan, there will be subscriptions for Voice Calling, National Roaming, SMS and Geo Apps except daily Tada. However, it will only benefit from Prime Members.
First of all, you will be given 1.2GB 4G data every day if you talk about Geo 199. The validity of this plan will be 29 days, so the total data will be 33.6GB. Along with Voice Calling, National Roaming, SMS and Geo Apps subscriptions will also be available.
Geo's second plan is Rs 299. It has 28 days of validity. There you will find 2GB of data every day. As soon as this data is complete, the speed of the data will be 128Kbps.

Interested for our works and services?
Get more of our update !