Programming & IT Tricks . Theme images by MichaelJay. Powered by Blogger.

Copyright

Facebook

Post Top Ad

Search This Blog

Post Top Ad

Responsive Ads Here

Archive

Post Top Ad

Contact


Editors Picks

Follow us

Post Top Ad

Fashion

Music

News

Sports

Food

Technology

Featured

Videos

Fashion

Technology

Fashion

Label

Translate

About

Translate

Sponsor

test

Weekly

Comments

Recent

Connect With us

Over 600,000+ Readers Get fresh content from FastBlog

About

Showing posts with label web Developer. Show all posts

Friday, January 19, 2018

How video streaming works on the web: An introduction


Note: this article is an introduction to video streaming in JavaScript and is mostly targeted to web developers. A large part of the examples here make use of HTML and modern JavaScript (ES6).
 If you’re not sufficiently familiar with them, you may find it difficult to follow through, especially the code example.
Sorry in advance for that.

The need for a native video API

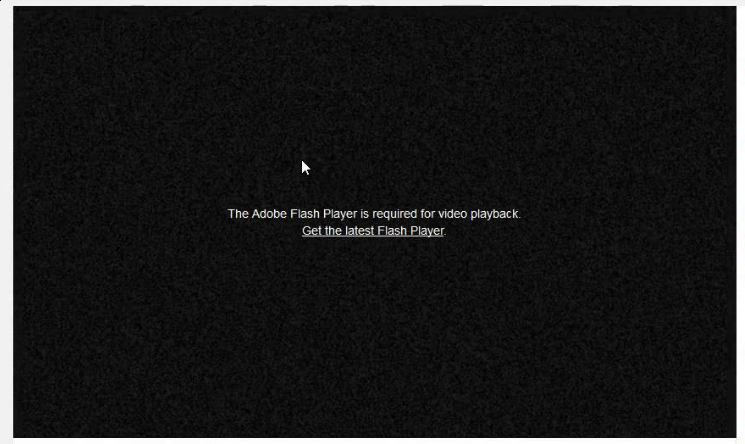
From the early to late 2000s, video playback on the web mostly relied on the flash plugin.
Screen warning that the user should install the flash plugin, at the place of a video
This was because at the time, there was no other mean to stream video on a browser. As a user, you had the choice between either installing third-party plugins like flash or silverlight, or not being able to play any video at all.
To fill that hole, the WHATWG began to work on a new version of the HTML standard including, between other things, video and audio playback natively (read here: without any plugin). This trend was even more accelerated following Apple stance on flash for its products.
This standard became what is now known as HTML5.
The HTML5 Logo. HTML5 would be changing the way video are streamed on web pages
Thus HTML5 brought, between other things, the <video> tag to the web.
This new tag allows you to link to a video directly from the HTML, much like a <img> tag would do for an image.
This is cool and all but from a media website’s perspective, using a simple img-like tag does not seem sufficient to replace our good ol' flash:
  • we might want to switch between multiple video qualities on-the-fly (like YouTube does) to avoid buffering issues
  • live streaming is another use case which looks really difficult to implement that way
  • and what about updating the audio language of the content based on user preferences while the content is streaming, like Netflix does?
Thankfully, all of those points can be answered natively on most browsers, thanks to what the HTML5 specification brought. This article will detail how today’s web does it.

The video tag

As said in the previous chapter, linking to a video in a page is pretty straightforward in HTML5. You just add a video tag in your page, with few attributes.
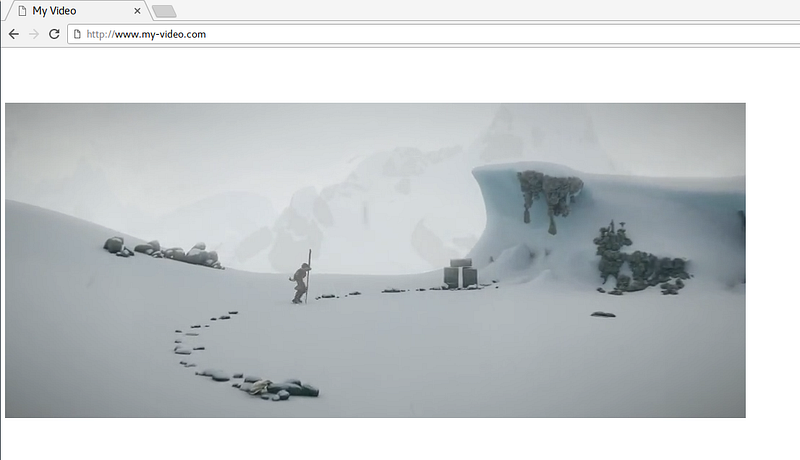
For example, you can just write:
This HTML will allow your page to stream some_video.mp4 directly on any browser that supports the corresponding codecs (and HTML5, of course).
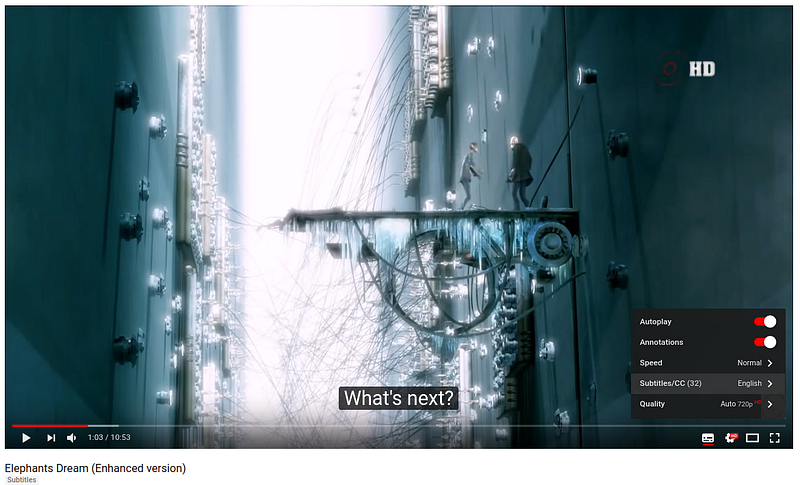
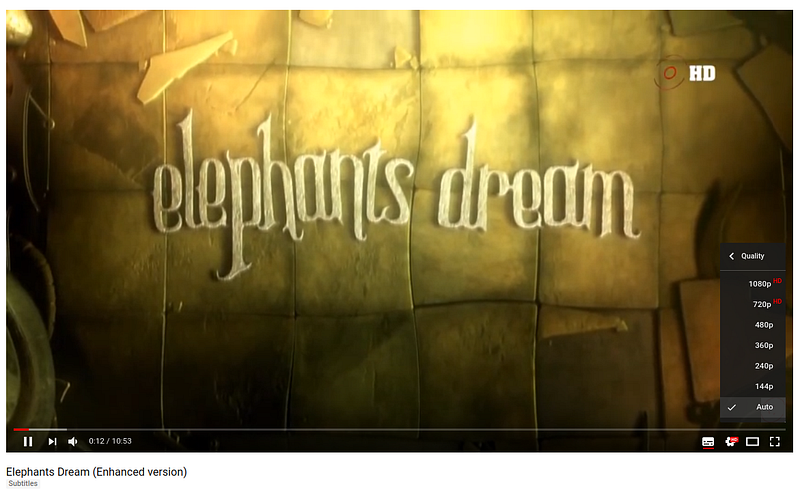
Here is what it looks like:
Simple page corresponding to the previous HTML code
This video tag also provides various APIs to e.g. play, pause, seek or change the speed at which the video plays.
Those APIs are directly accessible through JavaScript:
However, most videos we see on the web today display much more complex behaviors than what this could allow. For example, switching between video qualities and live streaming would be unnecessarily difficult there.
YouTube displays some more complex usecases: quality switches subtitles a tightly controlled progressive-download of the video…
All those websites actually do still use the video tag. But instead of simply setting a video file in the src attribute, they make use of much more powerful web APIs, the Media Source Extensions.

The Media Source Extensions

The “Media Source Extensions” (more often shortened to just “MSE”) is a specification from the W3C that most browsers implement today. It was created to allow those complex media use cases directly with HTML and JavaScript.
Those “extensions” add the MediaSource object to JavaScript. As its name suggests, this will be the source of the video, or put more simply, this is the object representing our video’s data.
The video is here “pushed” to the MediaSource, which provides it to the web page
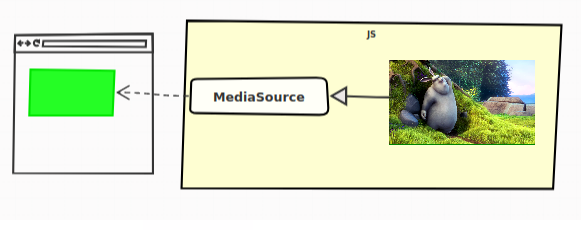
As written in the previous chapter, we still use the HTML5 video tag. Perhaps even more surprisingly, we still use its src attribute. Only this time, we're not adding a link to the video, we're adding a link to the MediaSource object.
You might be confused by this last sentence. We’re not talking about an URL here, we’re talking about an abstract concept from the JavaScript language, how can it be possible to refer to it as an URL on a video tag, which is defined in the HTML?
To allow this kind of use cases the W3C defined the URL.createObjectURL static method. This API allows to create an URL, which will actually refer not to a resource available online, but directly to a JavaScript object created on the client.
This is thus how a MediaSource is attached to a video tag:
And that’s it! Now you know how the streaming platforms play videos on the Web!
… Just kidding. So now we have the MediaSource, but what are we supposed to do with it?
The MSE specification doesn’t stop here. It also defines another concept, the SourceBuffers.

The Source Buffers

The video is not actually directly “pushed” into the MediaSource for playback, SourceBuffers are used for that.
A MediaSource contains one or multiple instances of those. Each being associated to a type of content.
To stay simple, let’s just say that we have only three possible types:
  • audio
  • video
  • both audio and video
In reality, a “type” is defined by its MIME type, which may also include information about the media codec(s) used
SourceBuffers are all linked to a single MediaSource and each will be used to add our video’s data to the HTML5 video tag directly in JavaScript.
As an example, a frequent use case is to have two source buffers on our MediaSource: one for the video data, and the other for the audio:
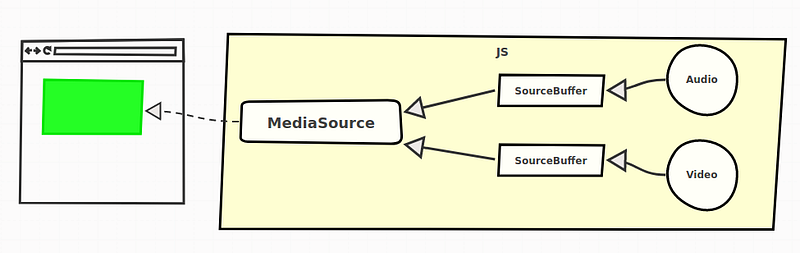
Relations between the video tag, the MediaSource, the SourceBuffers and the actual data
Separating video and audio allows to also manage them separately on the server-side. Doing so leads to several advantages as we will see later. This is how it works:
And voila!
We’re now able to manually add video and audio data dynamically to our video tag.

It’s now time to write about the audio and video data itself. In the previous example, you might have noticed that the audio and video data where in the mp4 format.
“mp4” is a
container format, it contains the concerned media data but also multiple metadata describing for example the start time and duration of the media contained in it.
The MSE specification does not dictate which format must be understood by the browser. For video data, the two most commons are mp4 and webm files. The former is pretty well-known by now, the latter is sponsored by Google and based on the perhaps more known matroska format (“.mkv” files).
Both are well-supported in most browsers.

Media Segments

Still, many questions are left unanswered here:
  • Do we have to wait for the whole content to be downloaded, to be able to push it to a SourceBuffer (and therefore to be able to play it)?
  • How do we switch between multiple qualities or languages?
  • How to even play live contents as the media isn’t yet finished?
In the example from the previous chapter, we had one file representing the whole audio and one file representing the whole video. This can be enough for really simple use cases, but not sufficient if you want to go into the complexities offered by most streaming websites (switching languages, qualities, playing live contents etc.).
What actually happens in the more advanced video players, is that video and audio data are splitted into multiple “segments”. These segments can come in various sizes, but they often represent between 2 to 10 seconds of content.
Artistic depiction of segments in a media file
All those video/audio segments then form the complete video/audio content. Those “chunks” of data add a whole new level of flexibility to our previous example: instead of pushing the whole content at once, we can just push progressively multiple segments.
Here is a simplified example:
This means that we also have those multiple segments on server-side. From the previous example, our server contains at least the following files:
./audio/
  ├── segment0.mp4
  ├── segment1.mp4
  └── segment2.mp4
./video/
  └── segment0.mp4
Note: The audio or video files might not truly be segmented on the server-side, the Range HTTP header might be used instead by the client to obtain those files segmented (or really, the server might do whatever it wants with your request to give you back segments).
However these cases are implementation details. We will here always consider that we have segments on the server-side.
All of this means that we thankfully do not have to wait for the whole audio or video content to be downloaded to begin playback. We often just need the first segment of each.
Of course, most players do not do this logic by hand for each video and audio segments like we did here, but they follow the same idea: downloading sequentially segments and pushing them into the source buffer.
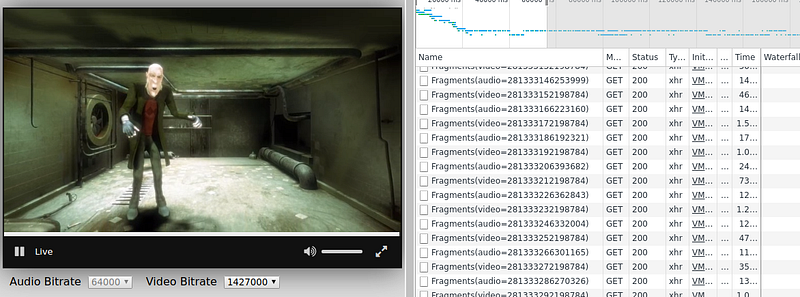
A funny way to see this logic happen in real life can be to open the network monitor on Firefox/Chrome/Edge (on linux or windows type “Ctrl+Shift+i” and go to the “Network” tab, on Mac it should be Cmd+Alt+i then “Network”) and then launching a video in your favorite streaming website.
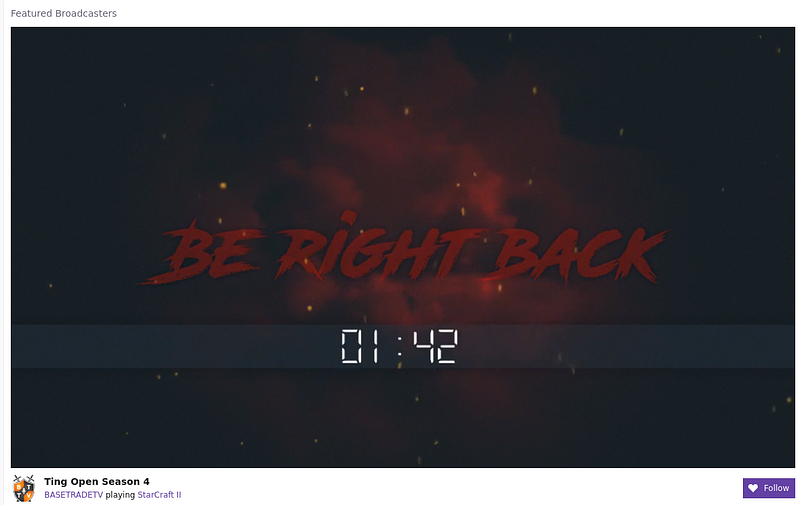
You should see various video and audio segments being downloaded at a quick pace:
Screenshot of the Chrome Network tab on the Rx-Player’s demo page
By the way, you might have noticed that our segments are just pushed into the source buffers without indicating WHERE, in terms of position in time, it should be pushed.
The segments’ containers do in fact define, between other things, the time where they should be put in the whole media. This way, we do not have to synchronize it at hand in JavaScript.

Adaptive Streaming

Many video players have an “auto quality” feature, where the quality is automatically chosen depending on the user’s network and processing capabilities.
This is a central concern of a web player called adaptive streaming.
YouTube “Quality” setting. The default “Auto” mode follows adaptive streaming principles
This behavior is also enabled thanks to the concept of media segments.
On the server-side, the segments are actually encoded in multiple qualities. For example, our server could have the following files stored:
./audio/
  ├── ./128kbps/
  |     ├── segment0.mp4
  |     ├── segment1.mp4
  |     └── segment2.mp4
  └── ./320kbps/
        ├── segment0.mp4
        ├── segment1.mp4
        └── segment2.mp4
./video/
  ├── ./240p/
  |     ├── segment0.mp4
  |     ├── segment1.mp4
  |     └── segment2.mp4
  └── ./720p/
        ├── segment0.mp4
        ├── segment1.mp4
        └── segment2.mp4
A web player will then automatically choose the right segments to download as the network or CPU conditions change.
This is entirely done in JavaScript. For audio segments, it could for example look like that:
As you can see, we have no problem putting together segments of different qualities, everything is transparent on the JavaScript-side here. In any case, the container files contain enough information to allow this process to run smoothly.

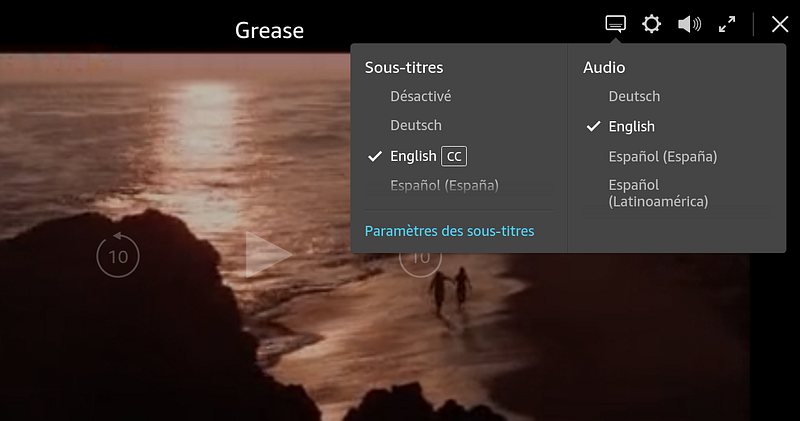
Switching between languages

On more complex web video players, such as those on Netflix, Amazon Prime Video or MyCanal, it’s also possible to switch between multiple audio languages depending on the user settings.
Example of language options in Amazon Prime Video
Now that you know what you know, the way this feature is done should seem pretty simple to you.
Like for adaptive streaming we also have a multitude of segments on the server-side:
./audio/
  ├── ./esperanto/
  |     ├── segment0.mp4
  |     ├── segment1.mp4
  |     └── segment2.mp4
  └── ./french/
        ├── segment0.mp4
        ├── segment1.mp4
        └── segment2.mp4
./video/
  ├── segment0.mp4
  ├── segment1.mp4
  └── segment2.mp4
This time, the video player has to switch between language not based on the client’s capabilities, but on the user’s preference.
For audio segments, this is what the code could look like on the client:
You may also want to “clear” the previous SourceBuffer’s content when switching a language, to avoid mixing audio contents in multiple languages.
This is doable through the SourceBuffer.prototype.remove method, which takes a starting and ending time in seconds:
Of course, it’s also possible to combine both adaptive streaming and multiple languages. We could have our server organized as such:
./audio/
  ├── ./esperanto/
  |     ├── ./128kbps/
  |     |     ├── segment0.mp4
  |     |     ├── segment1.mp4
  |     |     └── segment2.mp4
  |     └── ./320kbps/
  |           ├── segment0.mp4
  |           ├── segment1.mp4
  |           └── segment2.mp4
  └── ./french/
        ├── ./128kbps/
        |     ├── segment0.mp4
        |     ├── segment1.mp4
        |     └── segment2.mp4
        └── ./320kbps/
              ├── segment0.mp4
              ├── segment1.mp4
              └── segment2.mp4
./video/
  ├── ./240p/
  |     ├── segment0.mp4
  |     ├── segment1.mp4
  |     └── segment2.mp4
  └── ./720p/
        ├── segment0.mp4
        ├── segment1.mp4
        └── segment2.mp4
And our client would have to manage both languages and network conditions instead:
As you can see, there’s now a lot of way the same content can be defined.
This uncovers another advantage separated video and audio segments have over whole files. With the latter, we would have to combine every possibilities on the server-side, which might take a lot more space:
segment0_video_240p_audio_esperanto_128kbps.mp4
segment0_video_240p_audio_esperanto_320kbps.mp4
segment0_video_240p_audio_french_128kbps.mp4
segment0_video_240p_audio_french_320kbps.mp4
segment0_video_720p_audio_esperanto_128kbps.mp4
segment0_video_720p_audio_esperanto_320kbps.mp4
segment0_video_720p_audio_french_128kbps.mp4
segment0_video_720p_audio_french_320kbps.mp4
segment1_video_240p_audio_esperanto_128kbps.mp4
segment1_video_240p_audio_esperanto_320kbps.mp4
segment1_video_240p_audio_french_128kbps.mp4
segment1_video_240p_audio_french_320kbps.mp4
segment1_video_720p_audio_esperanto_128kbps.mp4
segment1_video_720p_audio_esperanto_320kbps.mp4
segment1_video_720p_audio_french_128kbps.mp4
segment1_video_720p_audio_french_320kbps.mp4
segment2_video_240p_audio_esperanto_128kbps.mp4
segment2_video_240p_audio_esperanto_320kbps.mp4
segment2_video_240p_audio_french_128kbps.mp4
segment2_video_240p_audio_french_320kbps.mp4
segment2_video_720p_audio_esperanto_128kbps.mp4
segment2_video_720p_audio_esperanto_320kbps.mp4
segment2_video_720p_audio_french_128kbps.mp4
segment2_video_720p_audio_french_320kbps.mp4
Here we have more files, with a lot of redundancy (the exact same video data is included in multiple files).
This is as you can see highly inefficient on the server-side. But it is also a disadvantage on the client-side, as switching the audio language might lead you to also re-download the video with it (which has a high cost in bandwidth).

Live Contents

We didn’t talk about live streaming yet.
Live streaming on the web is becoming very common (twitch.tv, YouTube live streams…) and is again greatly simplified by the fact that our video and audio files are segmented.
Screenshot taken from twitch.tv, which specializes on video game live streaming
To explain how it basically works in the simplest way, let’s consider a YouTube channel which had just begun streaming 4 seconds ago.
If our segments are 2 seconds long, we should already have two audio segments and two video segments generated on YouTube’s server:
  • Two representing the content from 0 seconds to 2 seconds (1 audio + 1 video)
  • Two representing it from 2 seconds to 4 seconds (again 1 audio + 1 video)
./audio/
  ├── segment0s.mp4
  └── segment2s.mp4
./video/
  ├── segment0s.mp4
  └── segment2s.mp4
At 5 seconds, we didn’t have time to generate the next segment yet, so for now, the server has the exact same content available.
After 6 seconds, a new segment can be generated, we now have:
./audio/
  ├── segment0s.mp4
  ├── segment2s.mp4
  └── segment4s.mp4
./video/
  ├── segment0s.mp4
  ├── segment2s.mp4
  └── segment4s.mp4
This is pretty logical on the server-side, live contents are actually not really continuous, they are segmented like the non-live ones but segments continue to appear progressively as time evolves.
Now how can we know from JS what segments are available at a certain point in time on the server?
We might just use a clock on the client, and infer as time goes when new segments are becoming available on the server-side.
We would follow the “segmentX.mp4" naming scheme, and we would increment the “X” from the last downloaded one each time (segment0.mp4, then, 2 seconds later, Segment1.mp4 etc.).
In many cases however, this could become too imprecise: media segments may have variable durations, the server might have latencies when generating them, it might want to delete segments which are too old to save space…
As a client, you want to request the latest segments as soon as they are available while still avoiding requesting them too soon when they are not yet generated (which would lead to a 404 HTTP error).
This problem is usually resolved by using a transport protocol (also sometimes called Streaming Media Protocol).

Transport Protocols

Explaining in depth the different transport protocol may be too verbose for this article. Let’s just say that most of those have the same core concept:
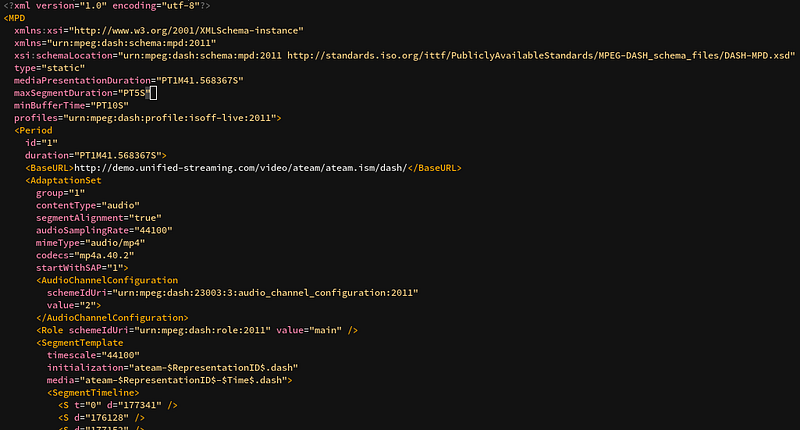
 the Manifest.
A Manifest is a file describing which segments are available on the server.
Example of a DASH Manifest, based on XML
With it, you can describe most things we learn in this article:
  • Which audio languages the content is available in and where they are on the server (as in, “at which URL”)
  • The different audio and video qualities available
  • And of course, what segments are available, in the context of live streaming
The most common transport protocols used in a web context are:
  • DASH
    used by YouTube, Netflix or Amazon Prime Video (and many others). DASH’ manifest is called the Media Presentation Description (or MPD) and is at its base XML.
    The DASH specification has a great flexibility which allow MPDs to support most use cases (audio description, parental controls) and to be codec-agnostic.
  • HLS
    Developped by Apple, used by DailyMotion, Twitch.tv and many others. The HLS manifest is called the playlist and is in the m3u8 format (which are m3u playlist files, encoded in UTF-8).
  • Smooth Streaming
    Developped by Microsoft, used by multiple Microsoft products and MyCanal. In Smooth Streaming, manifests are called… Manifests and are XML-based.

In the real — web — world

As you can see, the core concepts behind videos on the web lays on media segments being pushed dynamically in JavaScript.
This behavior becomes quickly pretty complex, as there’s a lot of features a video player has to support:
  • it has to download and parse some sort of manifest file
  • it has to guess the current network conditions
  • it needs to register user preferences (for example, the preferred languages)
  • it has to know which segment to download depending on at least the two previous points
  • it has to manage a segment pipeline to download sequentially the right segments at the right time (downloading every segments at the same time would be inefficient: you need the earliest one sooner than the next one)
  • it has also to deal with subtitles, often entirely managed in JS
  • Some video players also manage a thumbnails track, which you can often see when hovering the progress bar
  • Many services also require DRM management
  • and many other things…
Still, at their core, complex web-compatible video players are all based on MediaSource and SourceBuffers.
Their web players all make use of MediaSources and SourceBuffers at their core
That’s why those tasks are usually performed by libraries, which do just that.
More often than not, those libraries do not even define a User Interface. They mostly provide a rich APIs, take the Manifest and various preferences as arguments, and push the right segment at the right time in the right source buffers.
This allows a greater modularization and flexibility when designing media websites and web application, which, by essence, will be complex front-ends.

Open-source web video players

There are many web video players available today doing pretty much what this article explains. Here are various open-source examples:
  • rx-player: Configurable player for both DASH and Smooth Streaming contents. Written in TypeScript — Shameless self-plug as I’m one of the dev.
  • dash.js: Play DASH contents, support a wide range of DASH features. Written by the DASH Industry Forum, a consortium promoting inter-operability guidelines for the DASH transport protocol.
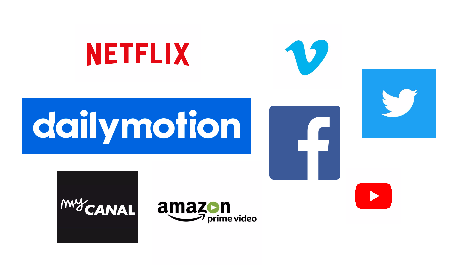
  • hls.js: well-reputed HLS player. Used in production by multiple big names like Dailymotion, Canal+, Adult Swim, Twitter, VK and more.
  • shaka-player: DASH and HLS player. Maintained by Google.
By the way, Canal+ is hiring ! If working with that sort of stuff interests you, take a look at http://www.vousmeritezcanalplus.com/ (⚠️ French website).

Are there any unavoidable technologies?


Last night I was struggling to fall asleep. So I started to reflect on a documentary I had seen. It was dedicated to Nikola Tesla, the visionary inventor who was obsessed with electrical energy at the turn of the 19th and 20th centuries.
The story that made me reflect is the famous “currents war” (a movie version with Benedict Cumberbatch has just been released). Thomas Alva Edison argued that direct current was the ideal solution to “electrify” the world, and invested on it large sums. Tesla, who worked a few months for Edison, was instead convinced that alternating current was to be used.
I do not go into technical explanations. Let’s just say that Tesla, allying with Edison’s rival, the industrialist George Westinghouse, won it. Today we use alternating current (AC), but then transform it into continuous (DC) when we need to power our digital devices (or any other battery-powered object).
The question I asked myself was: if there were no Westinghouse and Tesla, would we have direct current distribution networks today?
Most likely not, because the advantages of AC distribution would still have emerged, and even rather soon.
More generally, the question is: are there unavoidable technologies?
Are there any alternative technological paths?
In the only case study available, that of human civilization, some discoveries and inventions, and the order with which they were made, seems to be obligatory: fire-> metals-> agriculture-> city-> wheel-> earthenware for example.
But also hunter-gatherer societies could have invented the wheel: it would have been very convenient for them, there was no reason not to have the idea and they had the ability to build it. Perhaps some tribes did so, using it for generations before memory was lost.
A sculpture of Göbekli Tepe -By Teomancimit — Yükləyənin öz işi, CC BY-SA 3.0
Scholars think that to get to the monumental buildings, cities and civilizations we must go through the agriculture: the production surplus is able to support a large number of people and to give birth to social classes, as nobles and priests dispensed from manual work but able to “commission” great works.
The extraordinary discovery of the Göbekli Tepe temple — dating from around 9,500 BC — has however questioned the need for the transition to an urban society with social differentiations to create such buildings.
Another example. Sophisticated mechanisms such as those of clocks began to spread in the early Middle Ages, with the first specimens placed in church bell towers.
Why did not the Greeks or the Romans, so skilled in the practical arts, come to develop similar mechanisms? In fact, after the discovery of the Antikythera mechanism, a sophisticated astronomical calculator, we have seen how the capabilities (for example to have minimum tolerances) and the techniques to build high precision instruments existed. Probably social, economic and commercial structures more than technological limits did not allow to have Roman pendulum clocks. In the same way, having a lot of low-cost labor, the slaves, did not stimulate the invention of steam engines, if not some rare and simple system used for “special effects” in the temples.
A reconstruction Antikythera mechanism- Dave L via Flickr CC BY 2.0
With regard to the innovations of the last 120 years, it is important to underline, alas, the crucial importance of the two world wars, especially the second, for the acceleration of technological development; we only think of rocketry and computer science, born in that period, and electronics developed shortly after (and there was the Cold War …).
If there had not been World War II, what technologies would be surrounded by our daily life?
Probably we will be at the level of the 60s / 70s, with mainframes, first satellites in orbit, color televisions but with cathode ray tubes, first commercial jet planes, just in time production chains etc.
Perhaps an analog Internet would have developed, thanks to unpredictable developments in the amateur radio network hybridized to systems such as fax and video / audio cassettes.
Difficult to establish the timelines, life cycles of individual technologies, their interconnections and interdependencies.
In a complex system such as that of human society, small variations in the initial conditions can generate great changes in the trajectories and directions of the space of innovations.
As a last example we think of the web. Sir Timothy John Berners-Lee created it while working at CERN in 1990.
The web (or a similar one) could have been developed at least 10 years before, in one of the American universities already inter-connected with a telematic network.
This would have meant that the portals of the first web would have appeared at the end of the 80s, the web 2.0 around 1994, the social networks would have been established around 1997 and today … we can not know it. Also because there would have been a longer interval to have the mobile web, since in any case the evolution of mobile telephony would have followed its course as in our timeline. Or not?

This story is published in The Startup,

Wednesday, January 17, 2018

To Build An Amazing Design Team, Founders Should Start Here


Today, you’re going to learn how to build an amazing design team.
In most startups, design is often overlooked or seen as a nice-to-have instead of a must-have. But this mentality can quickly send startups on a one-way trip to the startup graveyard.
The first thing founders need to understand when thinking about the design of their mobile app or product is that design is not limited to the pixels. The design of an app is much more than pretty buttons and cool animations. The design is how the app is experienced from the moment it’s opened to the moment it’s closed. Your design can be the difference between building an app that people come back to over and over again and an app that is downloaded and never opened a second time.
Once you have a clear understanding of the important role that design plays in the success of your app, it’s important to realize that a design team’s success is determined by more than just the people you bring on board.
A design team’s success is also determined by the the roles they play, the tools they use, the culture they operate within and the structures that allow them to deliver results. Founders need to take each of these elements seriously if they want to assemble a high-quality design team and equip them for success.

Hiring The Right People For Design

Picking the right people for your design team is the most important of all. If you hire the wrong people, you’ll start down the wrong path and may eventually have to start all over with a new team that can actually deliver. Finding the right designers for your project can be challenging — but it’s not impossible.
Walk in to your search for the perfect design team knowing exactly what you need. Do you need one person who can be contracted for a short period of time, or are you looking to build a 3- to 4-person design team that will become a fundamental part of your startup’s DNA? Identifying which kind of team is right for you at this stage will be a huge factor in knowing where you should look and whom you should look for.
We’ve worked with all kinds of companies, from early-stage technical teams to startups with existing design teams and revenue. In both cases, MindSea was hired to help with design because of our ability to tackle mobile design challenges and deliver quality iOS and Android app experiences for our clients.
As you build your design team, it’s important to look at their previous work to see that they can deliver. It’s also important to take the time to speak with their past employers or clients to ensure that your prospective designers are reliable and easy to work with. If you can accomplish this, you’re more likely to find a successful design team than if you judged them solely on their portfolio.

Picking Roles For A Design Team

Like any other professional team, design teams should consist of assigned roles. Each role comes with a different scope of responsibilities, tasks and expertise. The structure in which these roles operate is an important factor, as it can make or break a team long-term. A lot of early-stage startups make the mistake of creating no clear roles for their design teams and hoping they will instead design by committee. In reality, the best approach for a design team is to establish a sense of structure.
Here’s what the typical roles on a design team look like:
Design Director: Directors push their teams to answer the tough questions about their decisions and are constantly trying to ensure that design decisions are based on reason, not gut instinct. The design director has the final say on the design team when it comes to decisions about the approach being taken.
Design Manager: Managers are responsible for making sure that the design team delivers on the overarching vision and successfully executes based on strategies and plans. Design managers understand how to make experiences that matter and how to help other designers do the same.
Designers: Designers come up with and implement ideas related to how the product works, how users interact with it, how it looks and how it behaves between frames. Within this role, there are a variety of specialties, and some design teams require a vast range of expertise — designers can take on roles in UX, illustration, animation and more. Together, this collaborative group will be on the front lines of bringing the project to life.
If you’re a large startup, hiring for each role would be an ideal scenario, but for early-stage startups, that’s not always a financially feasible solution. Keep in mind that roles and individuals don’t have to match up perfectly — one person can take on multiple roles. In small startups, it’s common to hire only one designer, and that individual takes on the triple role of design director, design manager and individual designer.
Limited resources are one reason that many early-stage startups outsource their app design to a third party. Our own partnership with Glue is a great example of how a third-party team can help a startup bring their ideas to life through design:

The Best Tools For A Design Team

It’s important to arm your team with the best tools of the trade.
There are a number of tools that can help designers craft a quality app, but not all designers are the same. Some designers have a preference for one tool over the next, so in the early days, you shouldn’t force your designer to use a specific tool just because you want them too. In a startup, you need to be optimizing for speed — if a designer is faster on one software than the next, let them use the tool that will take less time.
In this blog post, our design director, Reuben Hall, does a great job highlighting a handful of tools that designers use to plan and build beautiful apps. I strongly recommend that you take the time to check it out and consider these tools when you begin to think about your design process and what you’ll need to equip your team with.

Creating A Design-Friendly Culture

When you’re building your design team, another key component of the equation is the culture that surrounds your team. The culture of your organization as a whole will have a lasting impact on how work is developed and what your final product looks like.
Founders set the company culture within a startup. If you’re committed to open communication, it’s more likely that your team will follow suit. If you’re committed to embracing ideas from anyone regardless of their title, it’s more likely that your team will be too. The takeaway here is simple: Embrace the habits you hope to instill within your team to build a lasting corporate culture.
One of the most important parts of a healthy company culture is a commitment to design. Too many founders view design as a secondary element of the product, when in reality, the design of the product is what often determines its success or failure. Founders can help create a culture that celebrates design by enforcing regular design reviews, ensuring that design always has a seat at the table and hiring the best design talent possible.

Use Design Reviews To Improve Communication

Design reviews should happen throughout the design and development process. Early on in a project, a design review could be a quick meeting with another designer before presenting a concept to the larger team for a more in-depth design review. During development of an app, designers should regularly review in-progress builds to ensure the UX and layout of the app is as amazing as it was envisioned to be. At any stage of a project, a design review is an opportunity for improvement. Teams that overlook design reviews as a part of the process are often left scratching their heads wondering how they missed key features — once it’s too late.
While design reviews are tactical efforts that have an impact on culture, a startup’s design vision is also an important piece of the puzzle. Your design vision isn’t a scheduled action like a standing meeting, but rather a set of guiding ideas that must be communicated to the entire team from day one. It should act as the foundation of all design decisions, ensuring that when tough decisions need to be made, someone at the table is invested in the design of the product, not just the technical specs.

Wrapping Things Up

A quality design team can help a good product become something great with just a few weeks of work.
Not sure if you need a design team quite yet? We’d be happy to jump on a quick call, learn more about your vision and give you some insight based on our experiences helping other startups. Get in touch today!

Saturday, January 13, 2018

JavaScript — Null vs. Undefined


Learn the differences and similarities between null and undefined in JavaScript

At first glance, null and undefined may seem the same, but they are far from it. This article will explore the differences and similarities between null and undefined in JavaScript.

What is null?

There are two features of null you should understand:
  • null is an empty or non-existent value.
  • null must be assigned.
Here’s an example. We assign the value of null to a:
let a = null;
console.log(a);
// null

What is undefined?

Undefined most typically means a variable has been declared, but not defined. For example:
let b;
console.log(b);
// undefined
You can also explicitly set a variable to equal undefined:
let c = undefined;
console.log(c);
// undefined
Finally, when looking up non-existent properties in an object, you will receive undefined:
var d = {};
console.log(d.fake);
// undefined

Similarities between null and undefined

In JavaScript there are only six falsy values. Both null and undefined are two of the six falsy values. Here’s a full list:
  • false
  • 0 (zero)
  • “” (empty string)
  • null
  • undefined
  • NaN (Not A Number)
Any other value in JavaScript is considered truthy.
If you’re not familiar with truthy/falsy values in JavaScript, I recommend reading my previous article: JavaScript — Double Equals vs. Triple Equals
Also in JavaScript, there are six primitive values. Both null and undefined are primitive values. Here is a full list:
  • Boolean
  • Null
  • Undefined
  • Number
  • String
  • Symbol
All other values in JavaScript are objects (objects, functions, arrays, etc.).
Interestingly enough, when using typeof to test null, it returns object:
let a = null;
let b;
console.log(typeof a);
// object
console.log(typeof b);
// undefined
This has occurred since the beginning of JavaScript and is generally regarded as a mistake in the original JavaScript implementation.
If you’re not familiar with data types in JavaScript, I recommend reading my previous article: JavaScript Data Types Explained

null !== undefined

As you can see so far, null and undefined are different, but share some similarities. Thus, it makes sense that null does not strictly equal undefined.
null !== undefined 
But, and this may surprise you, null loosely equals undefined.
null == undefined
The explanation as to why this is true is a little complex, so bear with me. In JavaScript, a double equals tests for loose equality and preforms type coercion. This means we compare two values after converting them to a common type. Since both null and undefined are falsy values, when we compare them with loose equality, they are coerced to false prior to comparison.

Practical Differences

All of this is great, but what about a practical difference between null and undefined?
Consider the following code snippet:
let logHi = (str = 'hi') => {
  console.log(str);
}
The code above creates a function named logHi. This function requires one parameter and sets the default of that parameter to hi if it isn’t supplied. Here’s what that looks like:
logHi();
// hi
We can also supply a parameter to overwrite this default:
logHi('bye');
// bye
With default parameters, undefined will use the default while null does not.
logHi(undefined);
// hi
logHi(null);
// null
Thanks to Tim Branyen for the code inspiration.

Summary

  • null is an assigned value. It means nothing.
  • undefined typically means a variable has been declared but not defined yet.
  • null and undefined are falsy values.
  • null and undefined are both primitives. However an error shows that typeof null = object.
  • null !== undefined but null == undefined.

Friday, January 12, 2018

Learn mobile app development with these 10 online courses


Top 10 online courses to help your learn mobile app development plus some advice from the experts on why app prototyping makes all the difference!

Thinking about becoming a Mobile App Developer? You’re in luck! There’s never been a better time to learn mobile app development. Take a look:
For budding developers, it’s time to hop aboard the gravy train. But what’s the first step in learning mobile app development? What courses should you sign up for? Should you teach yourself app development? We’ve got you covered.
And yes, the first step is learning how to prototype a mobile app. Learn why here — plus get our top 10 online courses on mobile app development to get you started right away, no matter where you are!

10 free and paid online courses to help you learn mobile app development

Here are our top 10 online courses to help you learn mobile app development:

1 — Android Development Tips Weekly series on Lynda

Teach yourself app development with this series of Android development tips by David Gassner.
Each week, David shares techniques to help you speed up your coding, improve app functionality or make your apps more reliable and refined.
The tutorials cover developing the app’s user interface, backend processing and open source libraries, to get your coding knowledge off the ground even quicker.
  • Level: Beginner — Intermediate
  • Commitment: approximately 3h per video
  • Price-point: 30-day free trial, from $19.99 thereafter

2 — Mobile App Development for Beginners on Udemy

Dee Aliyu Odumosu’s mobile app development course is ideal if you’re looking to break into iOS.
Learn how to create and customize 10+ iPhone apps (using Swift 3 and Xcode 8) with easy step-by-step instructions. The course begins with implementation of basic elements — UILabel, UIButton, UITextField etc. — Auto Layout and multiple-sized icons, with more advanced classes covering memory issues, storyboarding and displaying rich local notifications.
Note that this course requires you to own and already be familiar with Mac.
  • Level: Beginner
  • Commitment: approximately 33 hours
  • Price-point: $10.99 (New Year discount, was $50.00)

3 — iOS App Development with Swift Specialization on Coursera

This is the ultimate Swift for iOS development course, brought to you by Parham Aarabi and the University of Toronto.
Using XCode, Parham will teach you how to design elegant interactions and create fully functioning iOS apps, such as the photo editing app for iPhone, iPad, and Apple Watch. The course also includes best practices to help you become proficient in functional Swift concepts.
Note that this course requires you to own and already be familiar with Mac.
  • Level: Intermediate (some previous experience required)
  • Commitment: 6 weeks
  • Price-point: 7-day free trial, $49 per month thereafter

4 — Introduction to Mobile Application Development using Android on edX

Learn mobile app development and the basics of Android Studio in Jogesh K Muppala’s introduction to the Android platform.
In this 5-week course, you’ll explore the basics of Android application components as well as Activities and their lifecycle, some UI design principles, Multimedia, 2D graphics and networking support for Android.
  • Level: Beginner
  • Commitment: 6 weeks
  • Price-point: free

5 — Full Stack Web and Multiplatform Mobile App Development Specialization on Coursera

If you’re learning mobile application development for Android and found the above course useful, try this course out next.
Here you’ll have the chance to build complete web and hybrid mobile solutions, as well as master front-end web, hybrid mobile app and server-side development.
  • Level: Intermediate (some previous experience required)
  • Commitment: approximately 20 weeks
  • Price-point: 7-day free trial, $39 per month thereafter

6 — iOS 9 and Swift 2: From Beginner to Paid Professional on Skillshare

Mark Price’s online course for iOS Swift is everything you need to know about iOS 9 development.
This is another great set of classes for novice iOS coders. Build 15+ apps for iOS 9, learn swift 2.0 and publish apps to the App Store. Warmups, class projects and exercises will help you keep on top of the workload.
  • Level: Beginner
  • Commitment: approximately 37 hours
  • Price-point: from $15 a month

7 — The iOS Development Course That Gets You Hired on Career Foundry

Jeffrey Camealy presents the iOS Development course to get your hired.
1-on-1 mentorship from industry experts and real-world projects complement a set of 6 structured modules. The course covers the very basic principles of iOS development and takes you right to the point of submitting an app to the App Store.
  • Level: Beginner
  • Commitment: 6 months
  • Price-point: $4000 (payment plans available)

8 — Get Started With React Native on TutsPlus

Markus Mühlberger’s course for React Native is perfect for anyone who wants to code for multiple mobile platforms.
Learn how to create and customize UI elements, build user interaction, and integrate third-party components into apps for both iOS and Android. Upon completion, you’ll be able to write mobile apps in React Native.
  • Level: Intermediate
  • Commitment: 1.2 hours
  • Price-point: $29 a month

9 — Build a Simple Android App with Java on Treehouse

Ben Deitch’s course will help you build simple mobile apps for Android with Java, without any prior knowledge.
Best-suited to budding Android developers, this course will explore programming in Android and some very basic concepts of the Android SDK. By the end of the course, you’ll have a working knowledge of how a basic app works.
  • Level: Beginner
  • Commitment: 1.5 hours
  • Price-point: from $25 a month

10 — Try iOS on Code School

Gregg Pollack’s tutorials on iOS app development from the ground up and requires only basic coding experience.
Write your first iPhone app code and learn about different UI elements, such as buttons, labels, tabs and images. Upon completion, you’ll be able to connect to the internet to fetch data, build out table views and navigate between different areas of your app.
  • Level: Beginner
  • Commitment: 6–8 hours
  • Price-point: $29 a month
It’s an exciting time for mobile app developers. And as you can see, there are plenty of resources out there to help get your career off the ground. But don’t forget to look at the big picture.
Prototyping is an integral part of the mobile app life cycle. Download Justinmind now and explore a prototyping tool that’s made with the entire product team in mind.

Interested for our works and services?
Get more of our update !