

Take back control of your phone (and your attention)

The
vast majority of consumers use their phone exactly as it was originally
configured. The problem is that this default setup, with built-in apps,
non-stop notifications, and constant cries for your attention has
nothing to do with productivity or happiness.
I’ve seen this firsthand.
Several
years ago, I had a job where I reviewed mobile phone apps and gadgets.
In the course of this job, I realized how much our phones were taking
over our lives each day. The entire industry is built around begging for
your attention.
But you’re the boss of your phone, and you should be the one in charge of when and how you give your attention.
There’s a better way. Let’s take a look at the ways you can set up your Android phone for a more zen experience.
This
guide will give you step-by-step instructions that will work for the
majority of Android phones. The menus may look slightly different on
your particular device, but the thought process will be the same.

Clear Your Lock Screen
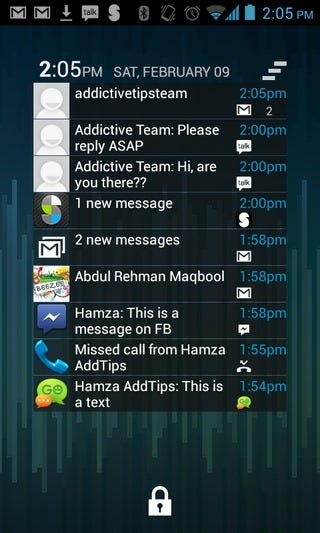
A
supposed selling point for Android is how customizable the lock screen
is. Some people like to add widgets, notifications, and all sorts of
information to the lock screen. But these extra bells and whistles just
tend to distract you; they take you away from the task that prompted you
to pick up your phone in the first place.
Remember
what the purpose of a lock screen is. It’s really just there as a
security measure. You shouldn’t be reading notifications there — you
should be confirming your identity and then moving on to more important
tasks.
If you want the security of a lock screen that doesn’t display your notifications, here’s an easy way to do it.
- Tap “Settings”
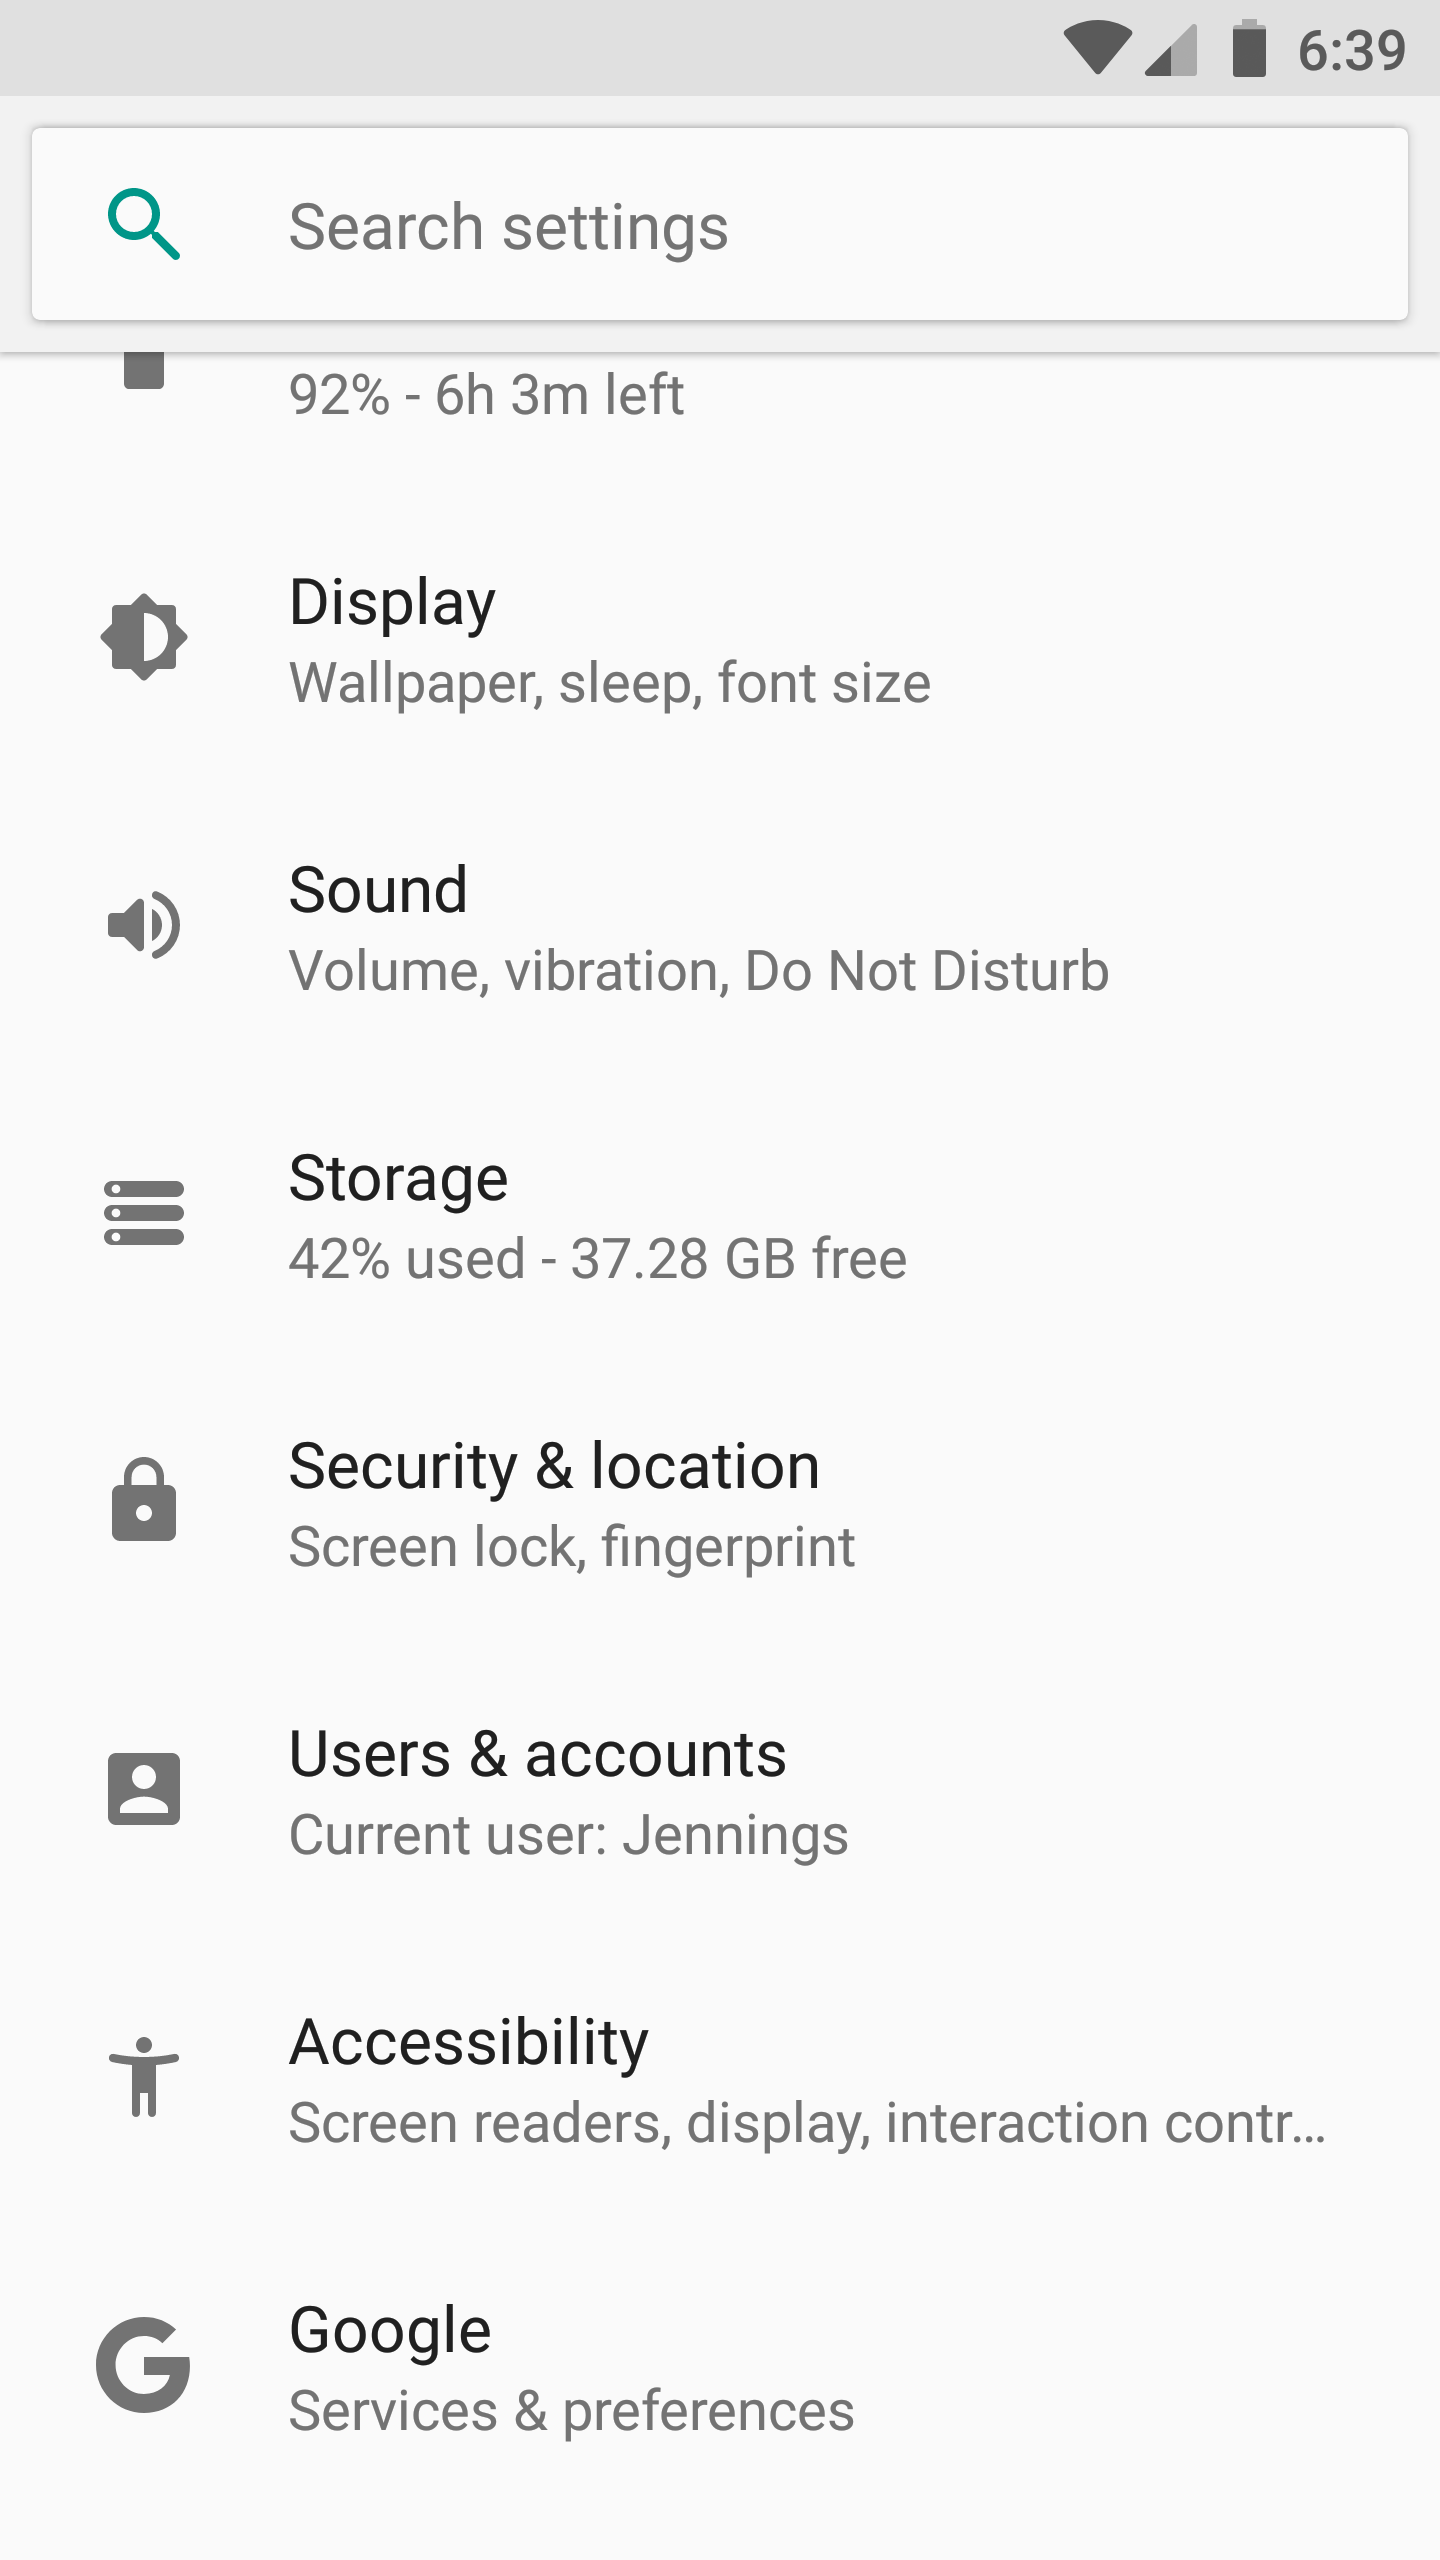
2. Tap “Security & location”
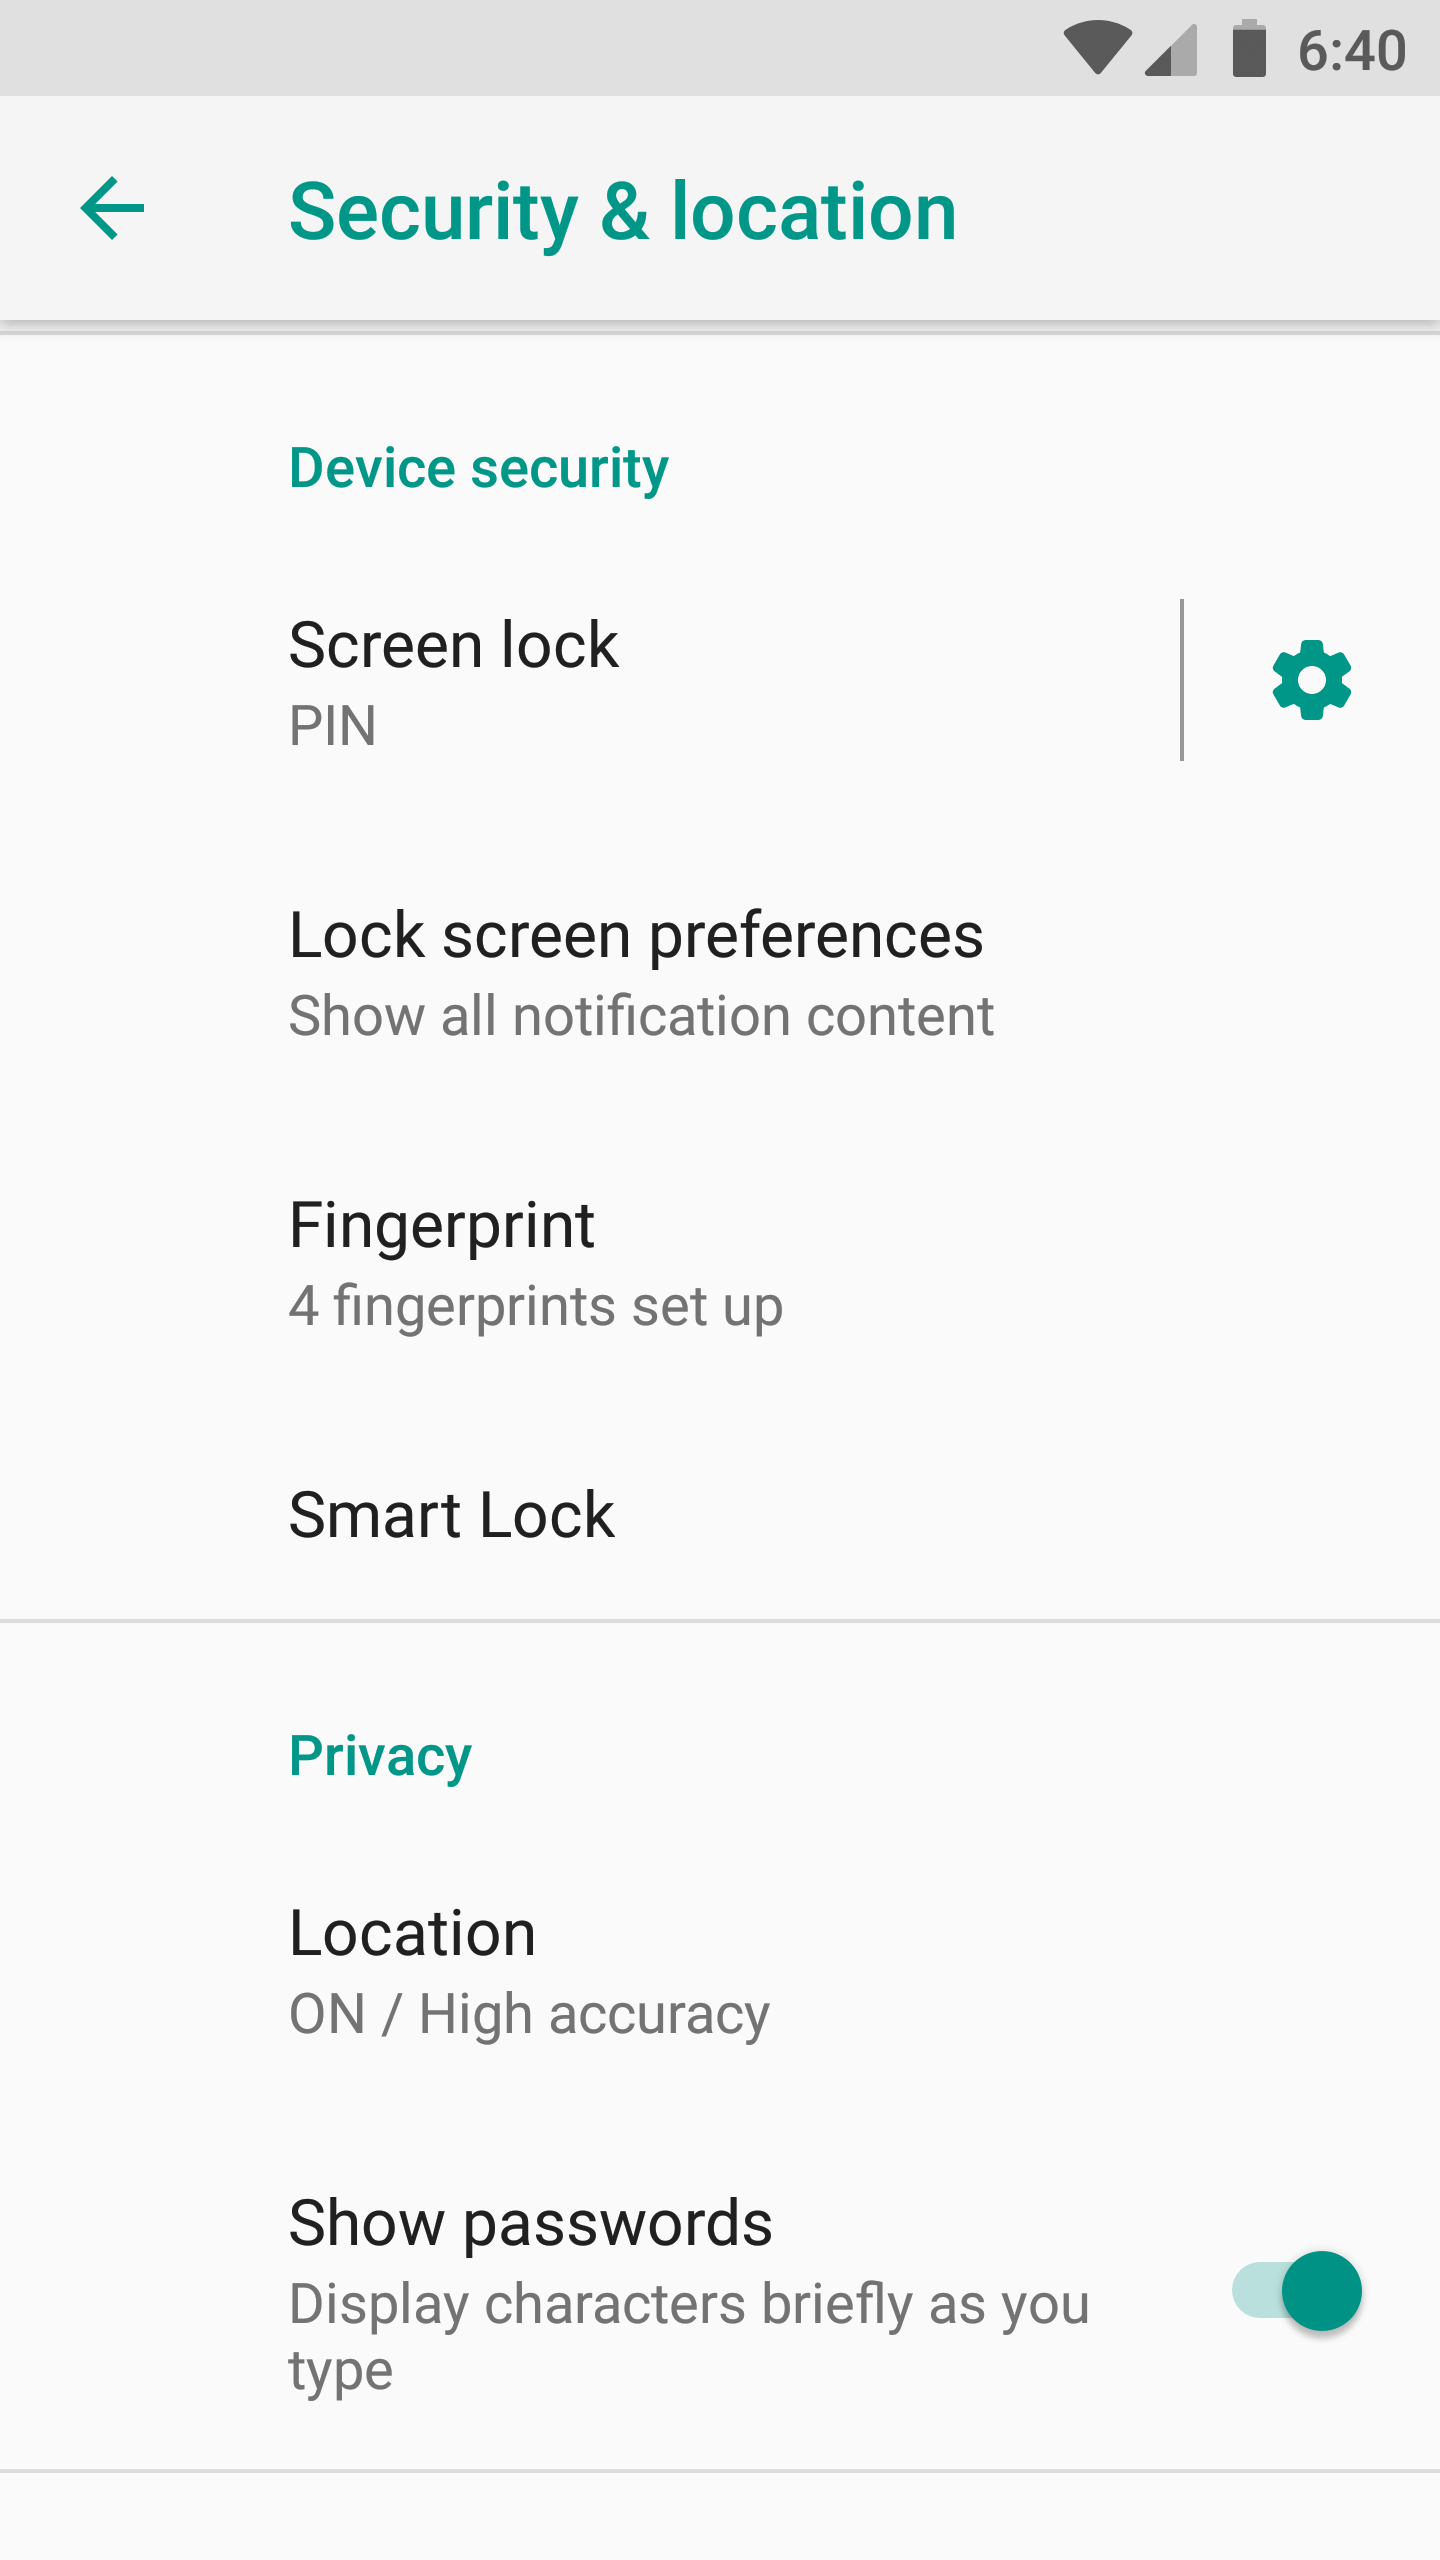
3. Tap “Lock screen preferences”
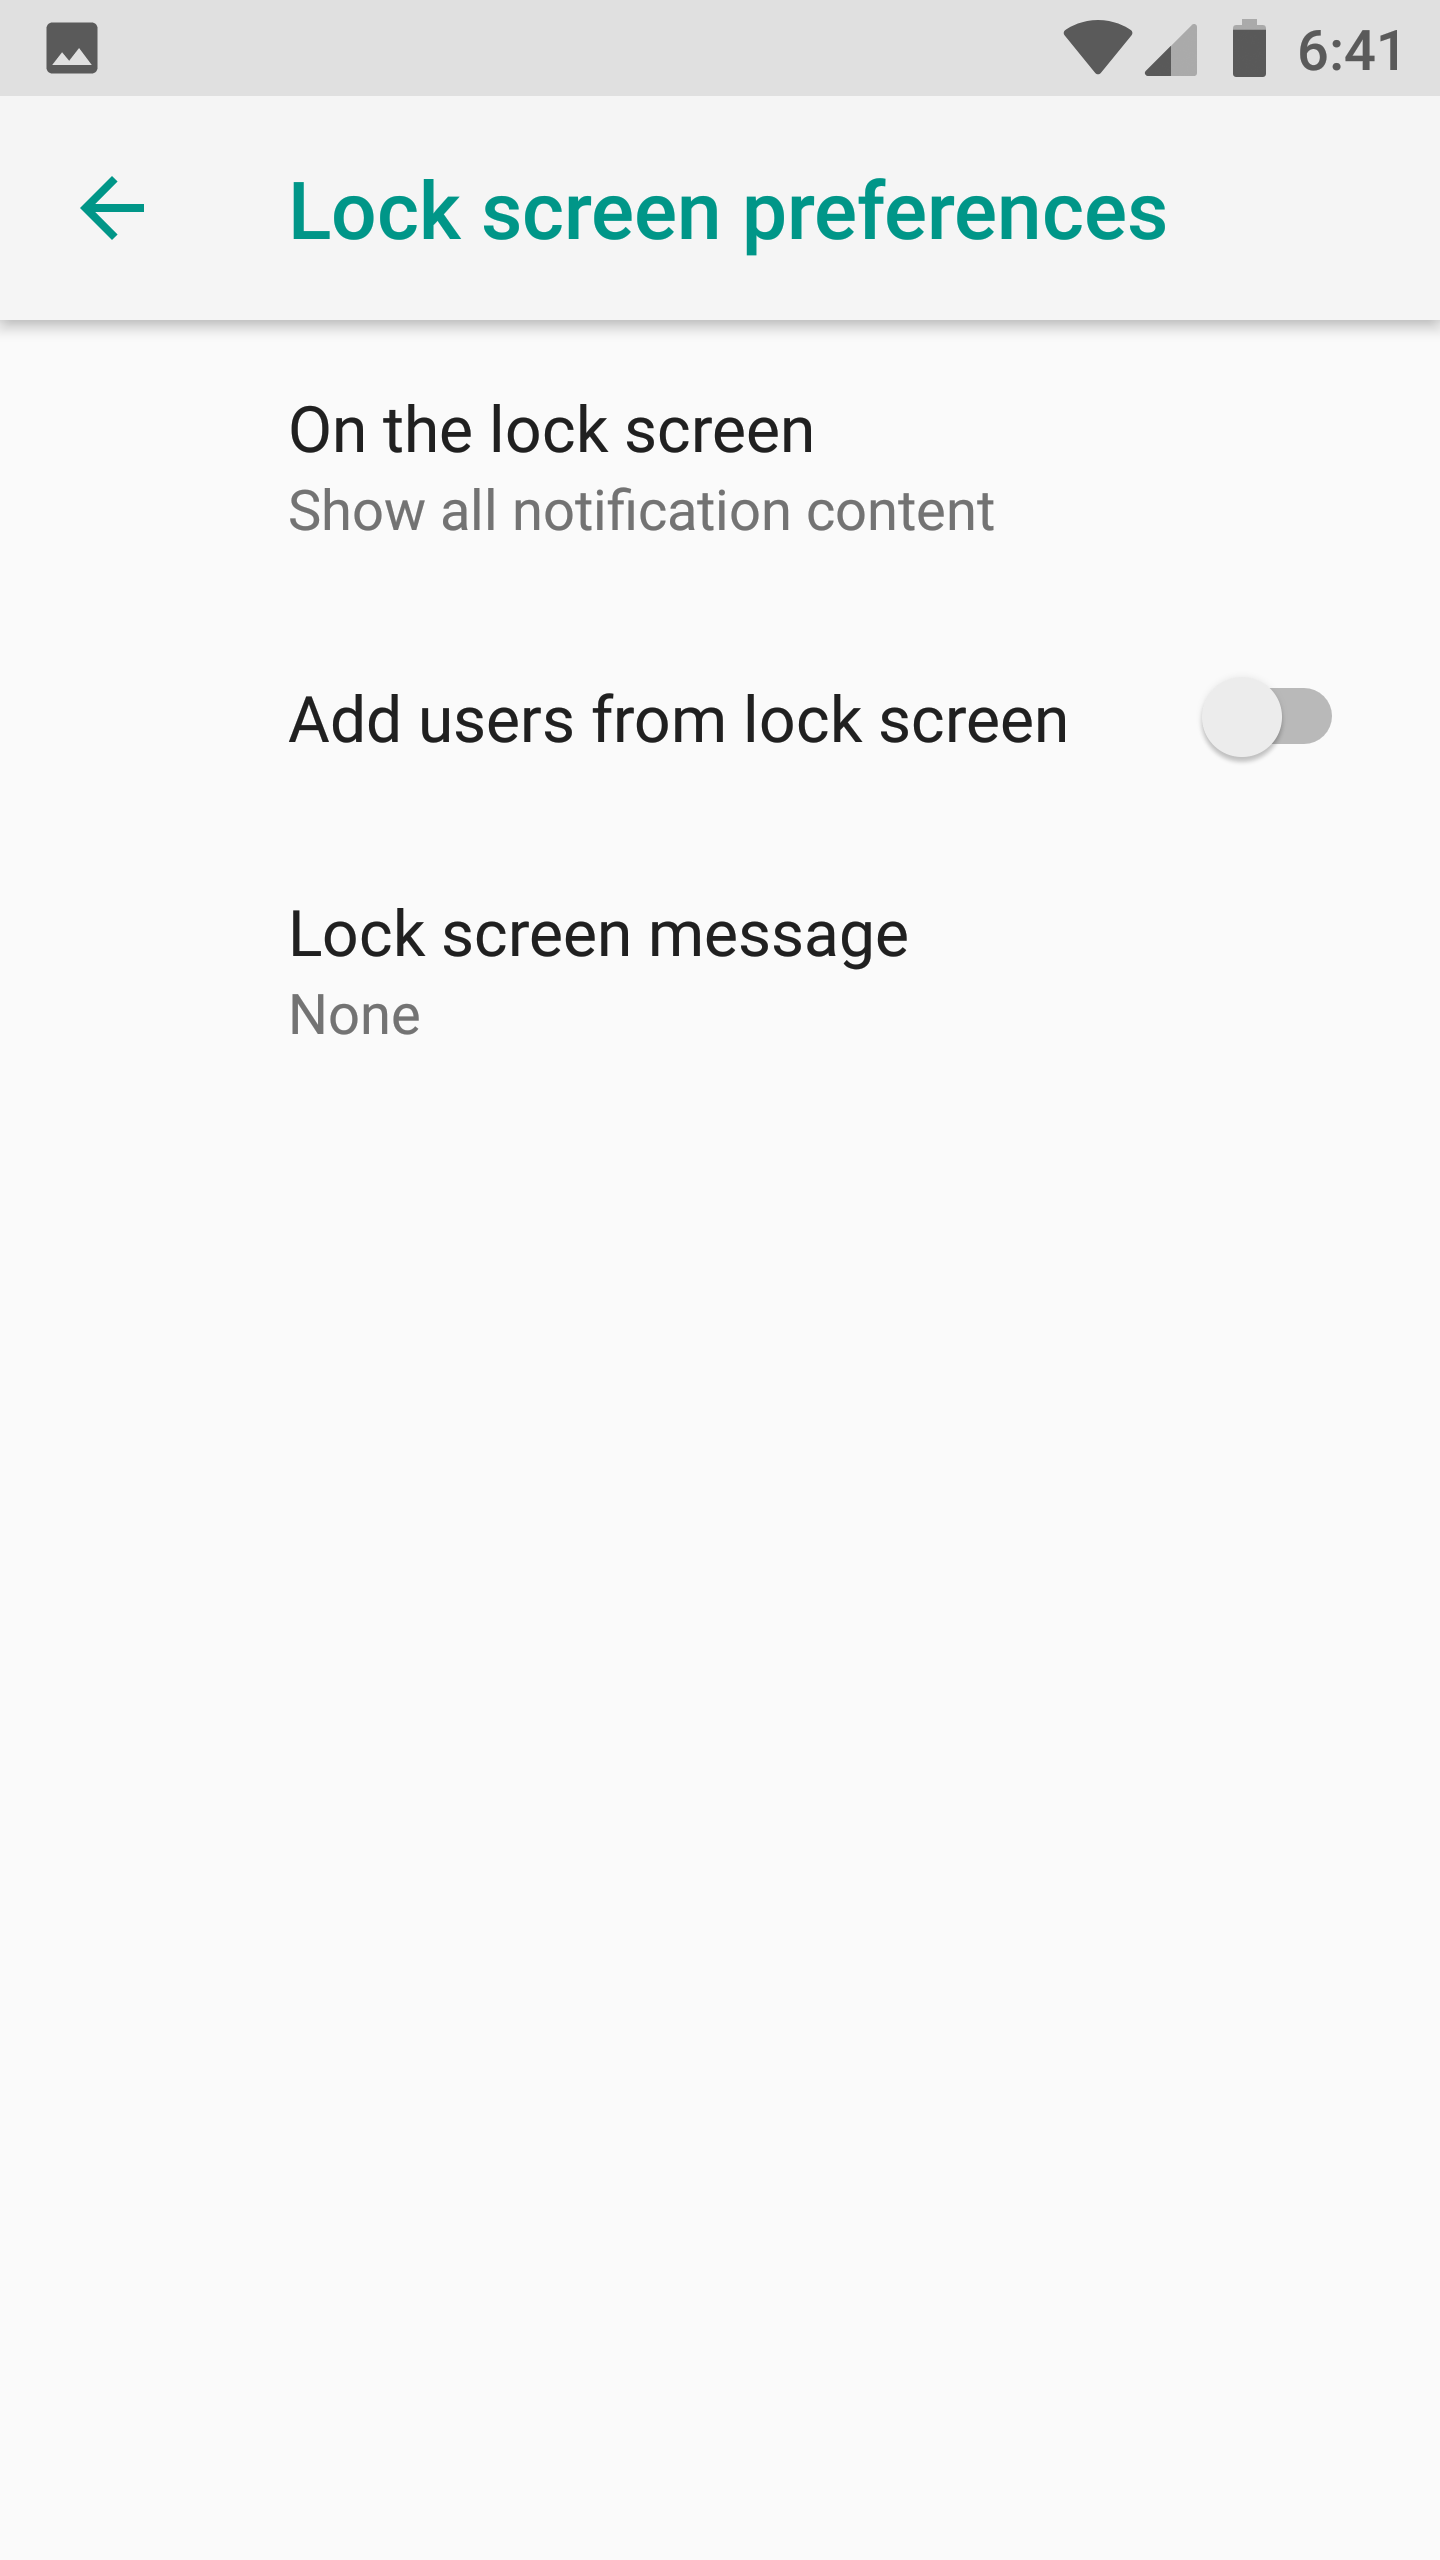
4. Tap “On the lock screen” and choose “Don’t show notifications at all”
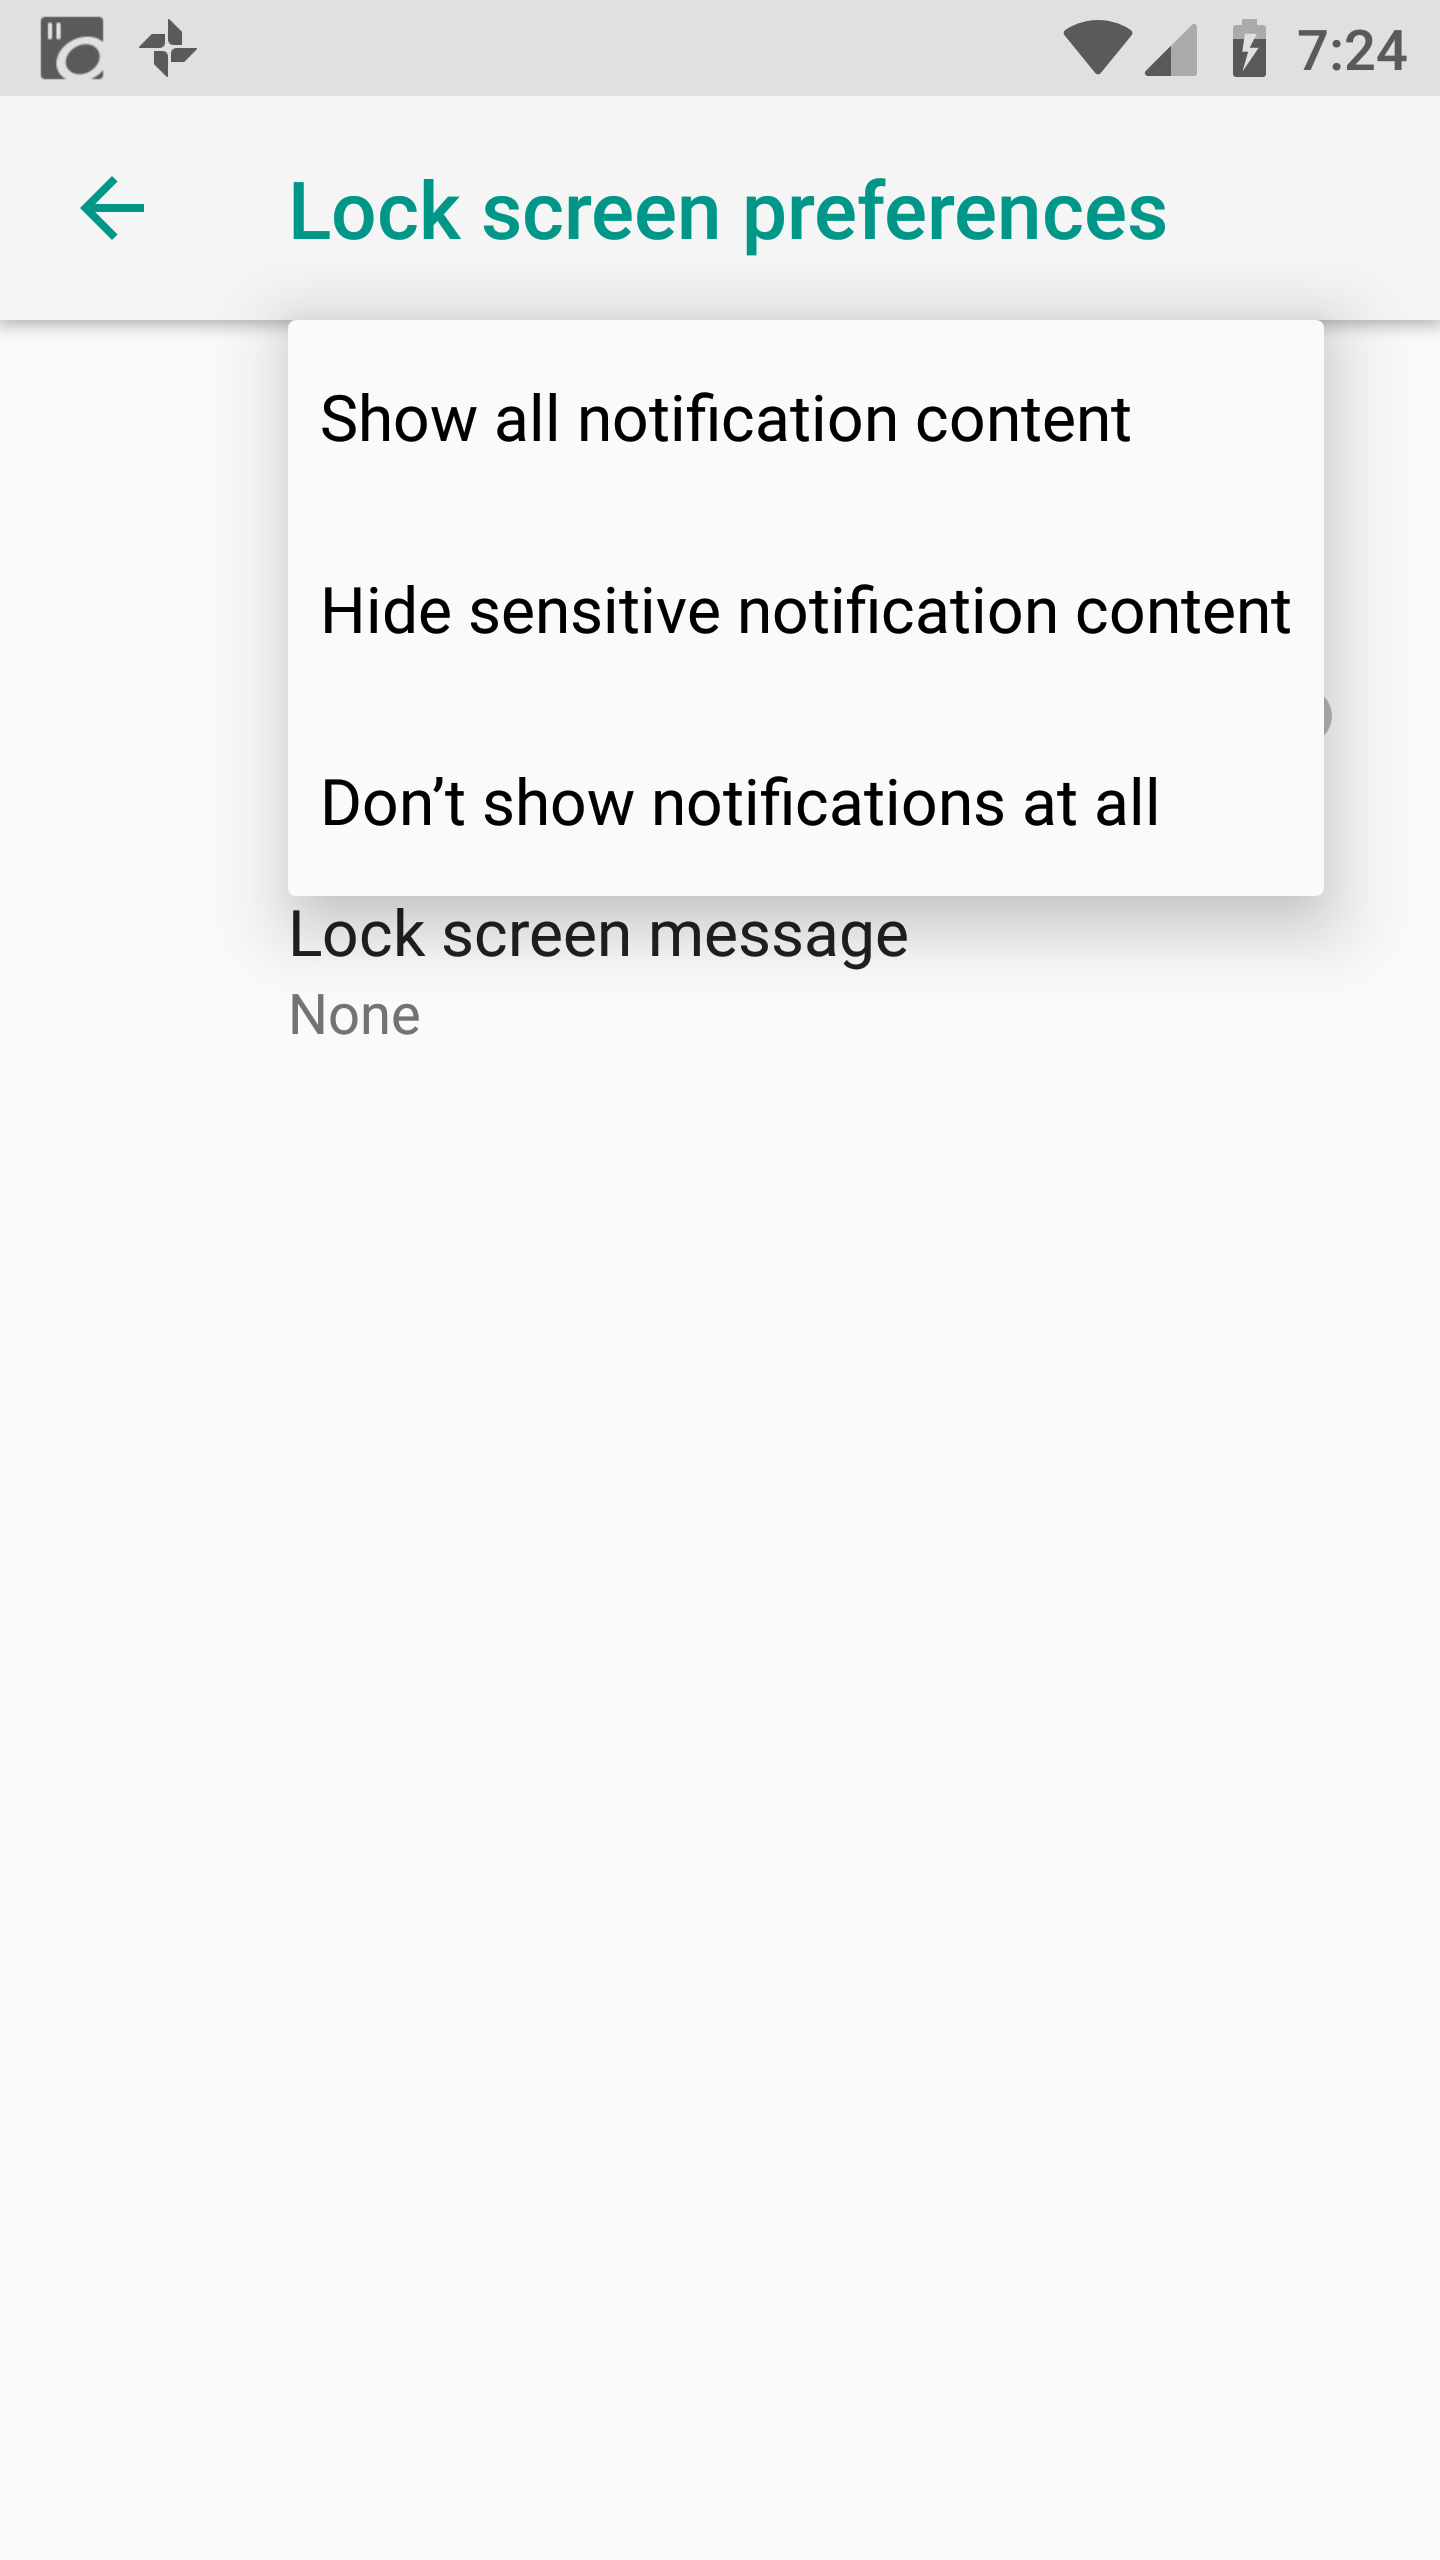
Once
you have this set up you’ll still have the security of a lock screen,
without being bombarded by a stream of notifications as soon as you look
at your phone.
Clear Your Home Screen
Most
Android phones come with a home screen pre-configured. Often there are
shortcuts to the apps the manufacturer assumes you’ll use the most.
Worse, there are often some sponsored apps that companies have paid to
get in front of you. You’re paying to be advertised to. That’s not cool.
In almost all cases, there are a lot of things that you just don’t need to be staring at.
The
home screen certainly is a personal space that will vary from user to
user. But here I will give you my rationale for why a clean, uncluttered
home screen works the best.
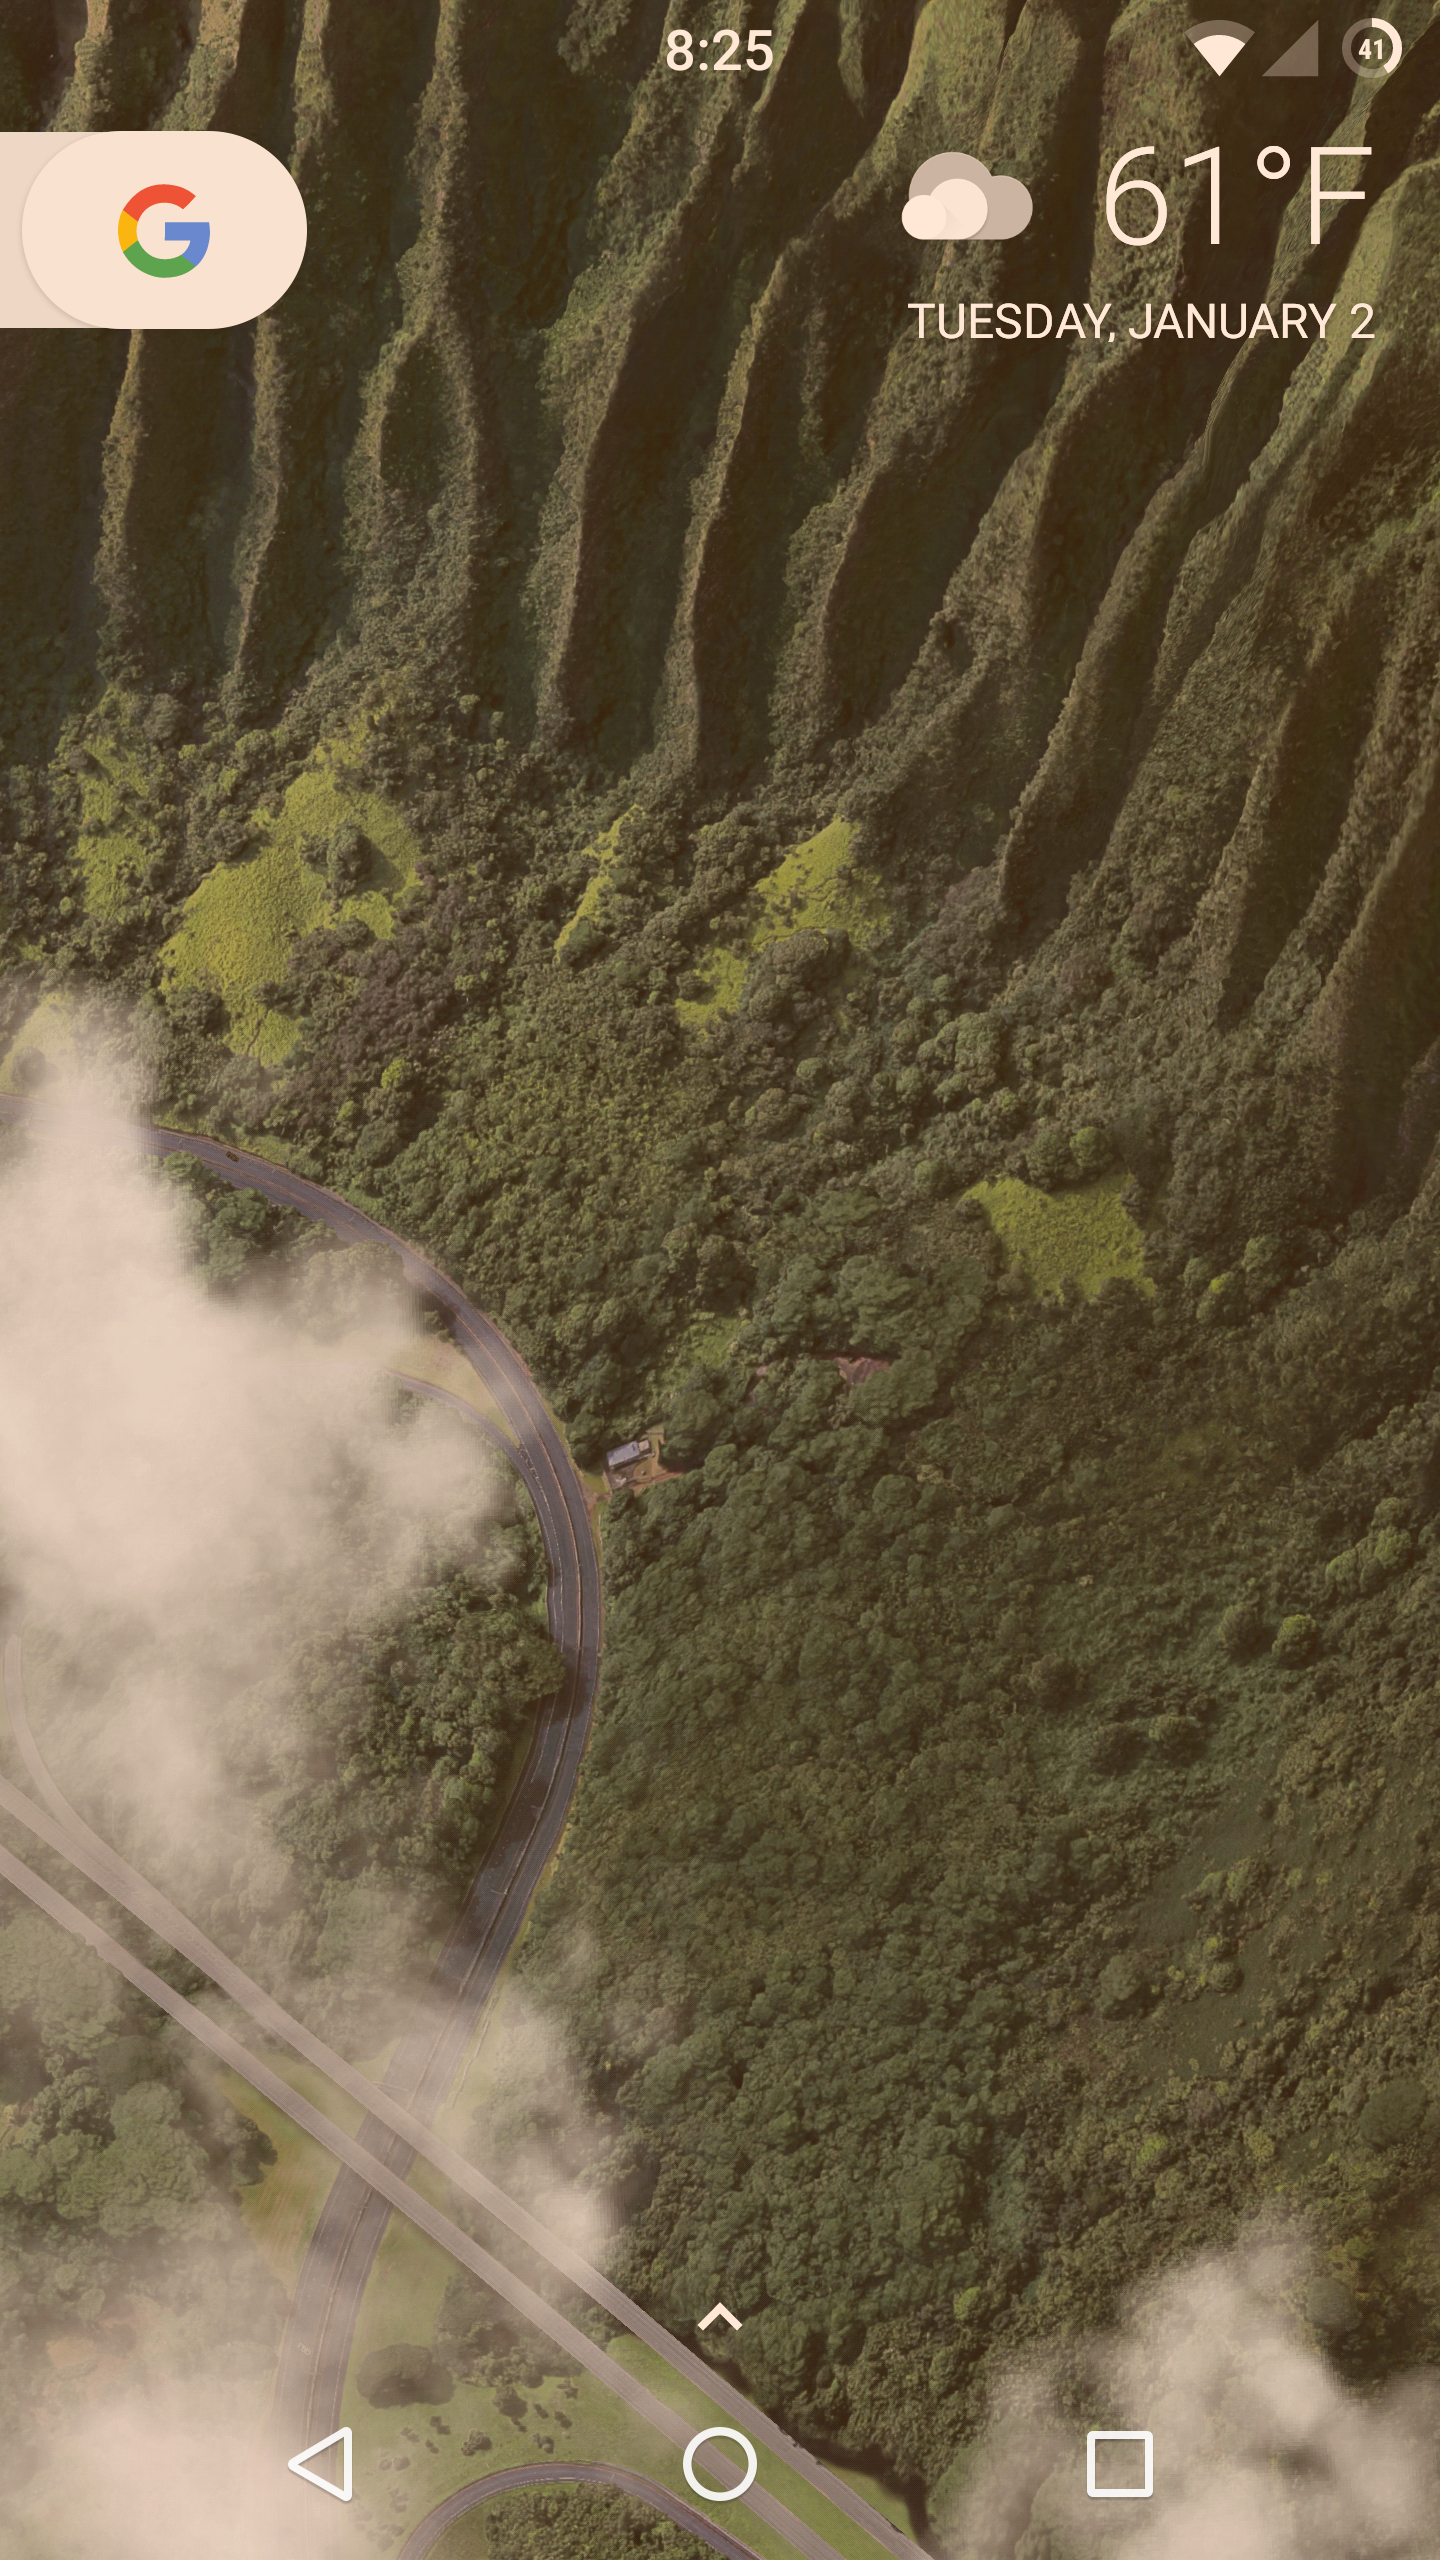
My
home screen has no app shortcuts. It does not has excessive widgets. It
has nothing but a Google search icon, the date and weather, and
navigation buttons.
Whenever
I look at my home screen, I see nothing but the relaxing live wallpaper
that I’ve installed. All of my apps are still easily accessible with a
swipe up from the bottom, but there are no shortcuts with badges of
unread messages or widgets displaying news headlines that I didn’t ask
for.
A clear home screen equates to a clear mind, and it makes me far more productive.
App
badges, in particular, are a case of the app manufacturing trying to
control your behavior. If there’s one principle of this article, it’s
that you should always be in control of your phone. I’m glad not to see those badges any more.
Here’s how to remove the clutter from your home screen:
- Long press on any app shortcut on your home screen

2. You’ll see some options appear at the top of the page (Remove, App info, Uninstall)
3. Drag the icon into the option that says “Remove”
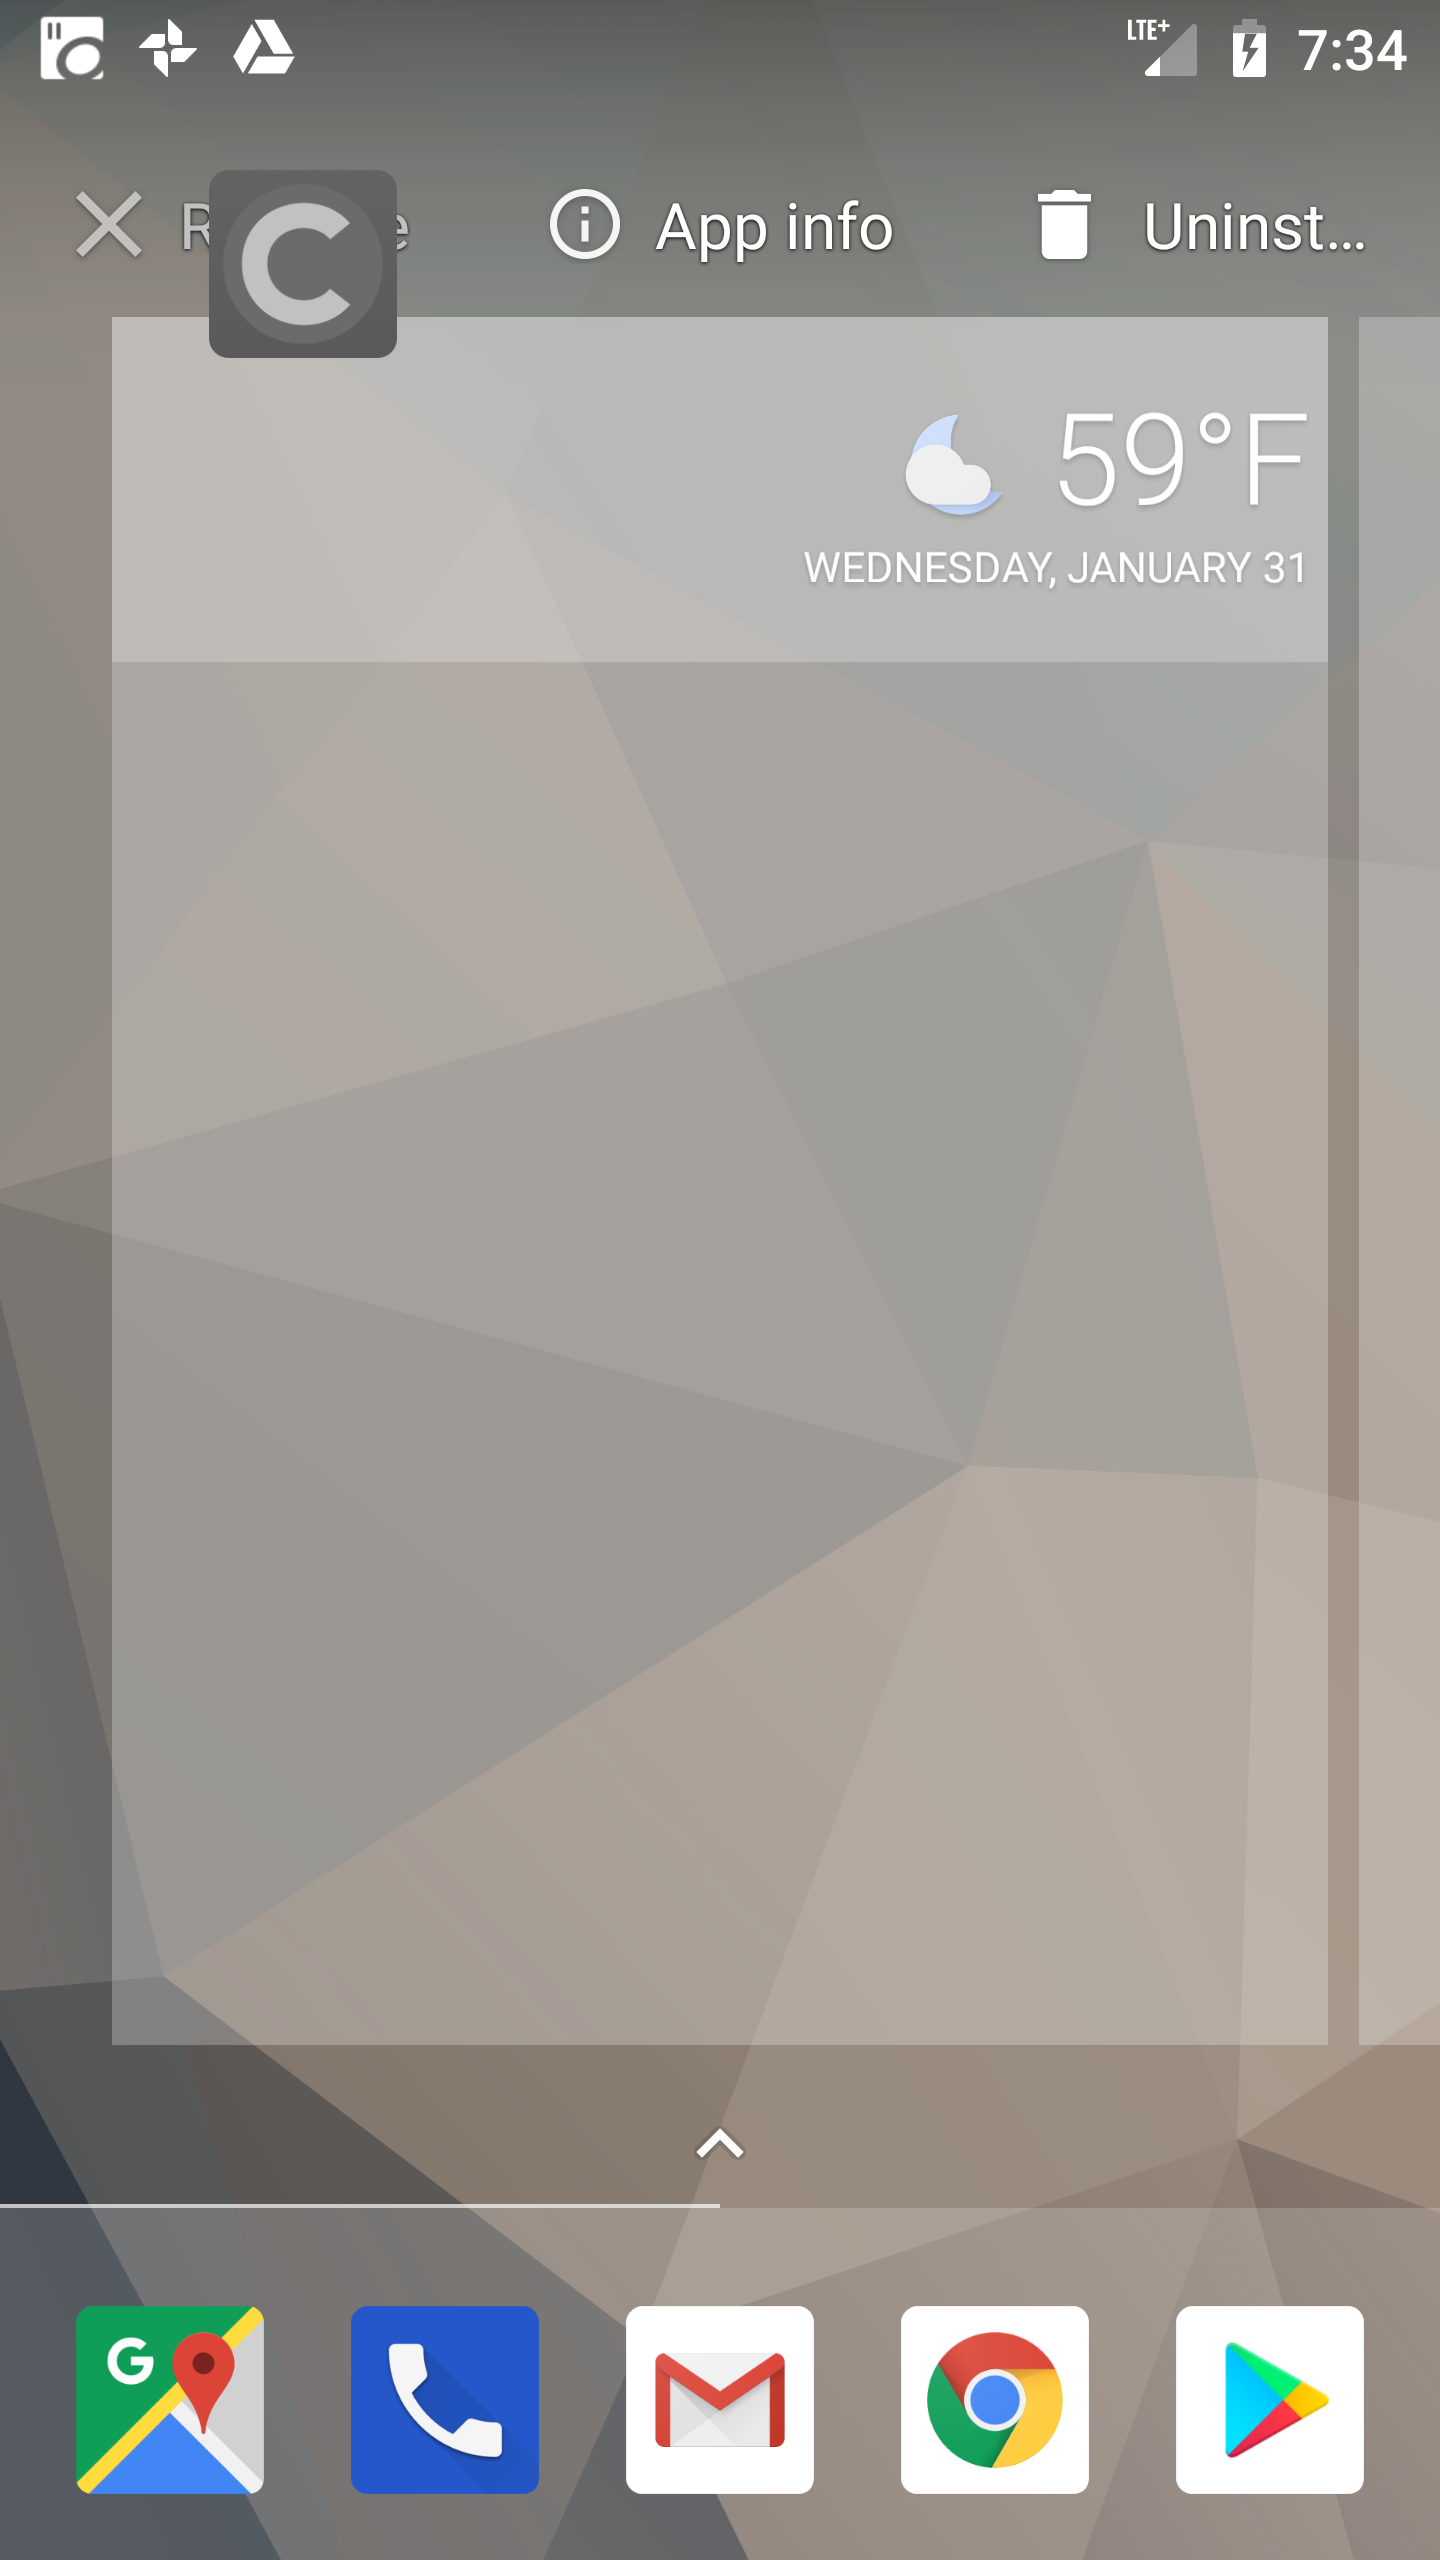
4. Repeat the process for any widget or app shortcut that you no longer want to see on the home screen
Don’t
worry, removing an app shortcut from your home screen doesn’t entirely
remove the app from your phone — it just takes away that visual
distraction. You’ll still be able to open the app from your app drawer,
but only when you need to complete a task!
Hide (Almost) All Notifications
The
smartphone notification has become a scourge of modern society. People
are always checking for new notifications and searching for the shot of
dopamine they receive when they obtain new information.
Linda Stone has the best phrase for the multitasking world we live in: continuous partial attention.
It
may sound jarring, but I recommend turning off all notifications. You
won’t miss them. In fact, there are many reasons why the biggest lovers
of productivity, like the editor of this publication, are turning off their notifications.
I
know it can be an uncomfortable thought, but it will be worth the head
space you’re freeing up. Remember that all of the notifications are
still on your phone; you don’t need them to pop up and take control of
your time.
Turning off the notifications allows you to regain that control.
Social
media apps should be the first ones to go. You can still check your
favorite social media apps if you need to, but don’t let them distract
you throughout the day! Shutting off these notifications puts you back
in control. You’d be surprised at how unimportant most of these
notifications are.
Are
there any other apps that are needlessly notifying you? Maybe a photo
sharing app telling you to remember the photo you took on this day 4
years ago? Perhaps you downloaded a game that keep reminding you of the
latest high scores? We all have downloaded an app at some point that
just starts notifying us when we least expect it. At the very least you
need to disable these notifications. You may also want to reassess if
you need the app on your phone at all.
E-mail
should be the next notification that you tackle. Yes, we all need to
check e-mail throughout the day, but you don’t need to be told when each
and every new message has arrived in your inbox. Your postal mail
carrier delivers all of your mail at one time, right? You don’t receive
each piece of mail individually, and your e-mail should be received the
same way. Disable these email notifications, and just check your inbox a
few times throughout the day.
Texting
and SMS are typically the most urgent messages that are received on a
smart phone. This is the one area where I think it’s okay to allow
notifications. If your friends and family know that you’re not checking
the other notifications frequently, they can rely on the fact that
you’ll check your text messages. This doesn’t mean that you need to drop
everything and reply to each message on the spot, but if it’s something
urgent you’ll know about it.
Here’s how you can turn off your notifications:
- Go to “Settings”
2. “Apps & Notifications”
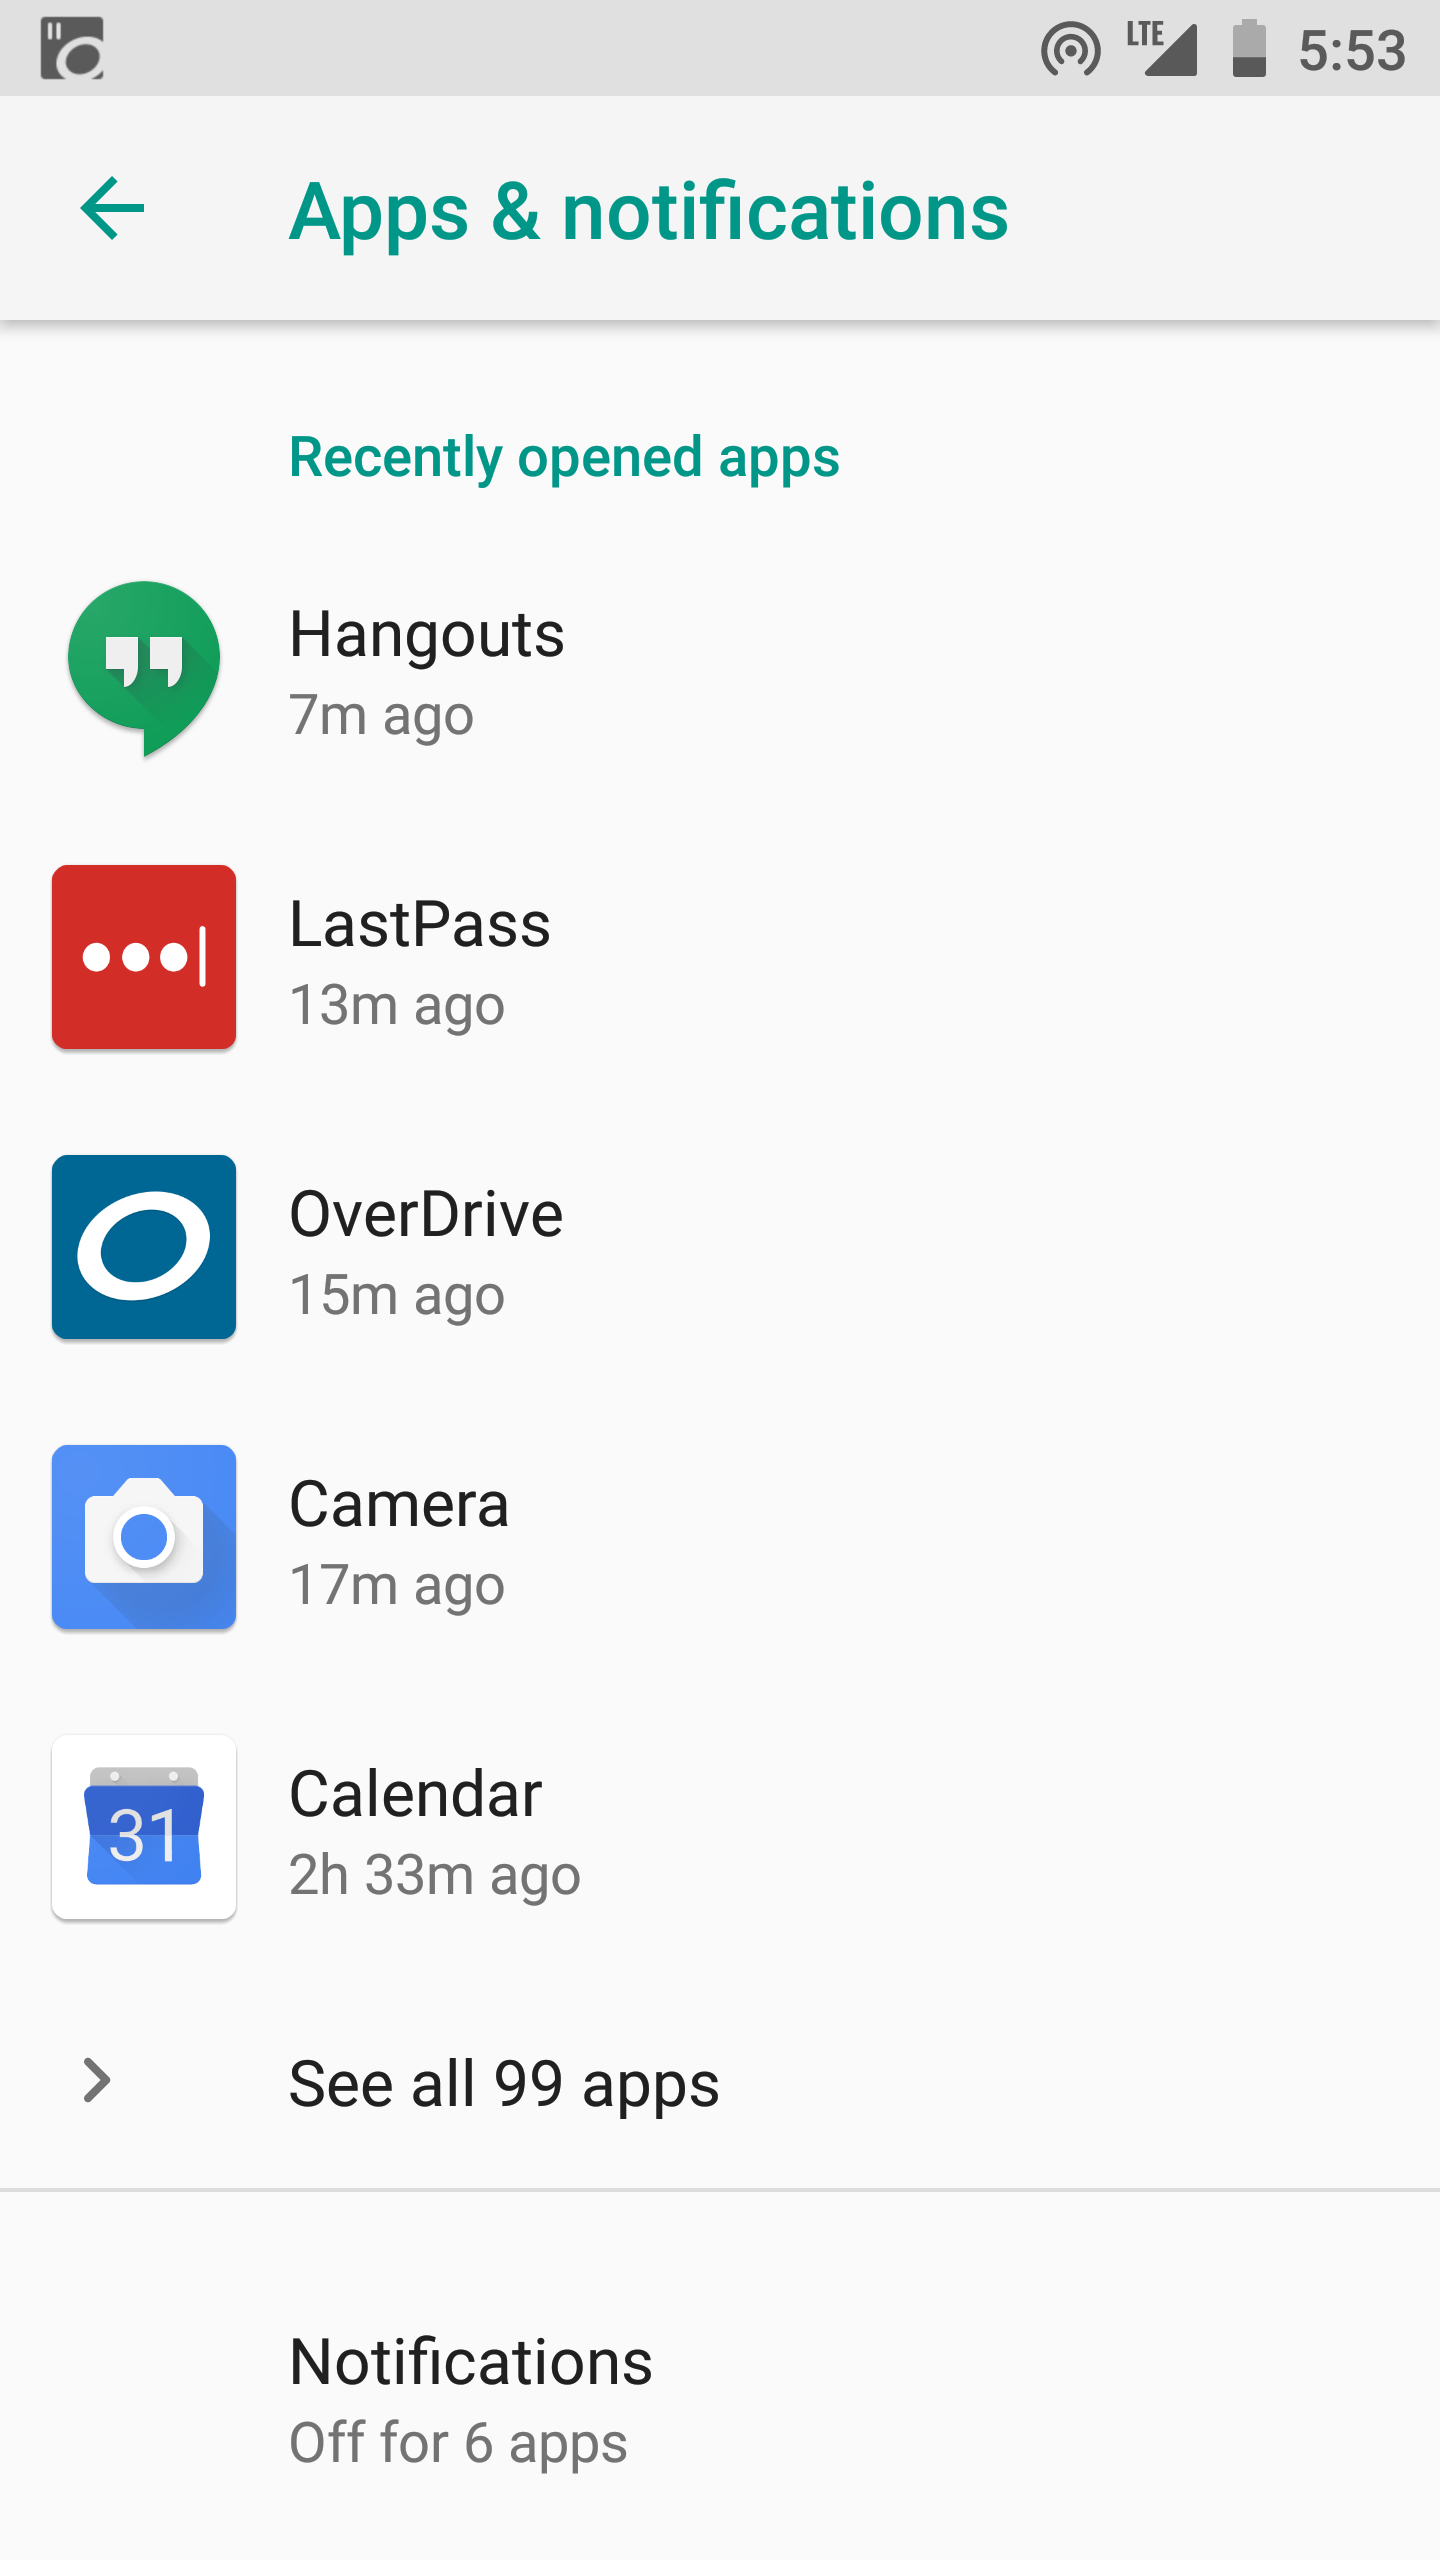
3. “Notifications”
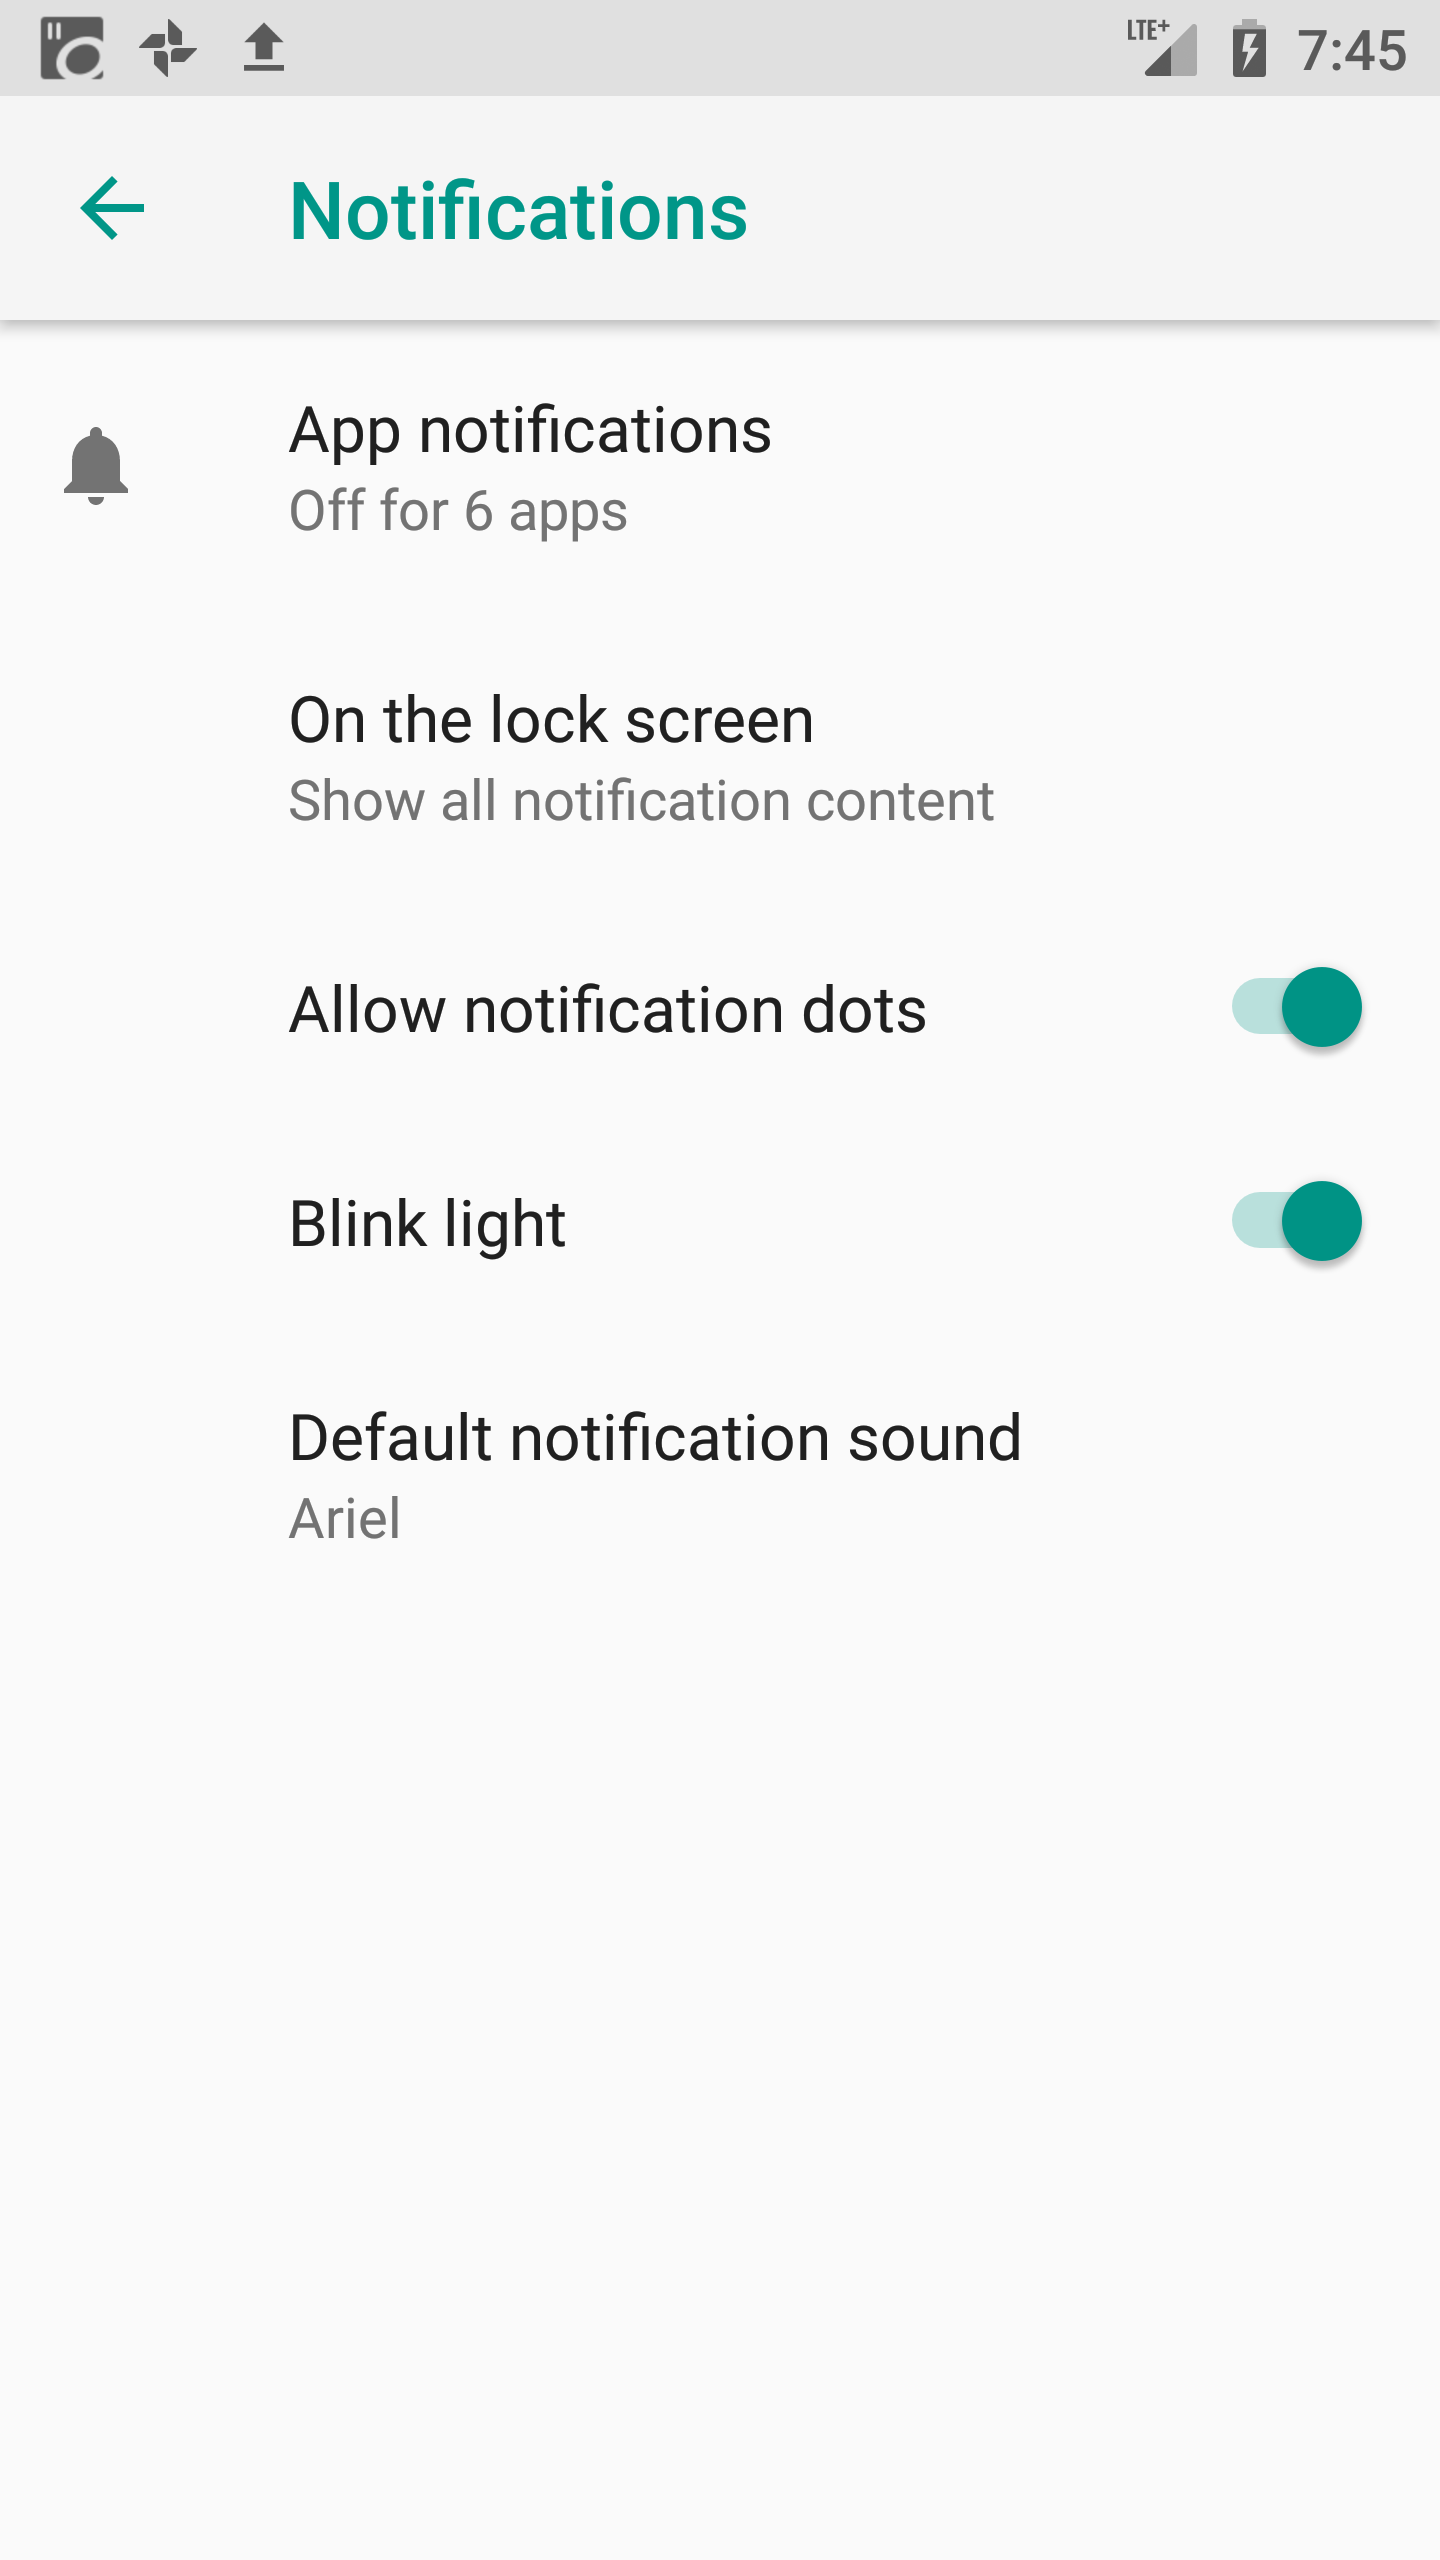
4. “App notifications”
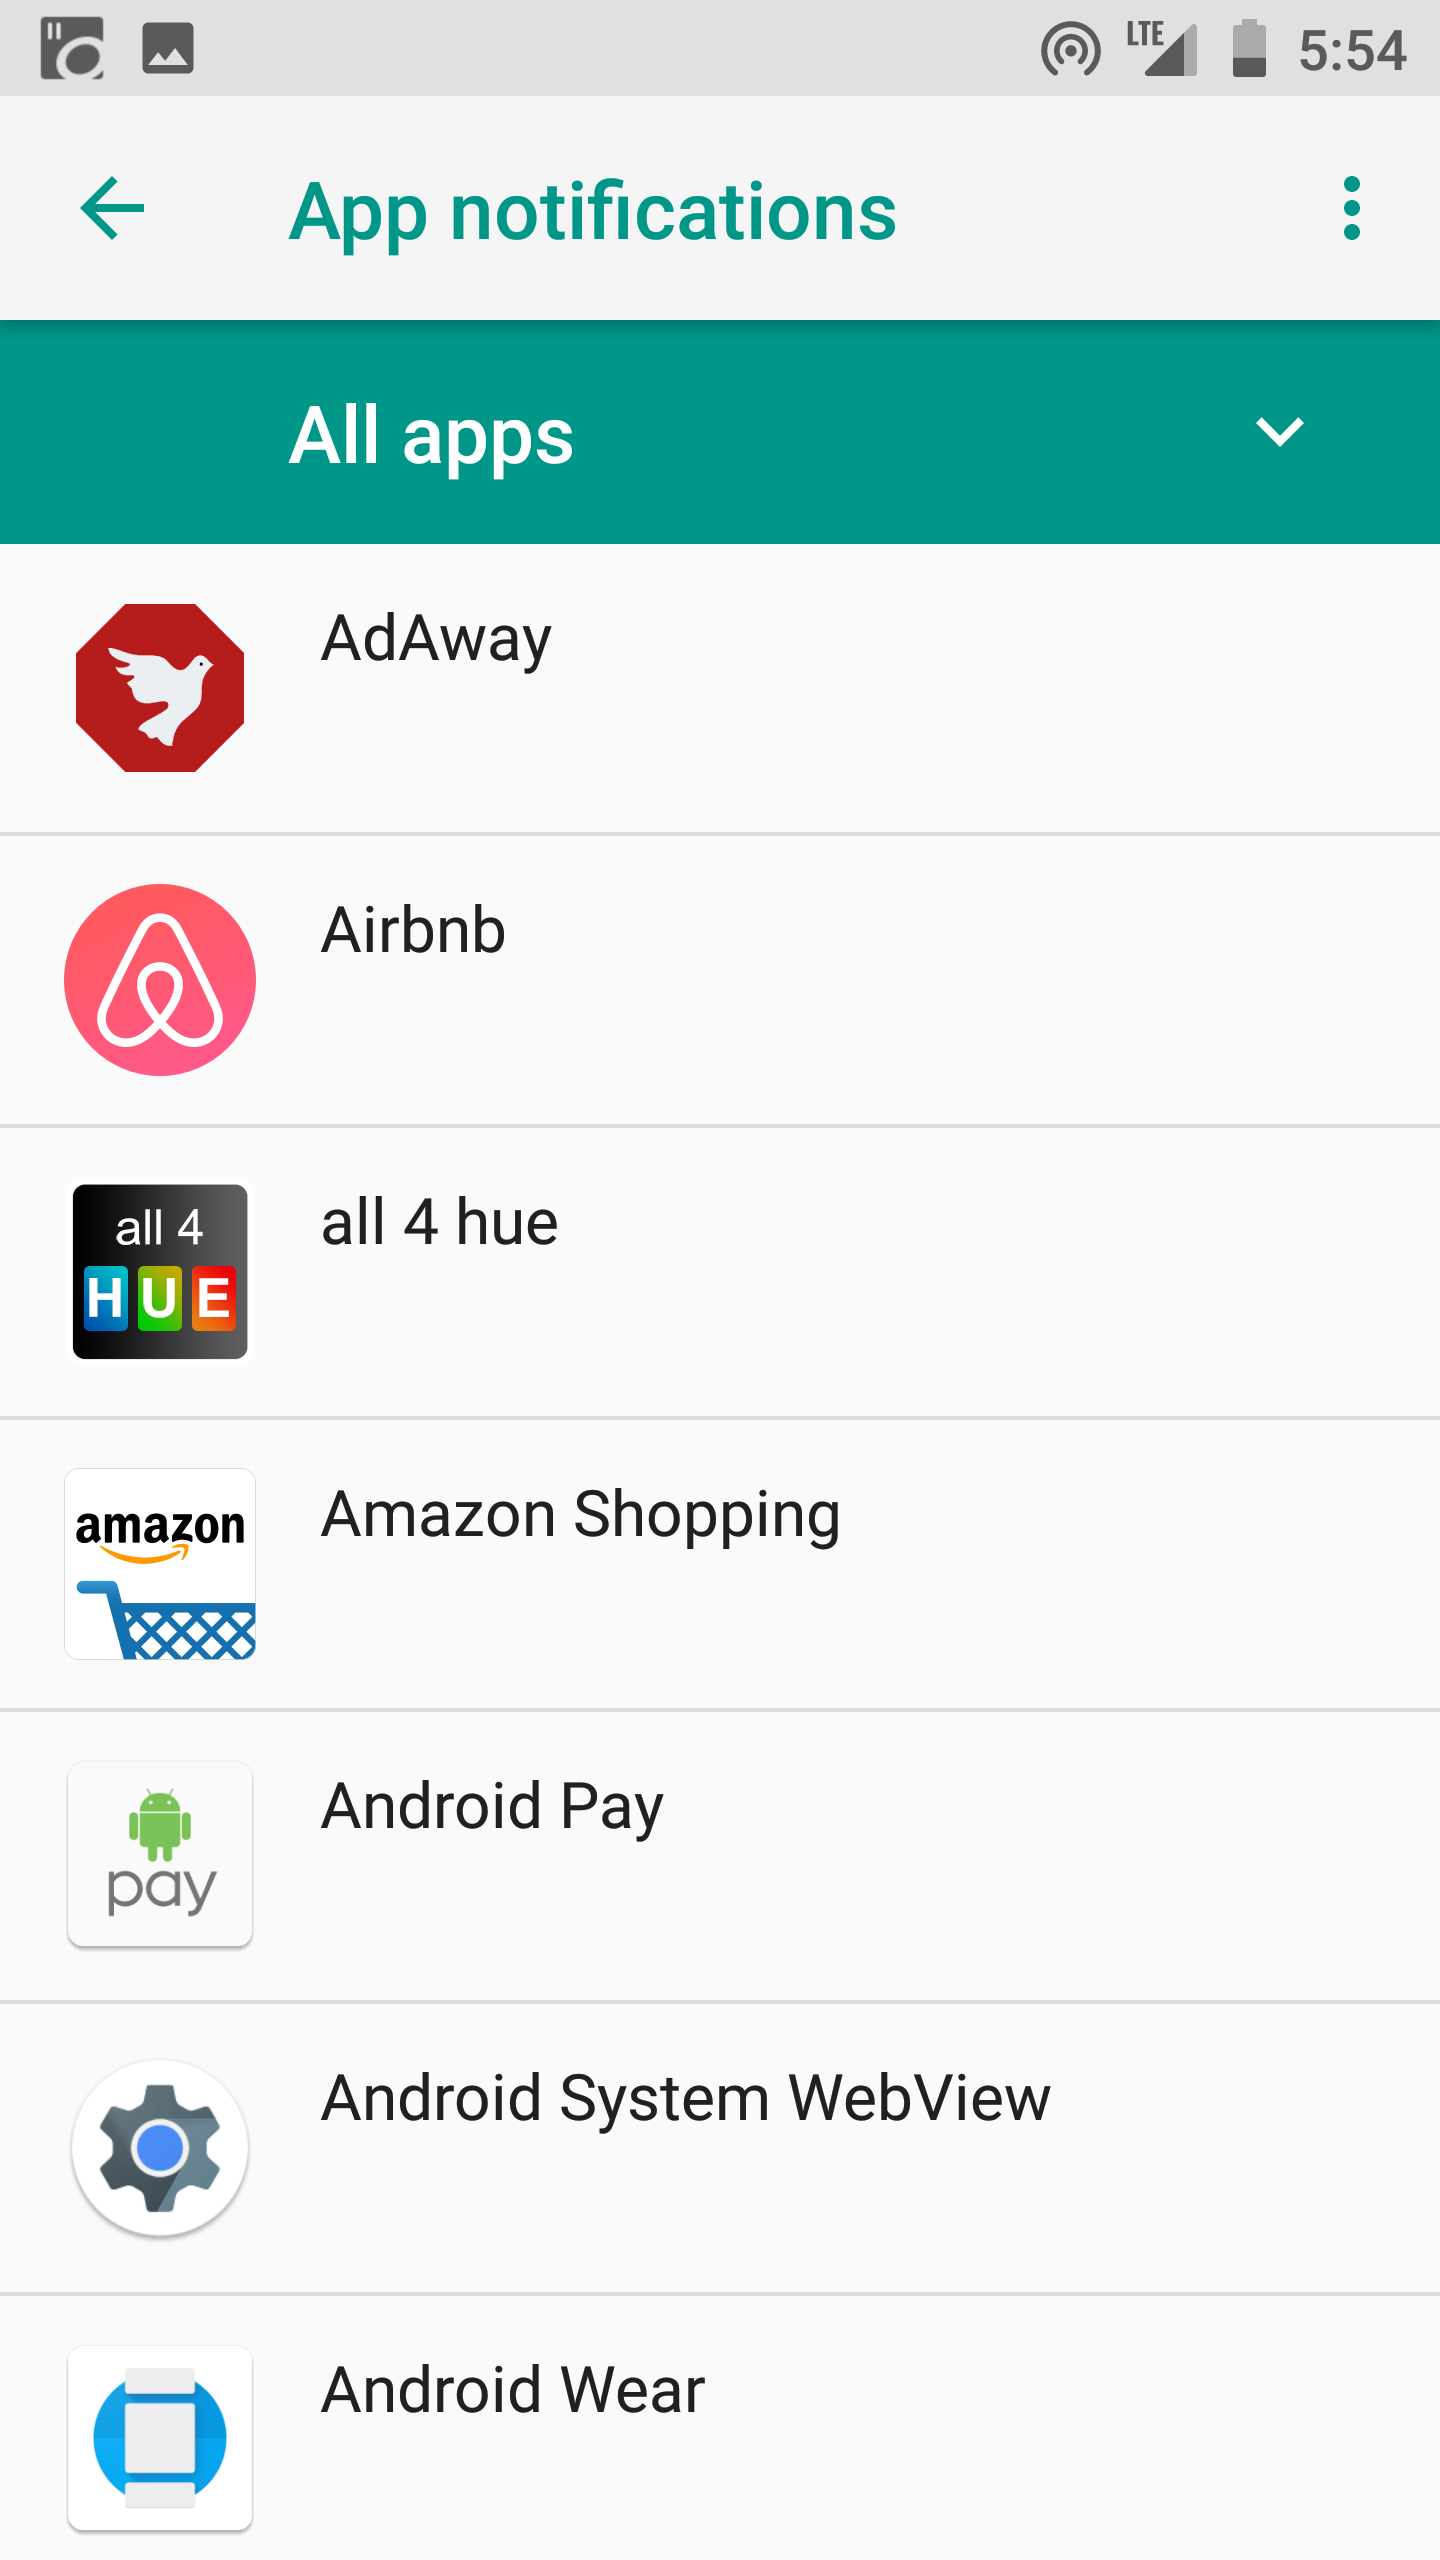
5. You’ll see a list of all the apps on your phone
6. Tap any app
7. Here you can toggle notifications on or off for any given app
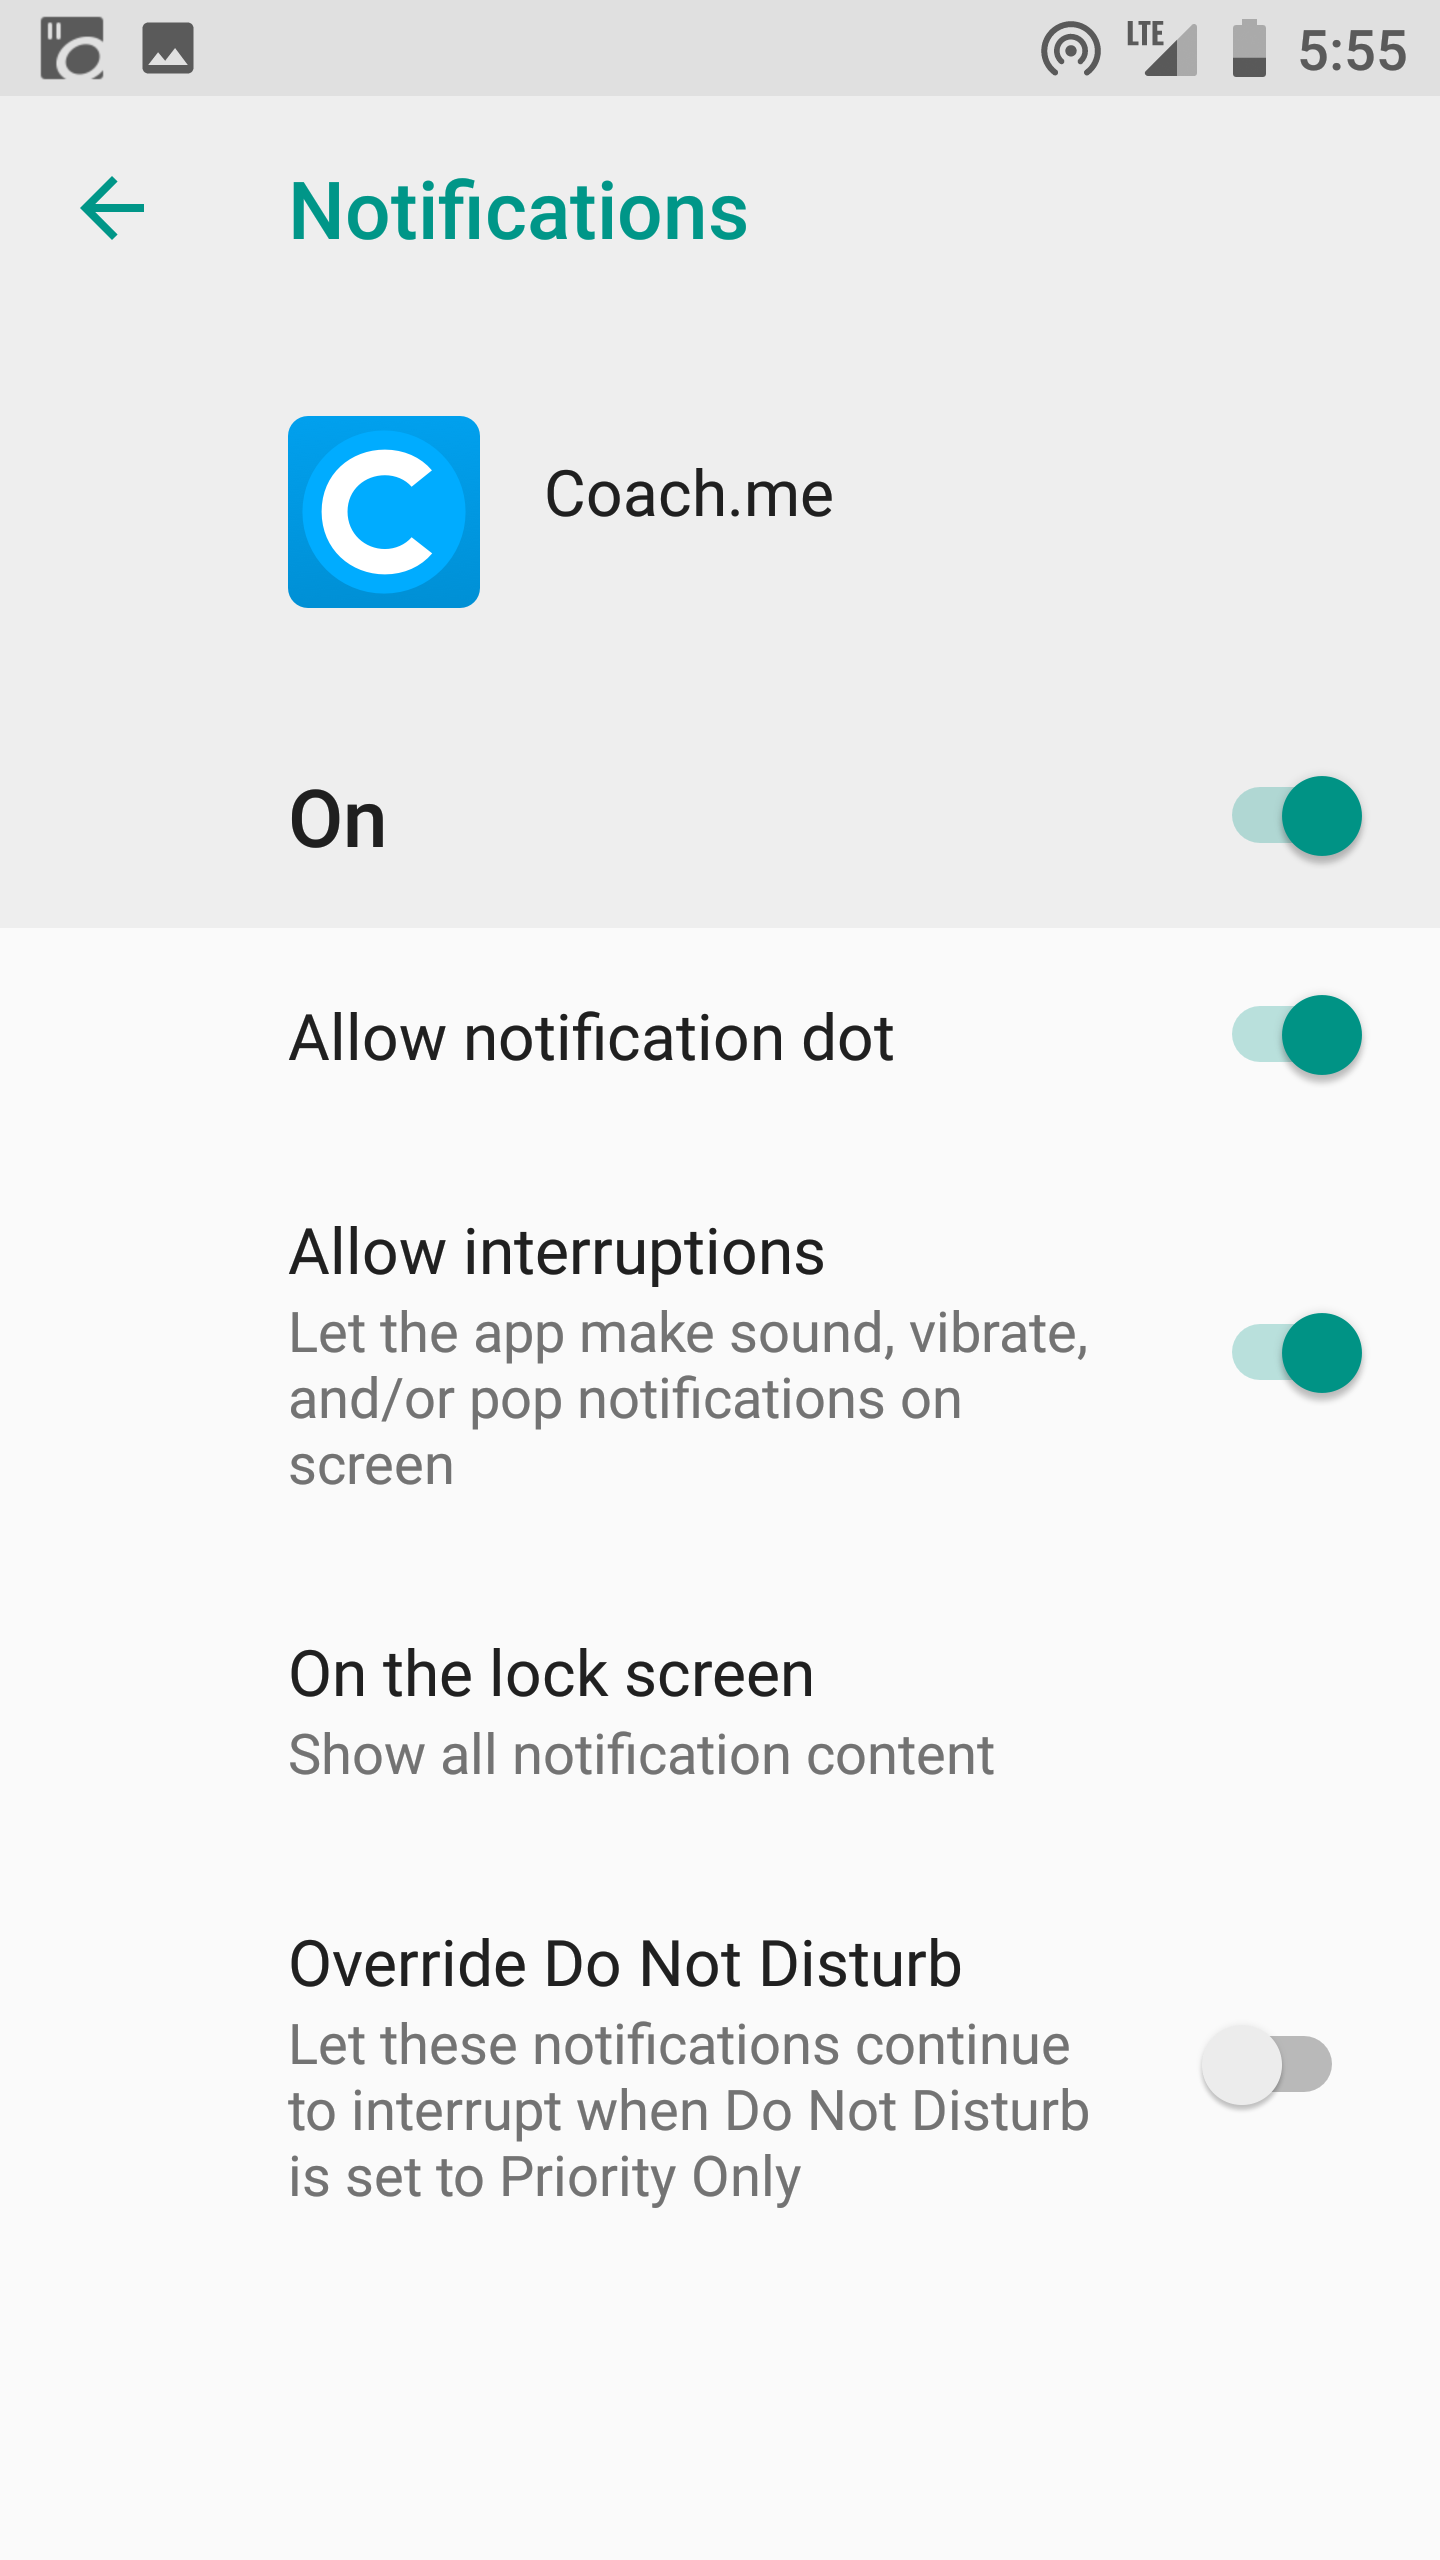
The
beauty of this method is that it allows you to take control of your
notifications. There may be some apps where you still want to allow
notifications, but you can turn off the ones that you know are
distracting you the most.
Set Quiet Hours or “Do Not Disturb”
We all need time to rest and recharge away from our smartphones.
Fortunately,
there are easy ways to disconnect during certain hours. All Android
phones now allow you to set quiet or “do not disturb” hours, during
which your phone will be silent. Depending on your sleep schedule, I’d
recommend setting these for an hour before bedtime and an hour after you
wake up.
This
allows you to have a wind down period when you’re preparing for sleep
when you’re not checking your phone. It’s also important to allow
yourself some time to wake up in the morning and plan your day before
you jump straight into checking your phone.
Here’s how you setup “Do Not Disturb” on your phone:
- Go to “Settings”
2. Click “Sound”
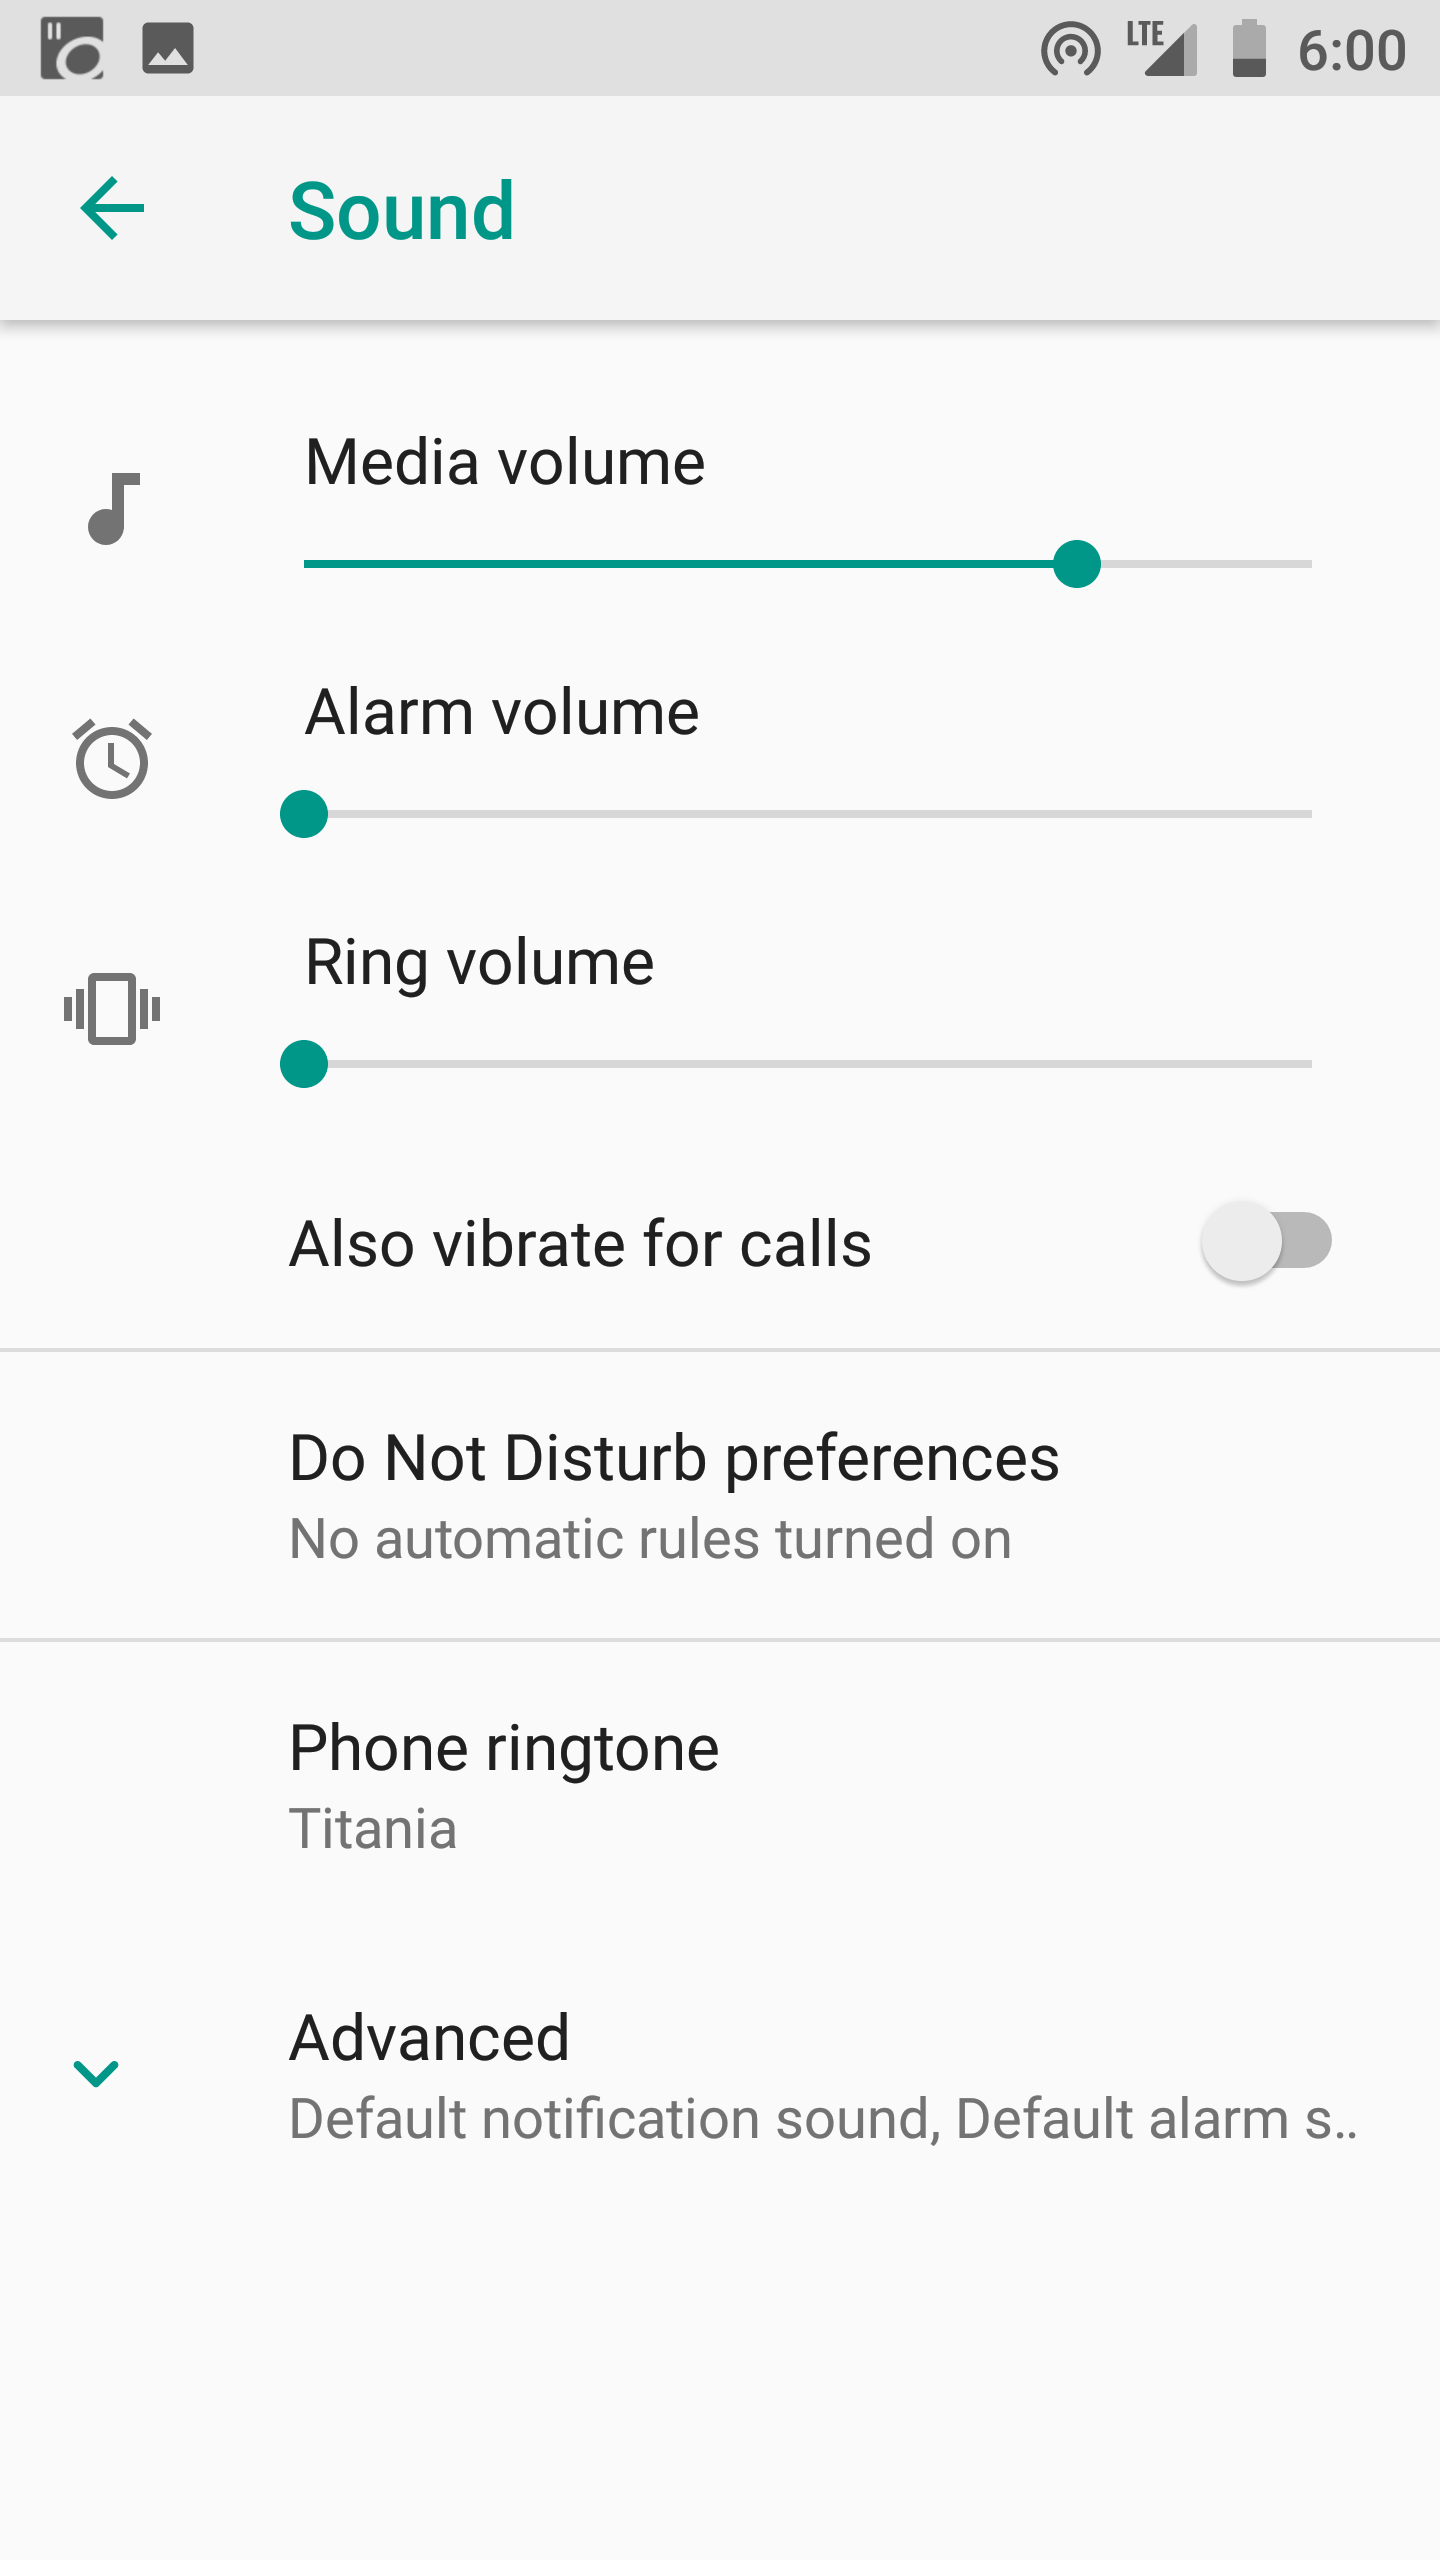
3. “Do Not Disturb Preferences”
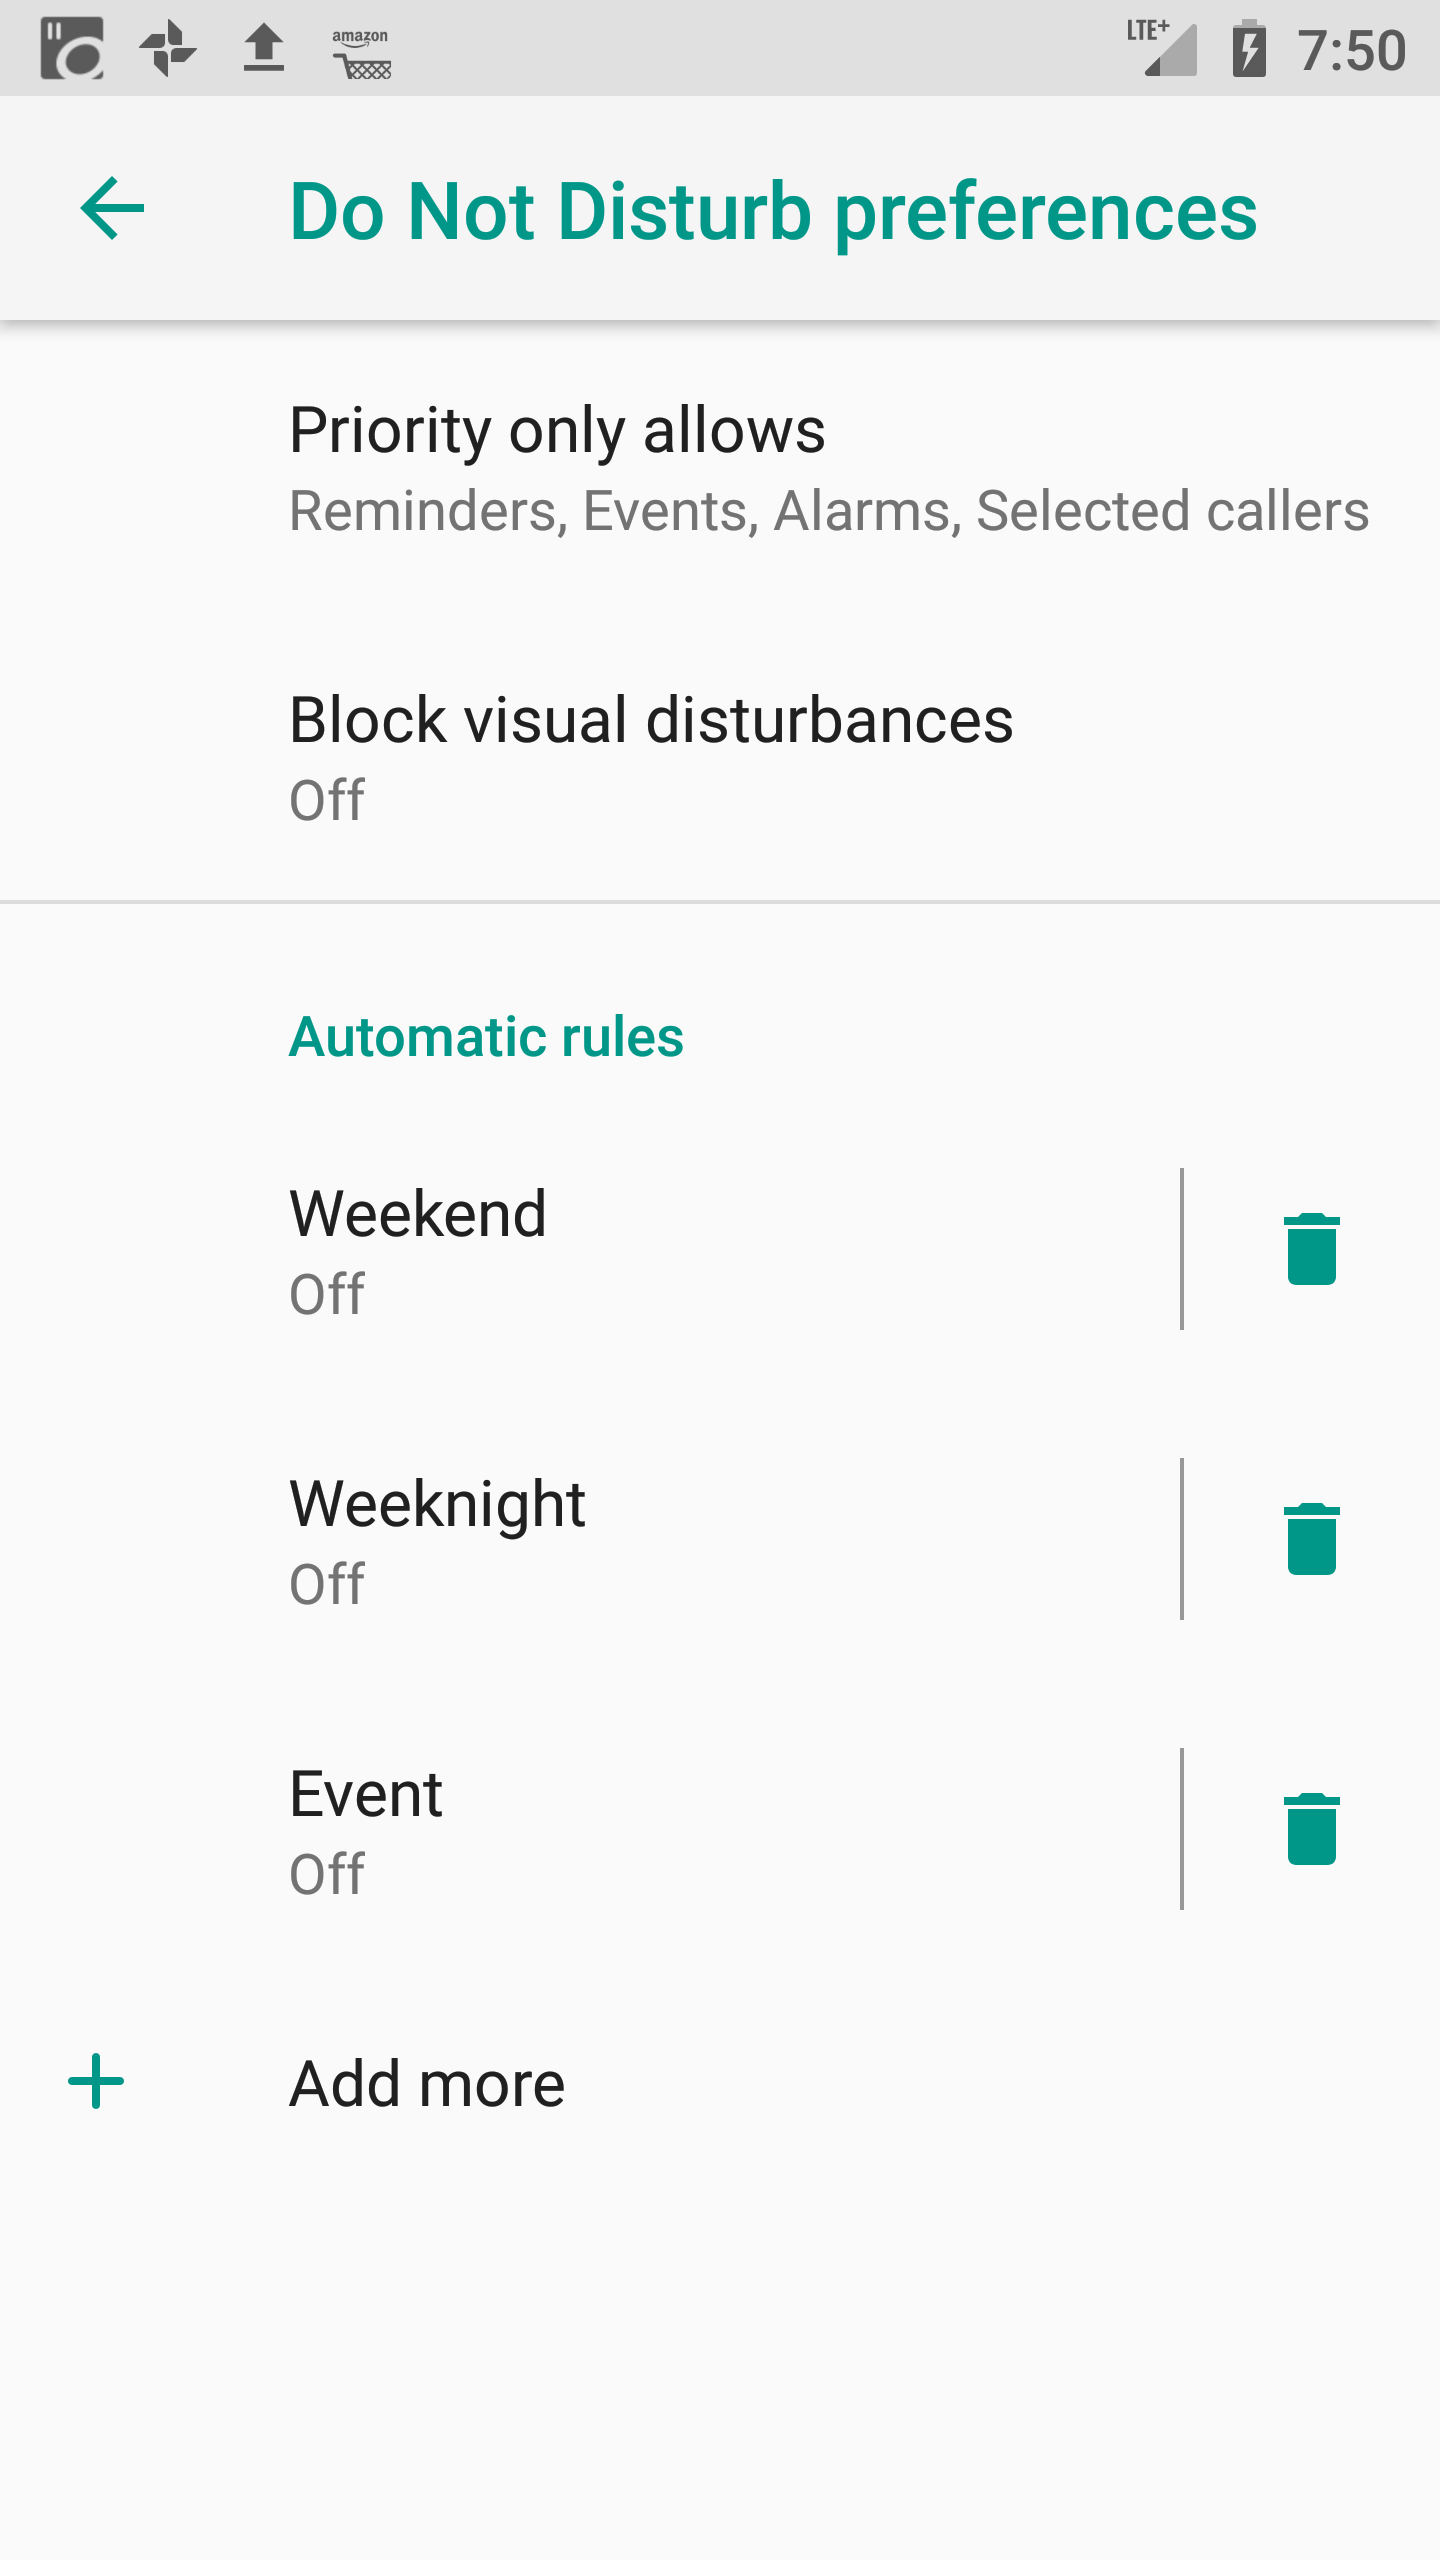
4.
This screen gives you options to set up different rules based on days
of the week or special events. (Maybe you don’t want to be disturbed
after 8pm during the week, but you’re okay with pushing it to 10pm on
the weekends.)
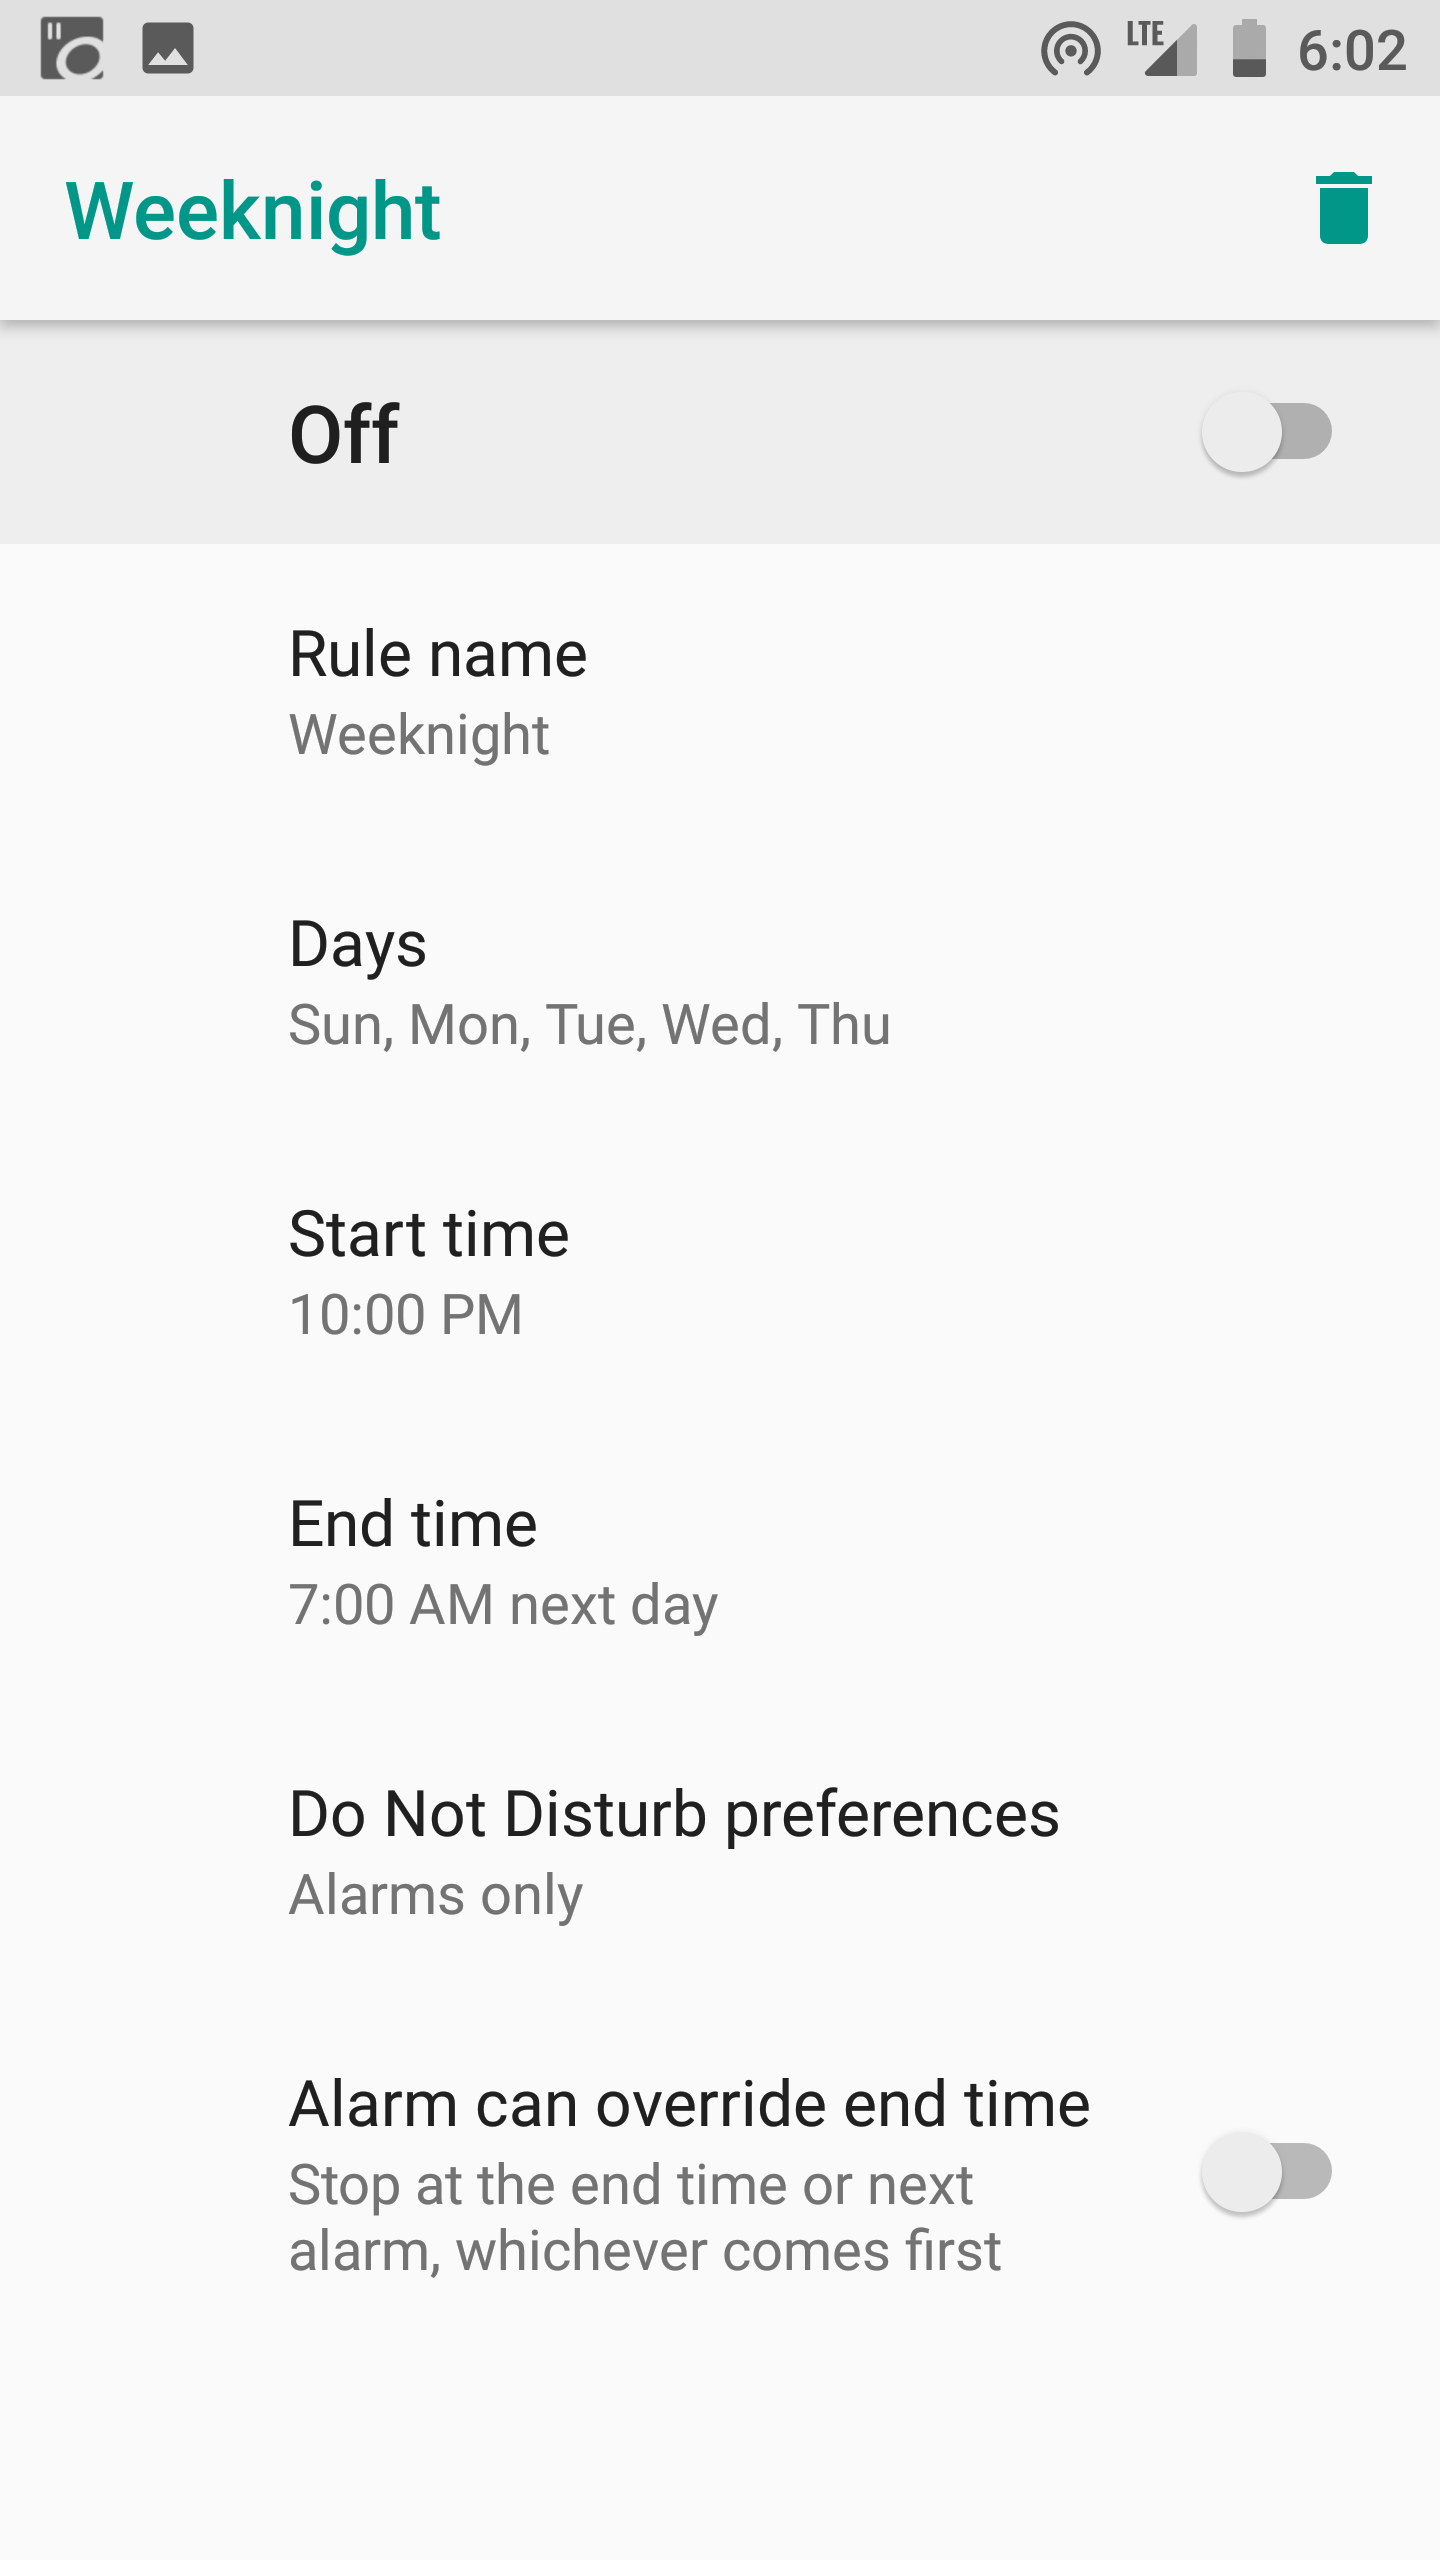
5.
Configure each rule as you see fit (Give it a name, days of the week,
start & end time, and allow overrides if you’d like)
Everyone
has a different schedule, and you’ll obviously have different “Do Not
Disturb” hours that make sense for you. For me, not being disturbed
between 9pm and 6am works really well any day of the week.
Experiment for yourself until you find what works!
Night Light & Blue Light Filters
Much has been written on how the blue light from our phones is keeping us awake at night.
It’s just not natural for human eyes to stare at such bright lights at
all hours of the day. Sure, not looking at a phone at all is the best
option. But the next best option is to calibrate your screen to block
the blue light wavelength and go easy on your eyes.
Some
of the latest Android phones (from Samsung and LG specifically) come
equipped with night time modes that dim the screen and reconfigure the
wavelengths of the light being emitted. If your phone doesn’t have this
capability straight out of the box, I highly recommend downloading an
app to help. My personal favorite is CF.lumen, but I’ve also used Twilight in the past and it has worked well.
Whichever
app you choose, just set some initial parameters and then let it do its
thing. Yes, there may be a few instances where the dimmed light is hard
to see, so you can temporarily disable it as needed. But your eyes will
surely thank you compared to the typical brightness of a phone screen.
Here’s how to setup a basic sleep filter that comes standard in the Android OS:
- Go to “Settings”
2. “Display”
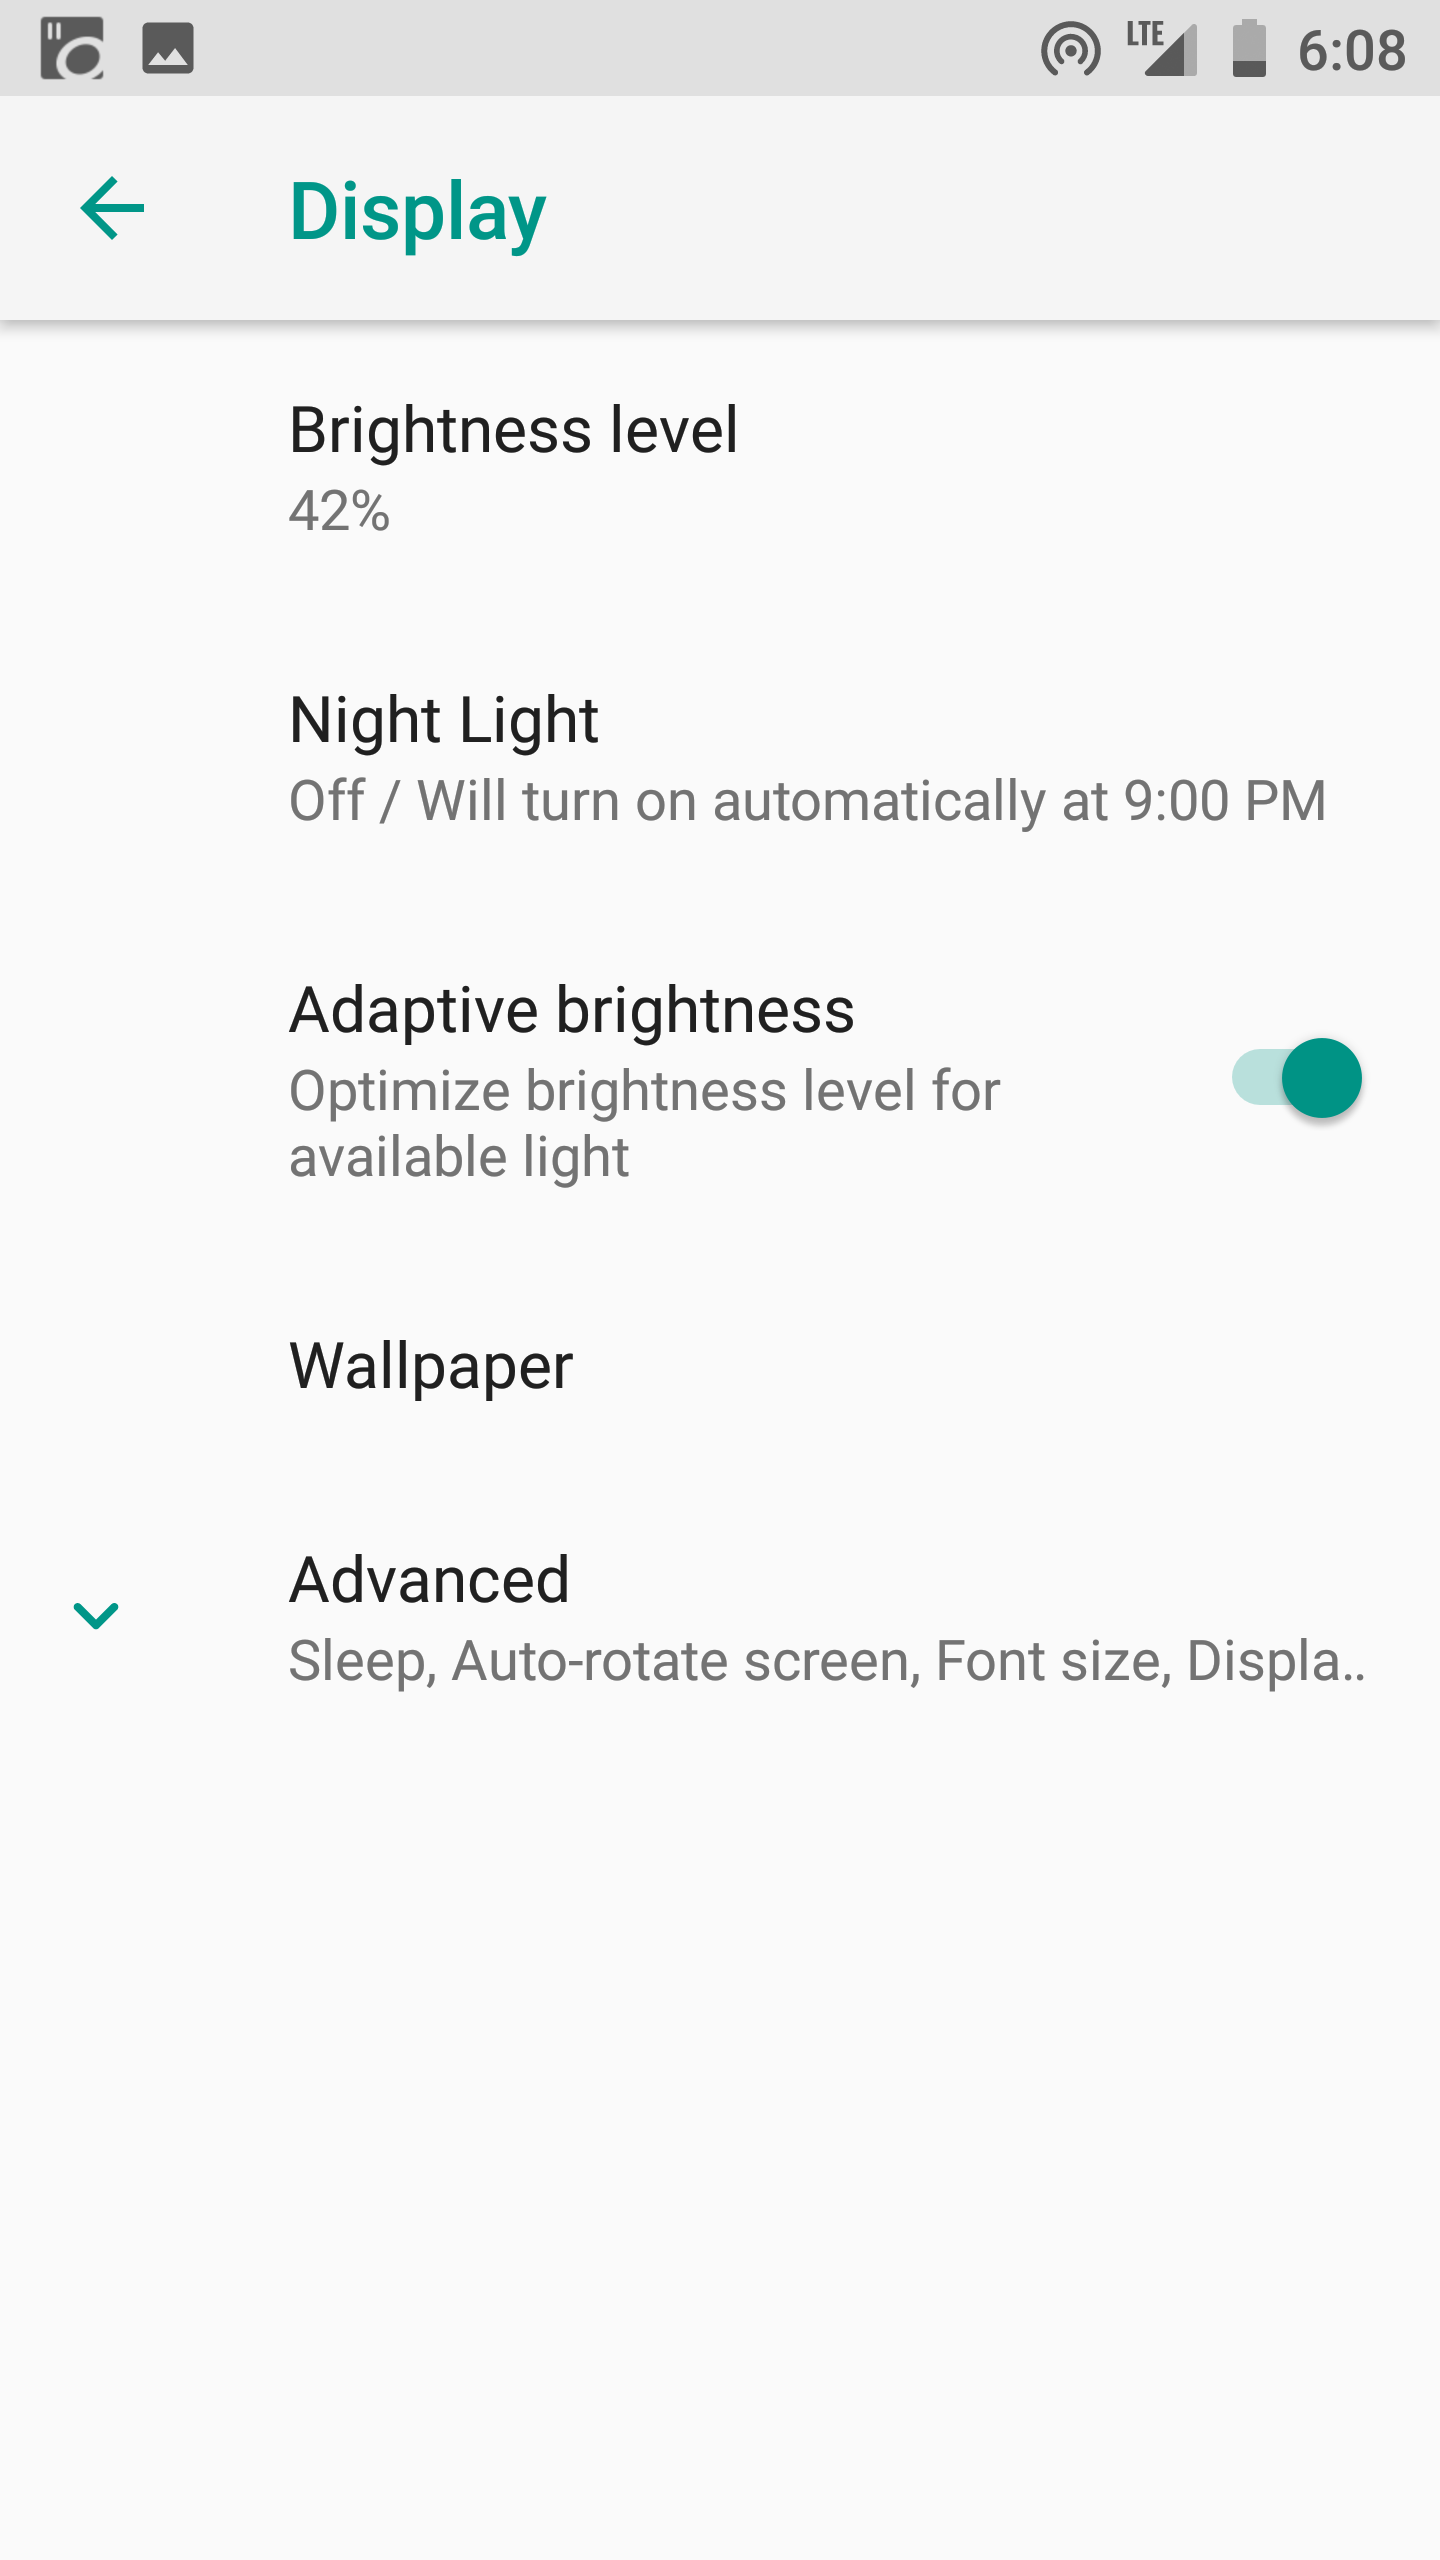
3. “Night Light”

4. From here, you can customize exactly how you want your night light to work
5. Choose a custom on/off time
6. Set your desired intensity for the screen brightness
For
most people, this will be plenty. But if you’re looking for some more
advanced features, here is a quick guide on getting CF.lumen setup:
- Download CF.lumen from the Google Play Store
- If your phone is rooted, you’ll have greater control over some of the settings. If you have no idea what rooting is, no worries! You can still use the app just fine.
- Yes, CF.lumen can look super intimidating, but stick with me!
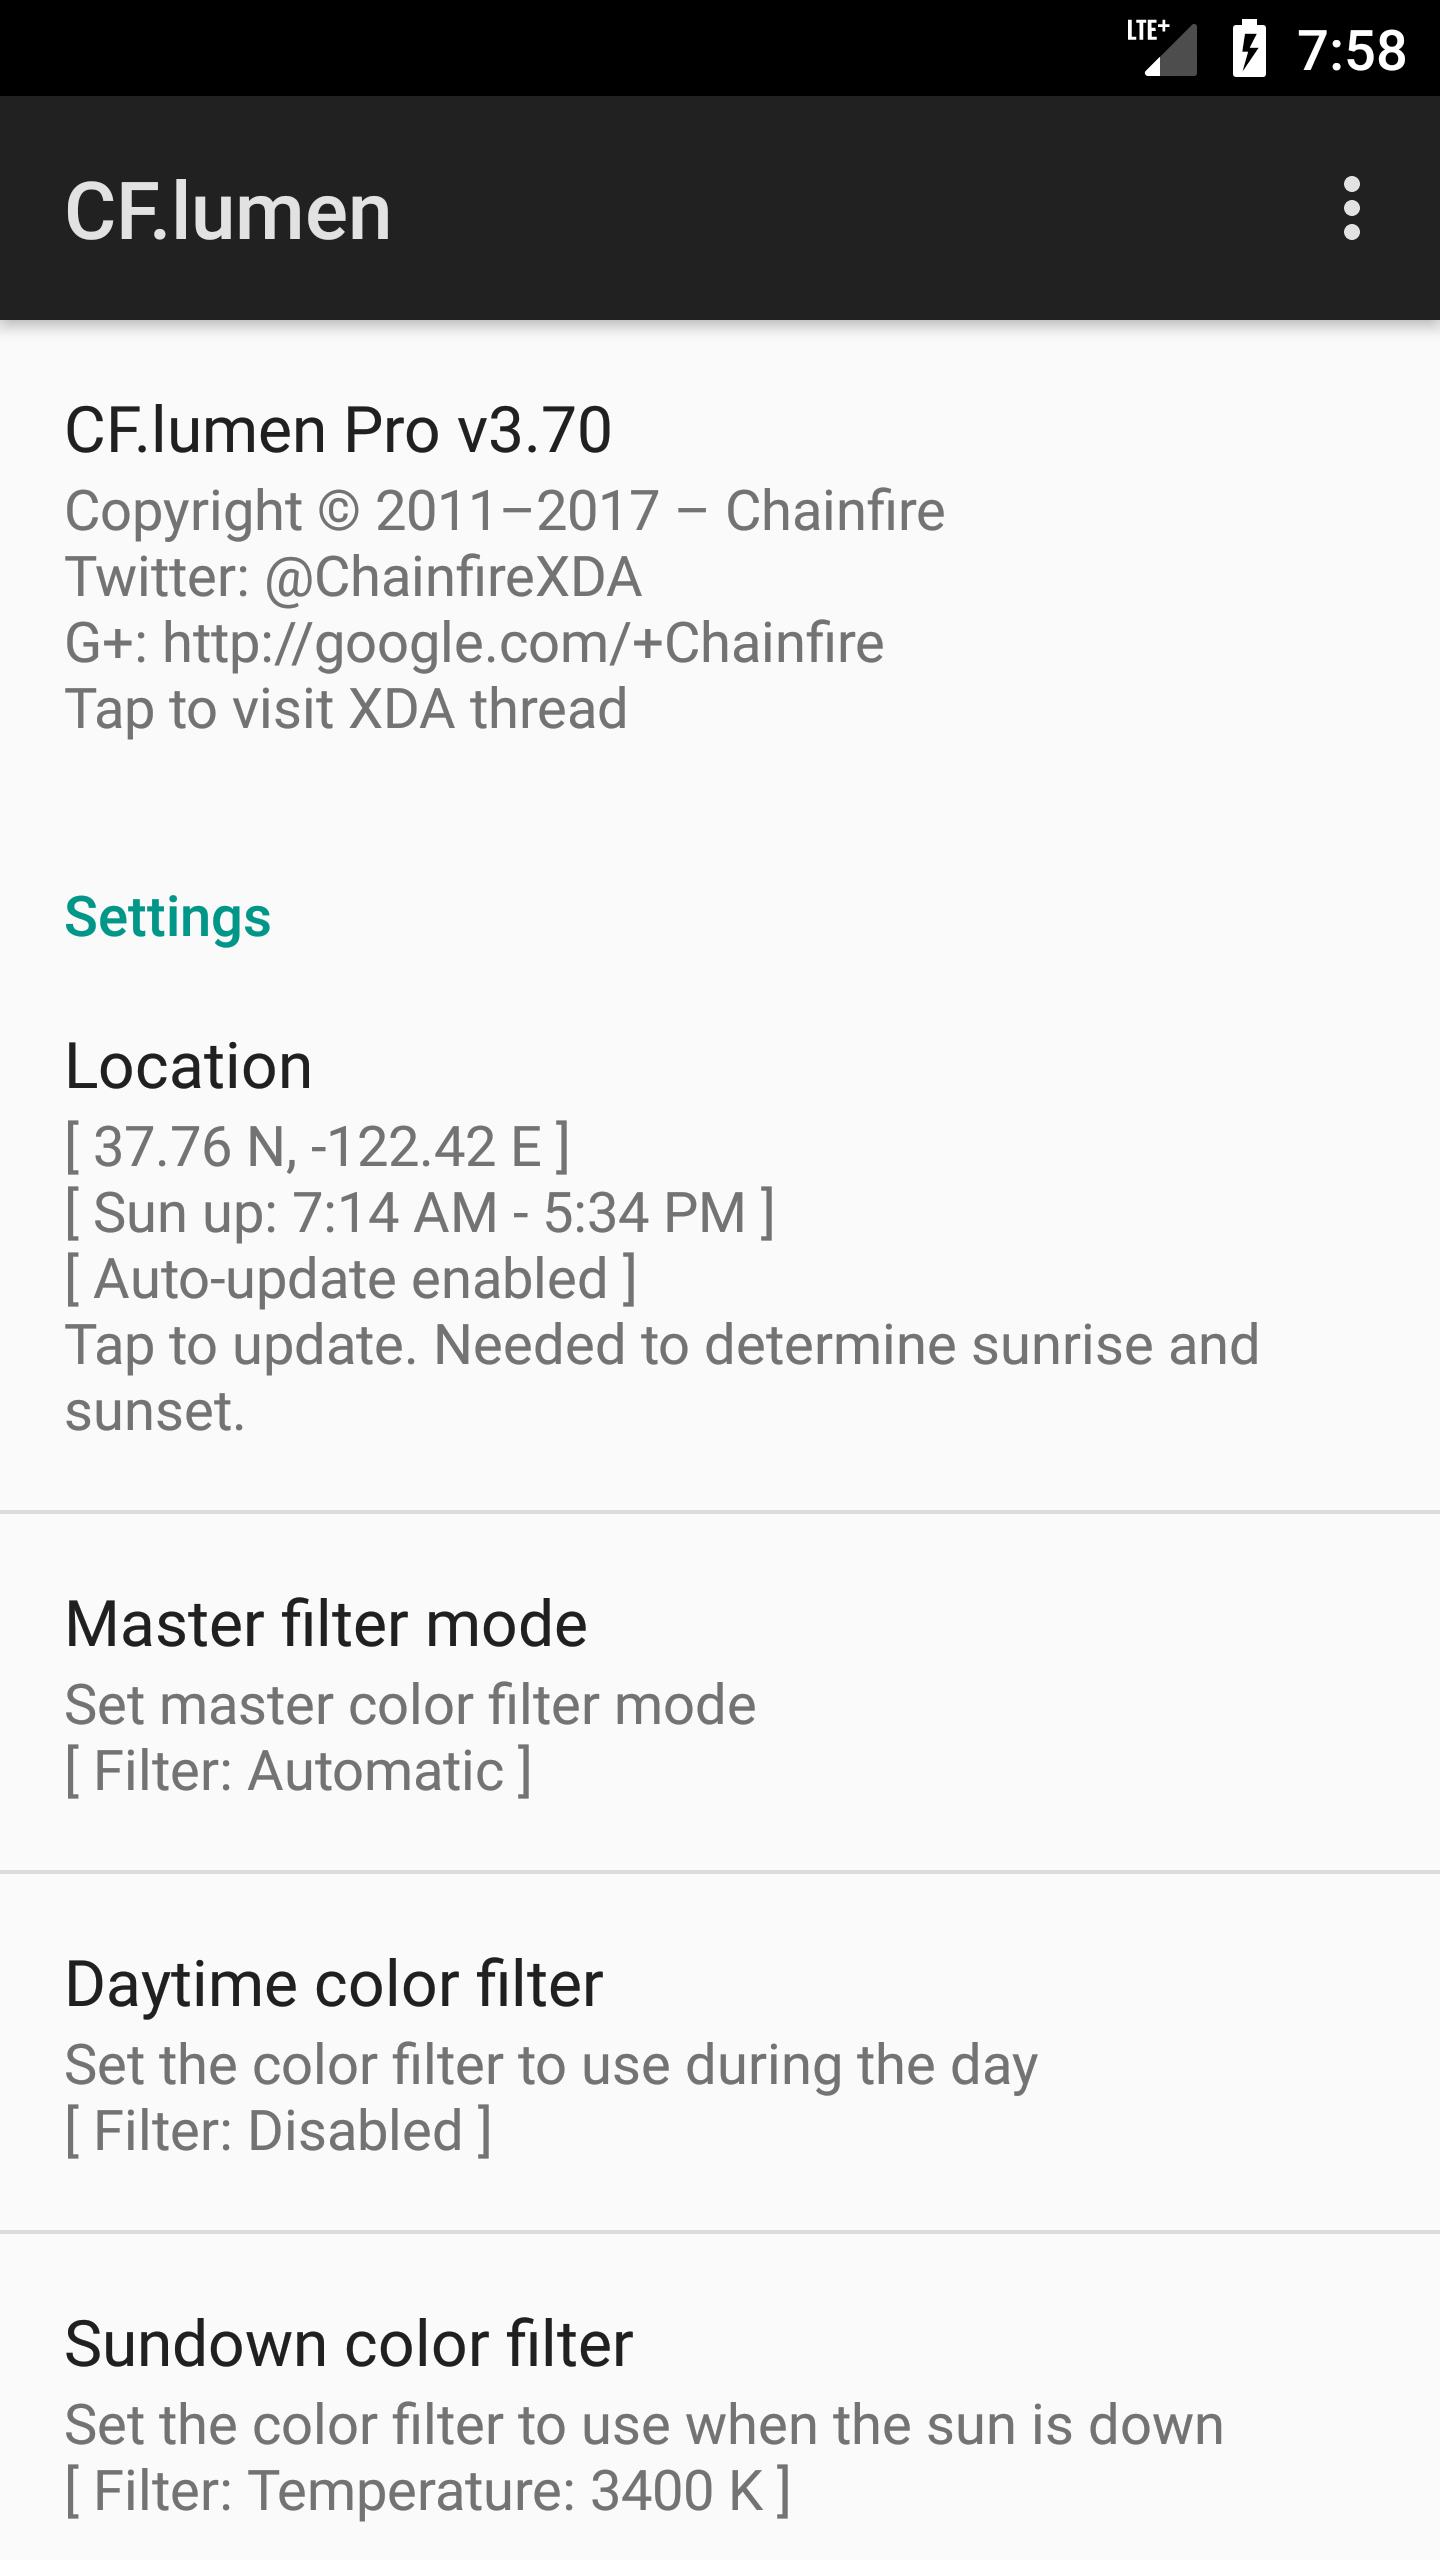
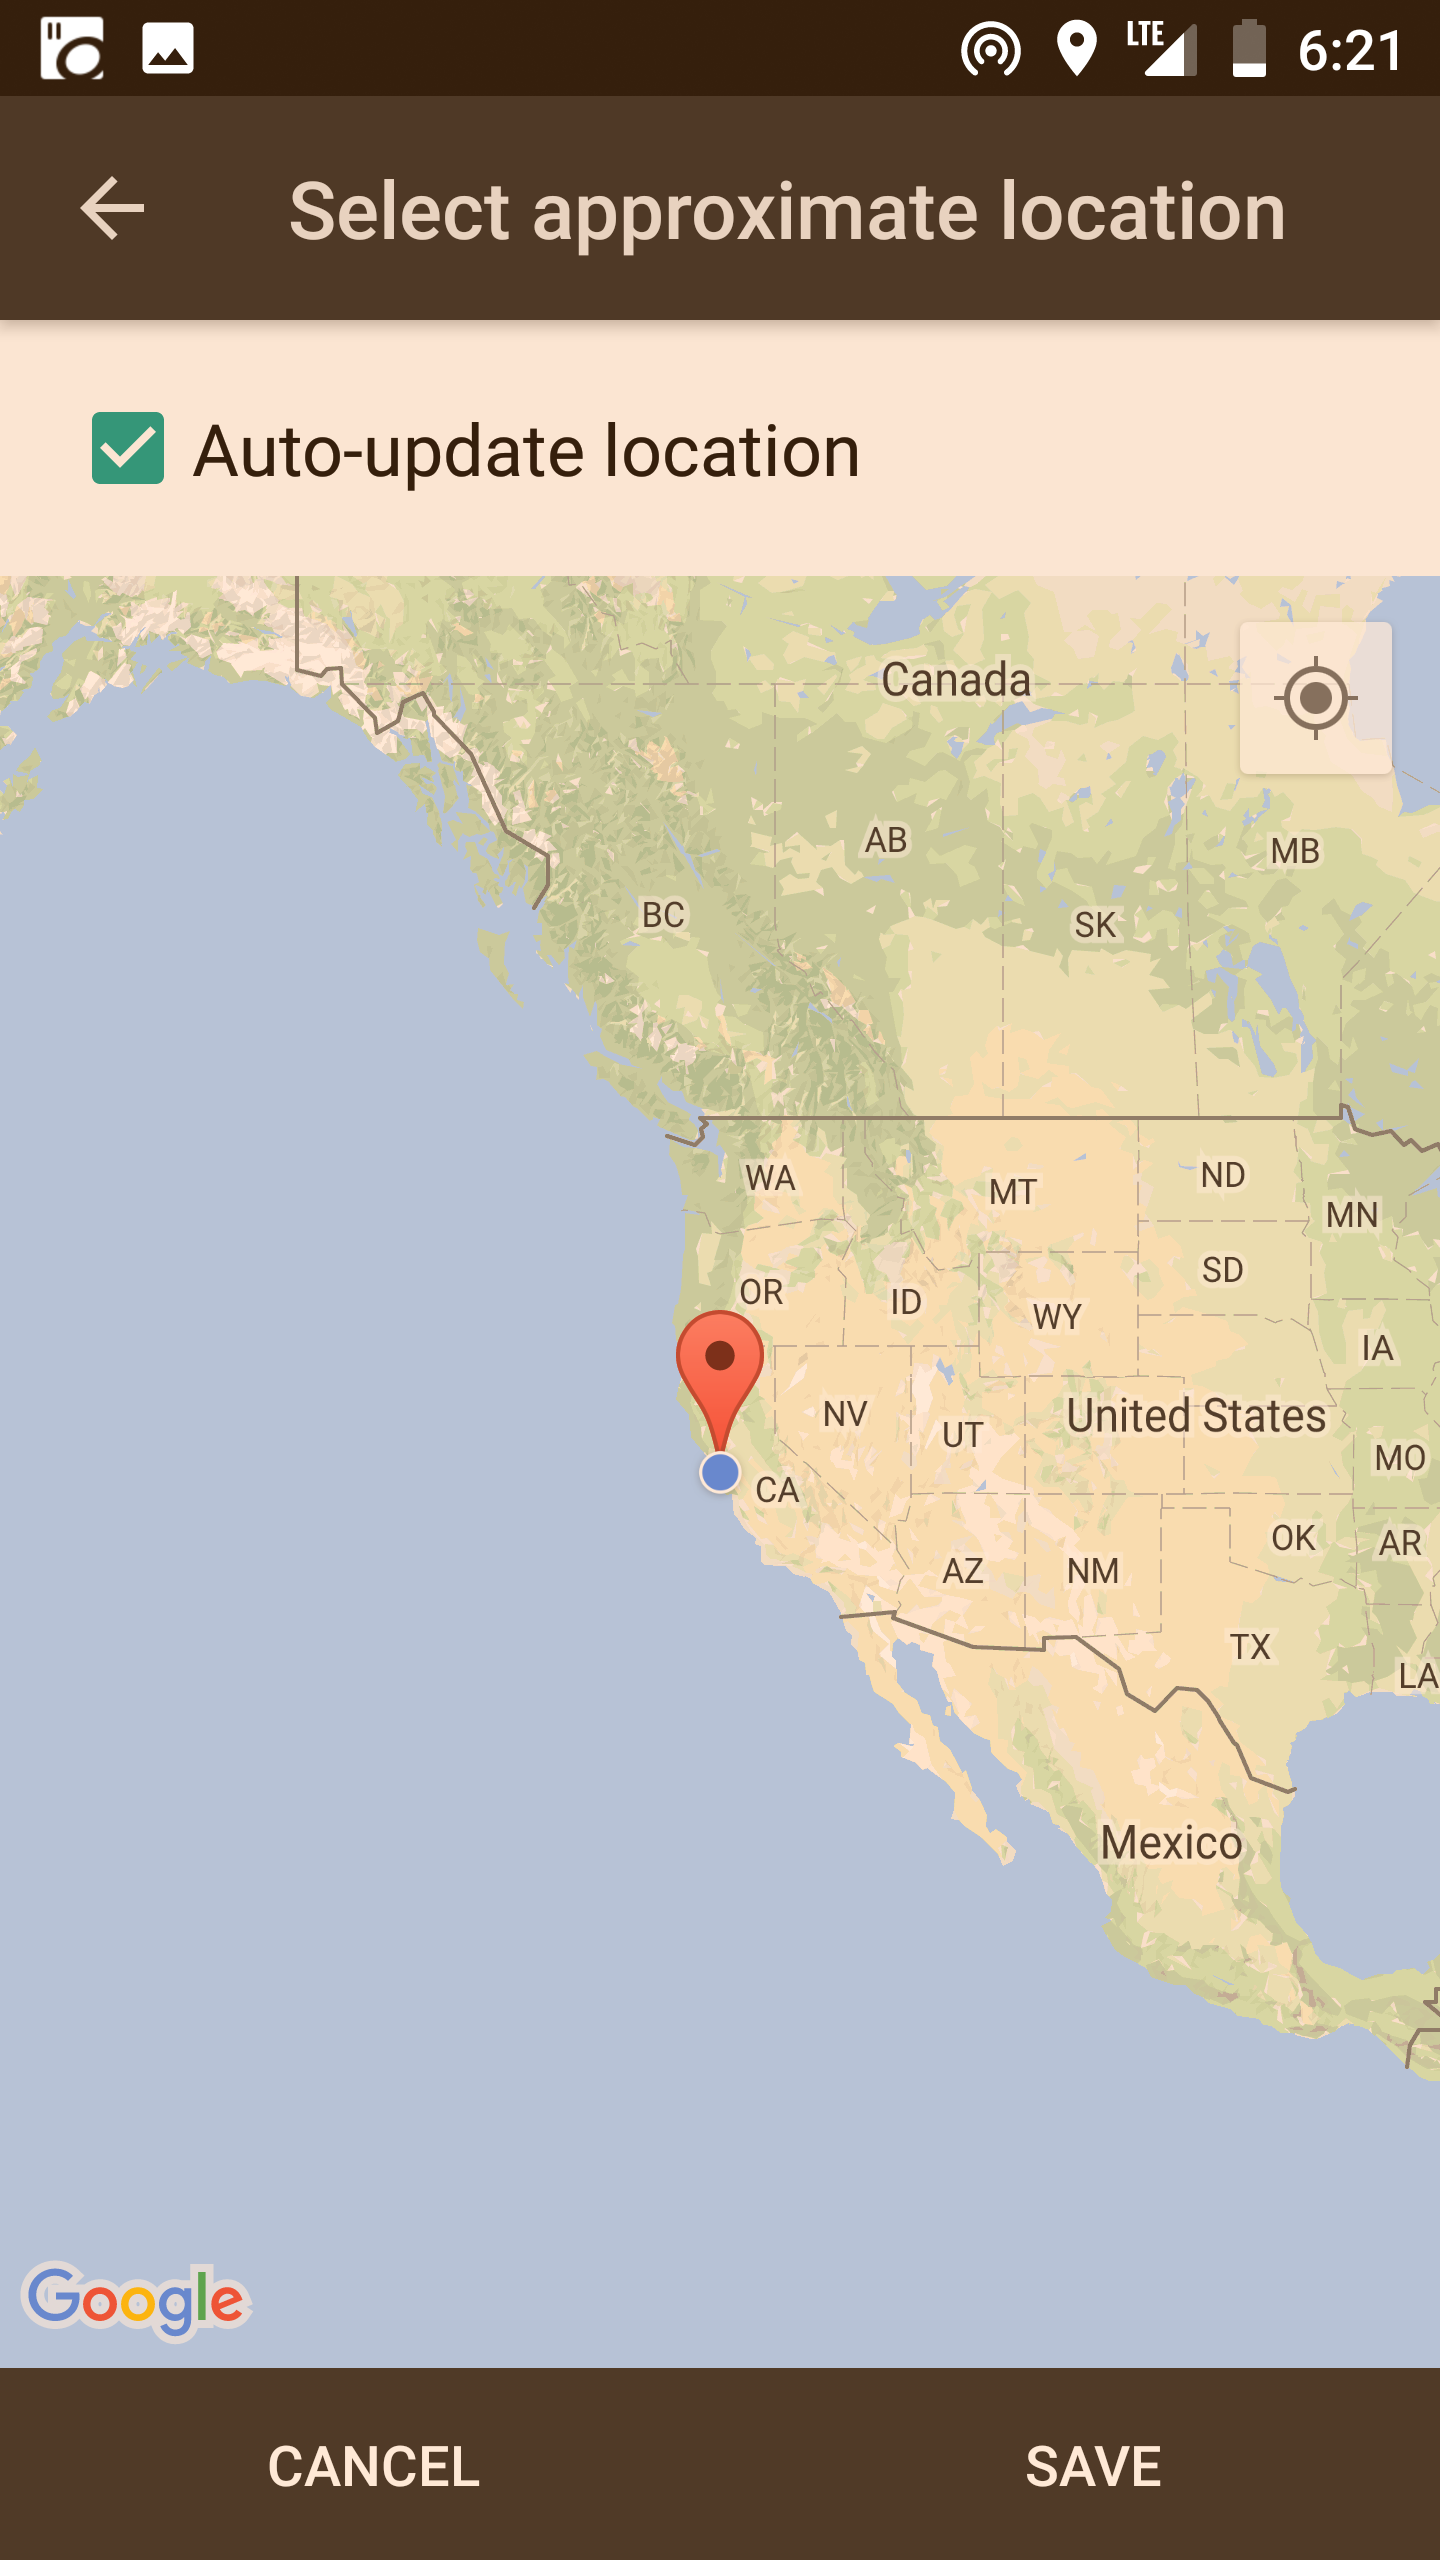
4.
Tap on the “Location” section to set your location. (don’t be scared
off by the longitude and latitude, the GPS on your phone will detect it
automatically. This is used to calibrate the sunset and sunrise times
for your location)
5. You’ll want to set the “Sleep: Start time” and “Sleep: End time” to know the specific times to start the blue light filtering
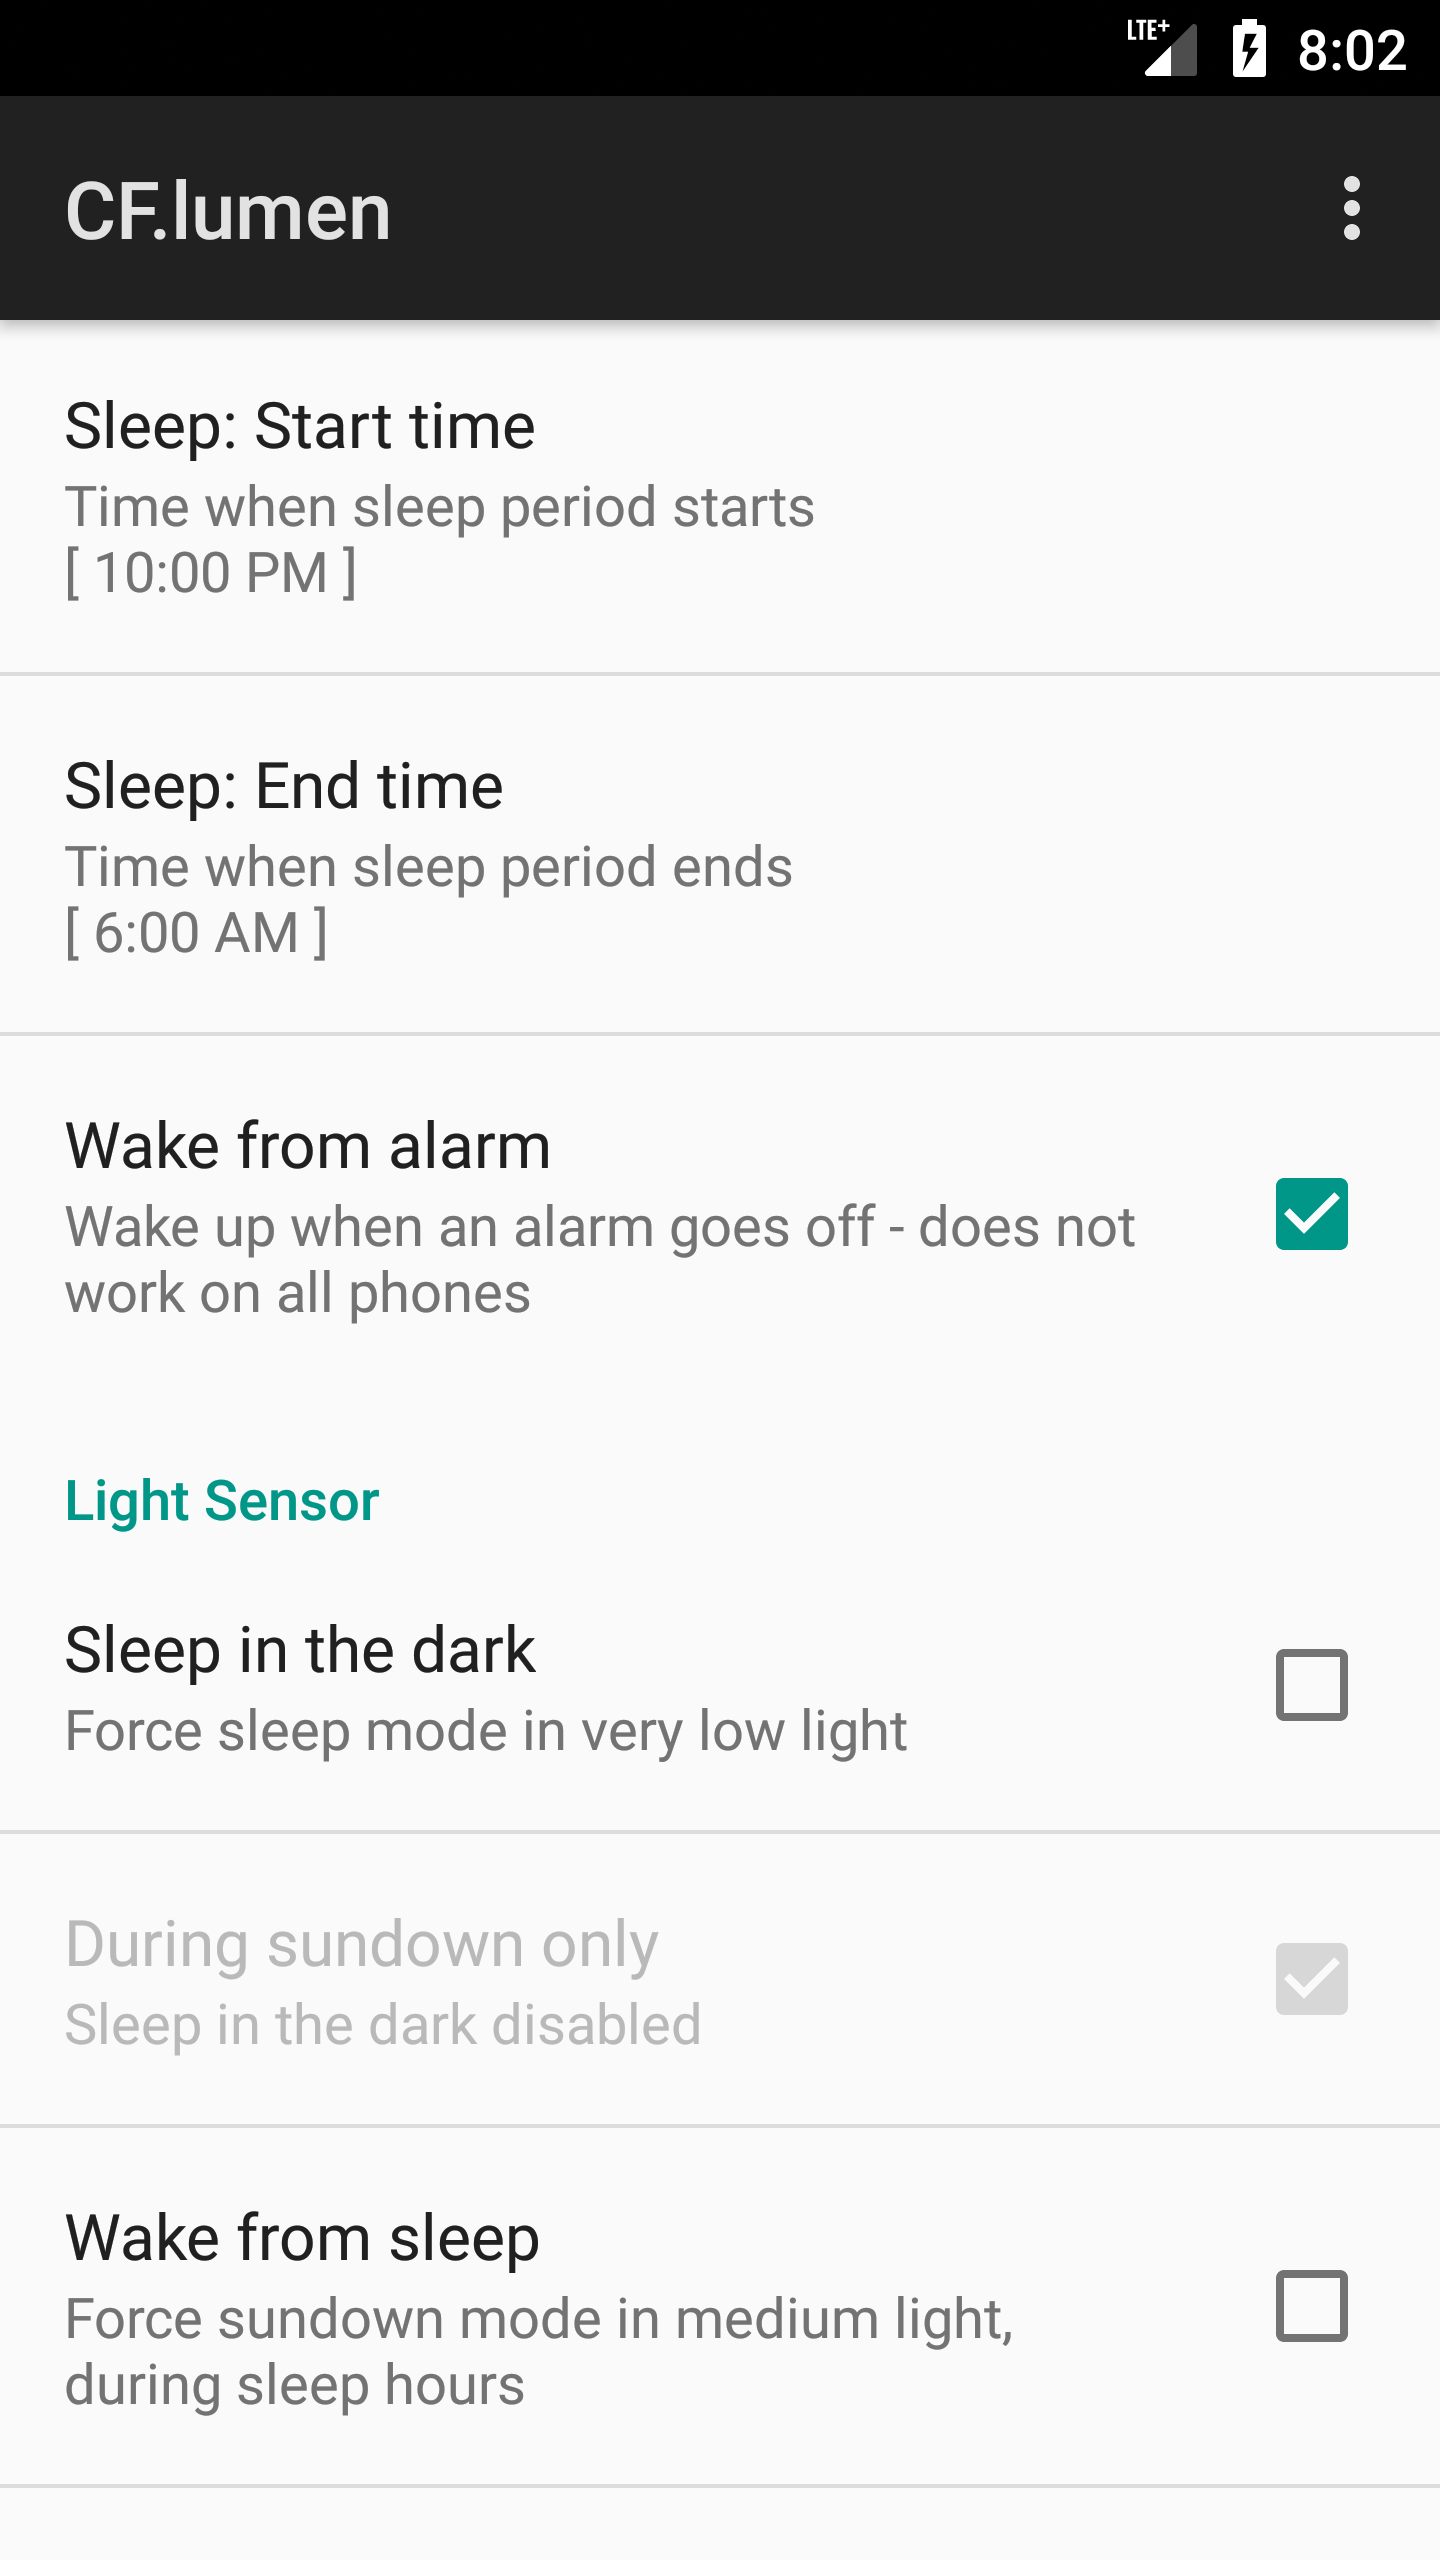
6.
Those are really the only required settings, the rest of the options
are for power users to customize things. (For instance, you can make
CF.lumen start automatically when you boot up your phone, or manually
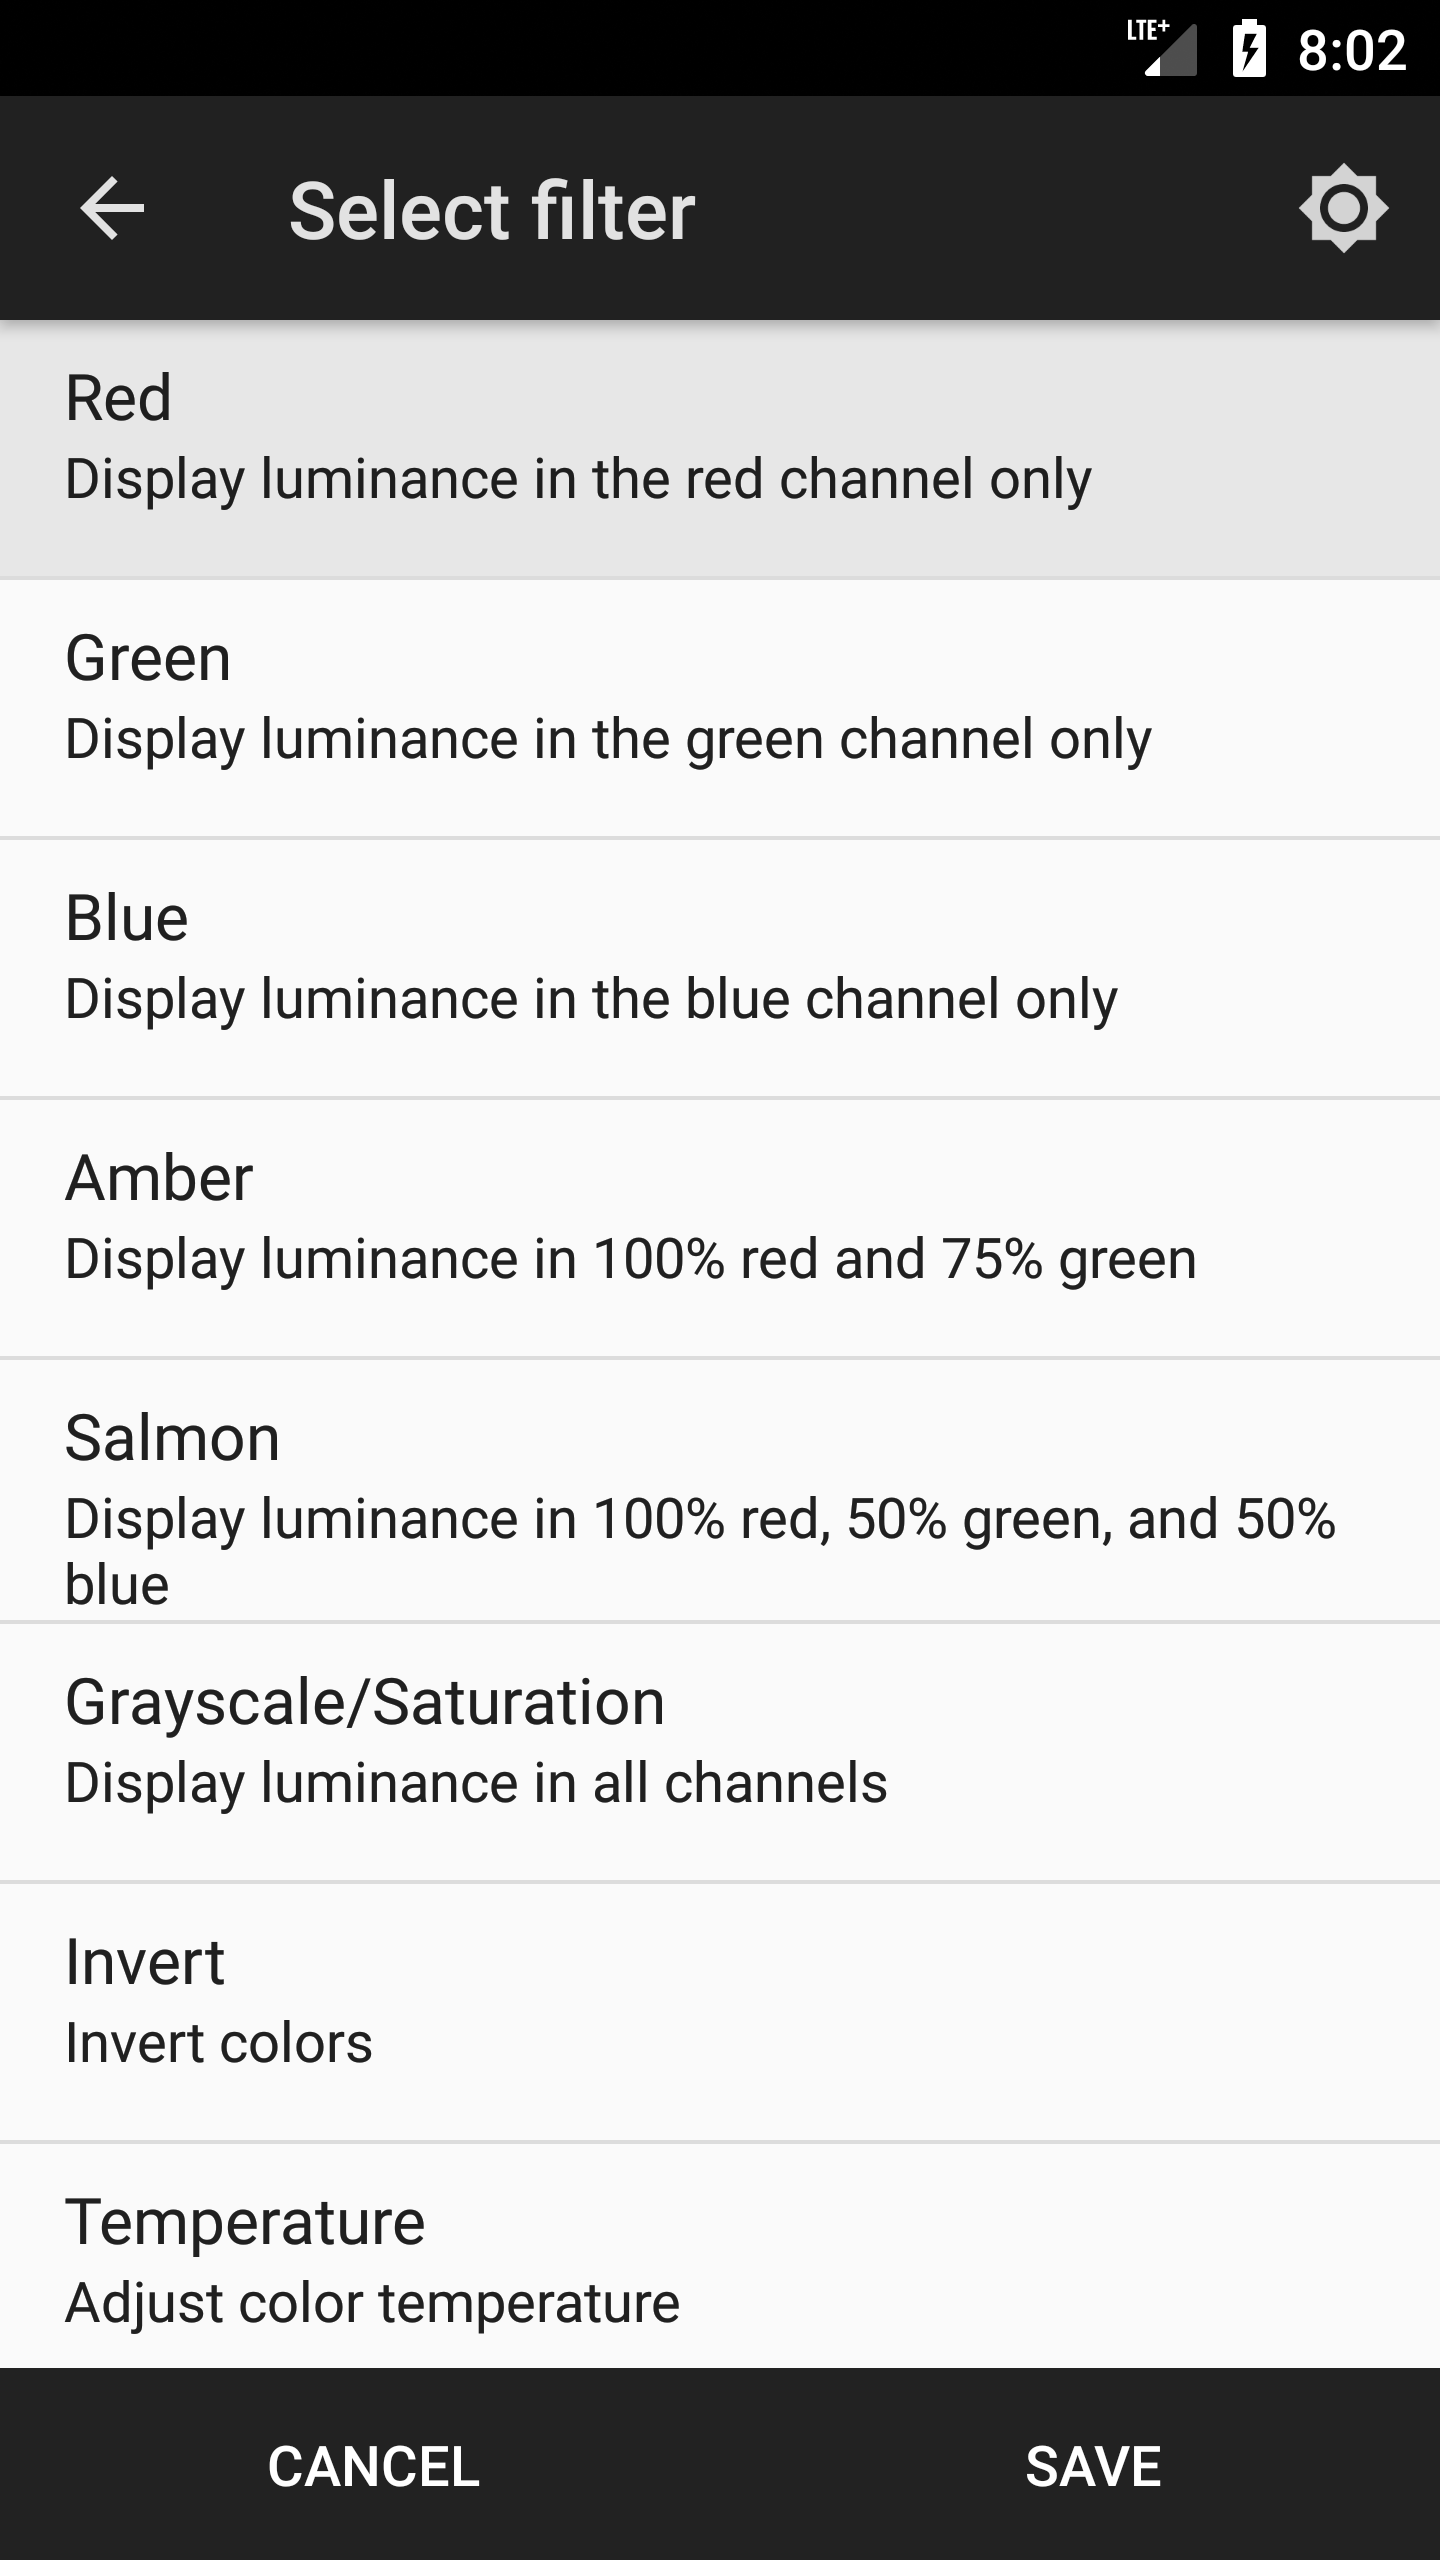
set up the color filter if you want to try something more extreme)
Concluding Thoughts
Taking
these steps will certainly improve your experience. But it’s important
to realize that every Android user needs to find their own personal
balance of function and aesthetics. What works for me may not work for
you.
The
beauty of the Android eco-system is that it’s built on choice and
customization. You may find that a clean home screen brings you joy but a
blue light filter just frustrates you. That’s okay! Only make changes
that you think will genuinely improve your experience.
We’re staring at our phones for nearly 5 hours per day. You owe it to yourself to maximize the visual experience and efficiency of that time.
Source
Source

No comments:
Write comments