


Xiaomi and HomeKit
I’ve
been building my smart home over the last few years and was in the
market to add sensors everywhere in an effort to improve the automations
that I was able to achieve.
I
previously had a couple of Philips Hue Motion sensors, and Elgato Eve
Door & Window sensors, but at £35 a piece, adding these to all rooms
and door would get very expensive. I was introduced to the Xiaomi
ecosystem and decided to give it a try. Interestingly this is the first
time that I’ve opted to buy some non native devices and rely on
Homebridge for the integration. Prior to this, I’ve used HomeBridge as a
way to integrate tech that I already owned.
Purchase
I
got all of my kit from a site called Lightinthebox.com. This was the
only site that I found that shipped to the UK and had a wide range
stocked. I initially opted for:
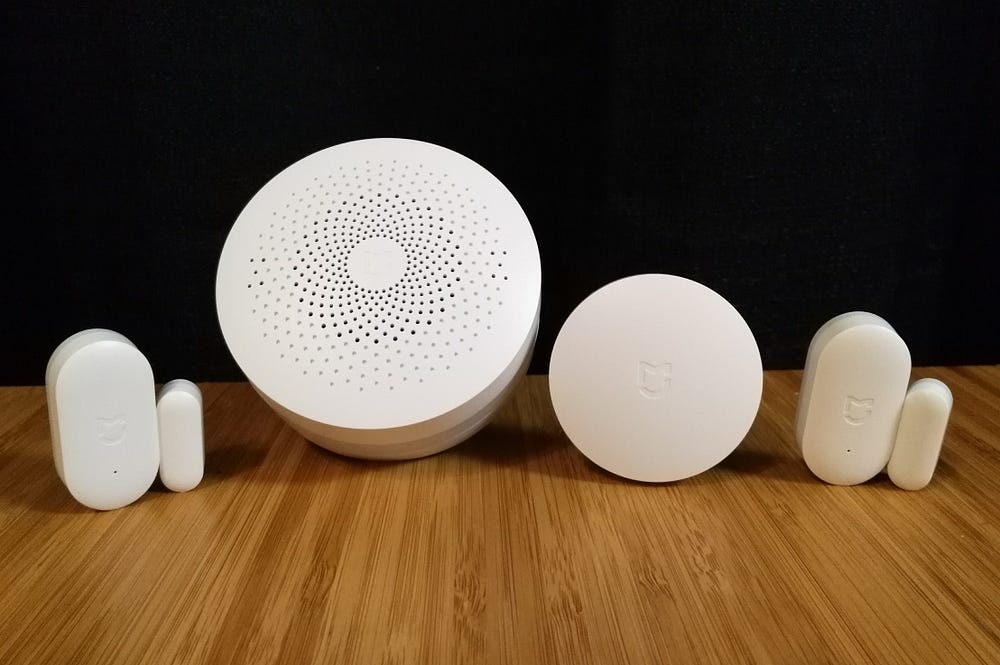
- Door and Window sensor x5 (currently £6.13 each)
- Gateway (currently £17.88)
I was that impressed with the kit that I purchased some more:
- Door and Window sensor; another 5
- Motion Sensor (currently £8.12 each)
- Smart Button (currently £5.27 each)
One
thing to note is that the website quoted 5–8 days for shipping — this
was actually more like 19, but for the price I can’t really complain.
Setup
The
setup was fairly trivial. I did however need to upgrade my version of
node running on my RPi3 to work with the plugin. As to not waste
countless hours in node dependency hell, I’d recommend a fresh install
of everything. I took a copy of my config.json file, made a note of
installed plugins and completely wiped my SD card.
Follow these steps to get going (this assumes you’re on an iPhone, running iOS 11 or later)
- Download the MiHome app and setup the gateway and configure your accessories. It doesn’t really matter what rooms the devices are placed in.
- Open the MiHome app, tap on the gateway, then tap on the 3 dots in the top right corner.
- Select about and then repeatedly (and quickly) tap on the blank space until three additional menu options in Chinese appear.
- Tap the second option. This allows you to turn on local access mode. A password should appear. Make a note as you’ll need that soon.
- Tap back and select the 3rd option. Make a note of the MAC address of the gateway. There’s a couple listed, one of the router that the gateway is connected to and one for the gateway itself. If it’s unclear which is which, try both. (If you run homebridge with the -D flag, you’ll get debug info which will let you know if you’ve connected to the gateway correctly).
- Install the homebridge-mi-aqara plugin and input the MAC and password from the steps above into your config.json file.
- Restart HomeBridge and your accessories should now appear.
Usage
The
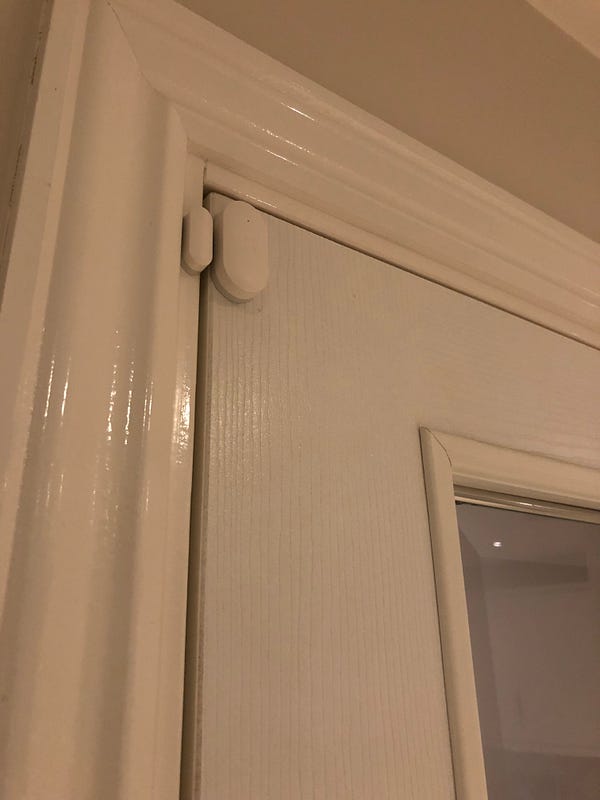
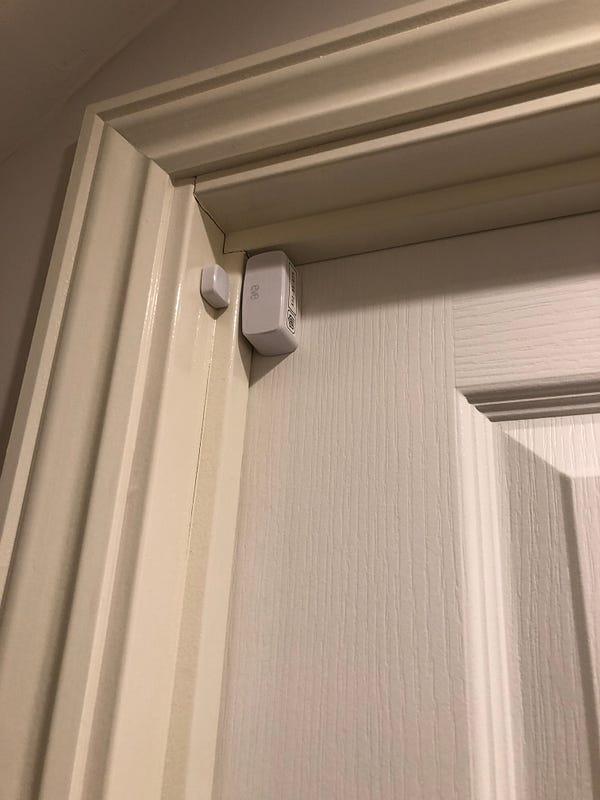
first thing to note is how tiny the door sensors are. Here’s an image
with the Elgato Eve as a comparison. Due to the size of the Eve device
and the trim around my doors, I’ve had to be creative with how I mount
it.
The
second thing to note is how quickly these sensors update within
HomeKit — unscientifically I’d say this is instant. Even with the latest
firmware the Elgato sensors still have a slight delay if that haven’t
been triggered for a period of time. This still makes them unsuitable
for certain automations, where you need a light to turn on immediately
for example.
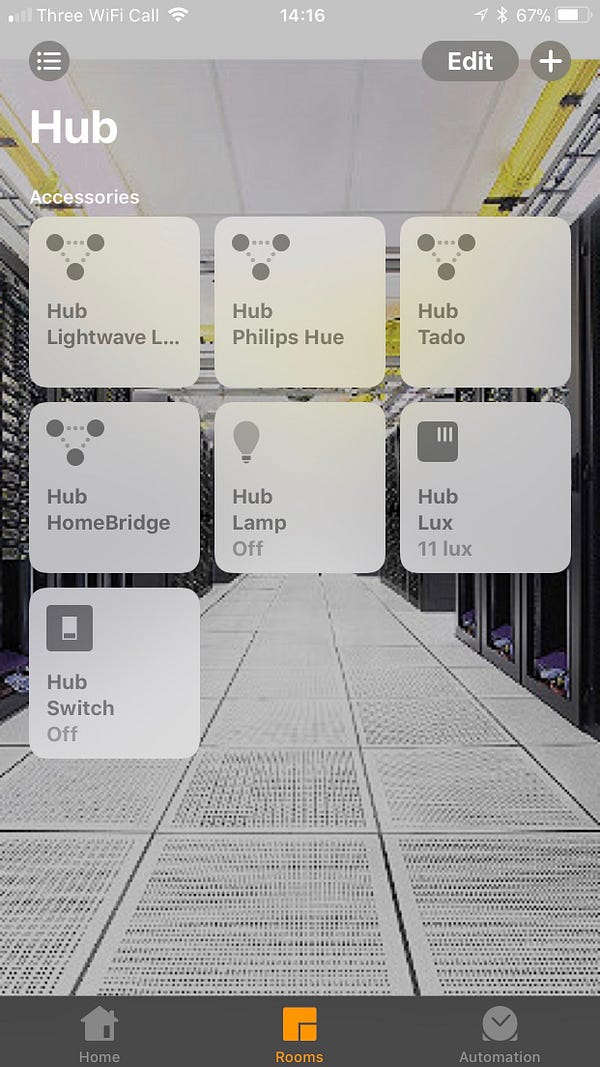
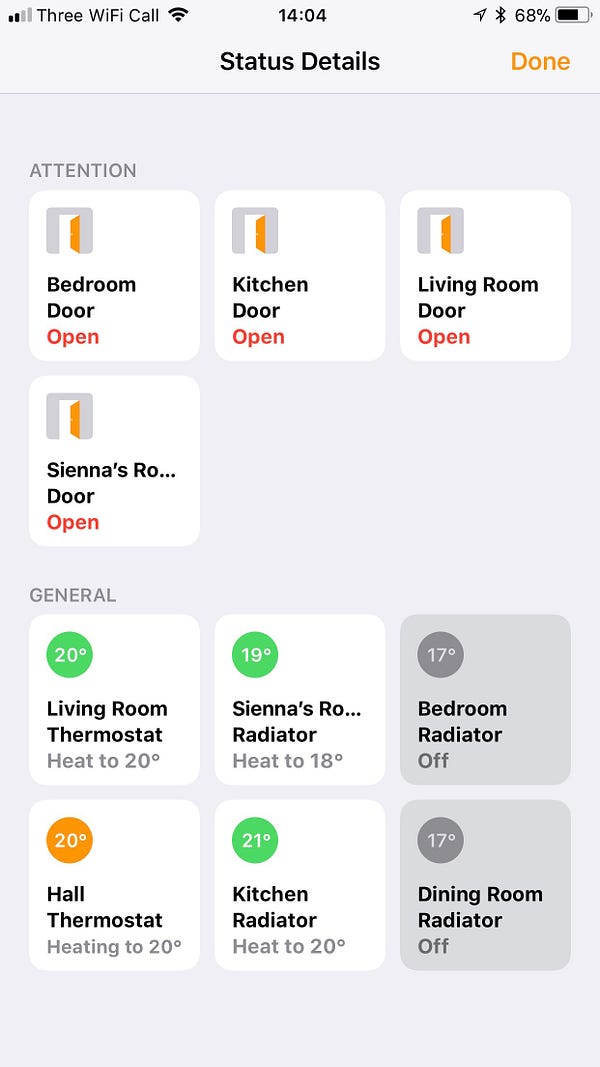
The
door sensors show up as regular sensors, along with three other
accessories from the gateway; a light sensor, multi colour light and a
switch. The light actually makes a pretty decent nightlight, especially
as you don’t need to physically connect it to a router.
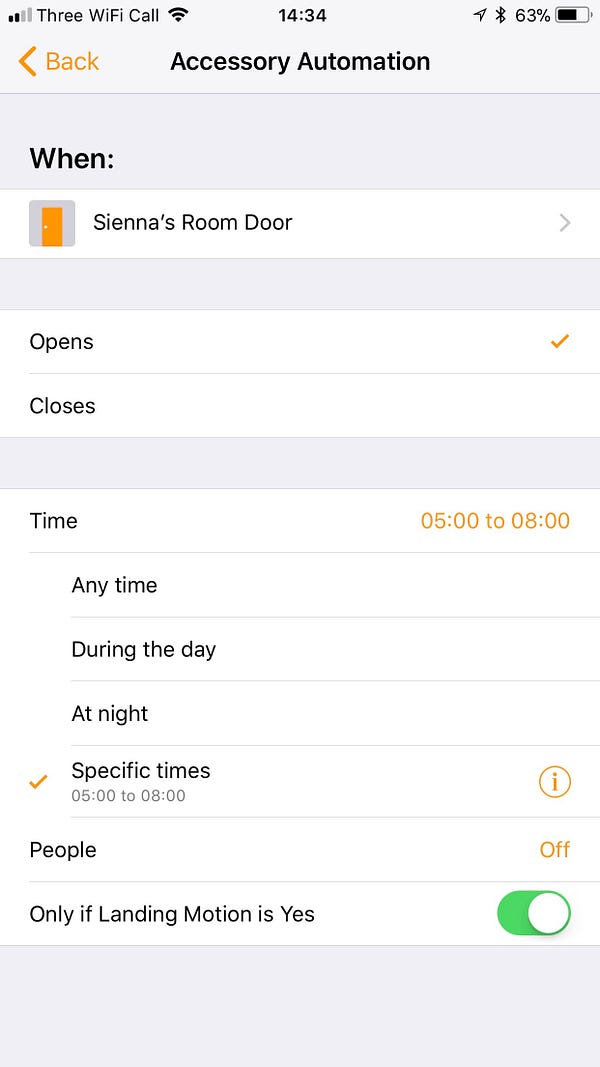
I’ve
got a couple of automations setup where I use a door sensor in
combination with a motion sensor to detect if somebody is entering or
leaving a room. To do this I have a motion sensor on each side of the
door and then use the motion as a conditional rule. For example, I want
to turn on a table lamp in my daughters room when the door opens, but
only between 5am and 8am. This assumes that I’m going in to her room
when she is awake and that I want the light to come on with a soft glow.
It also assumes that if I’m already in the room and leave during that
window that I don’t want to like to come on (if for example she actually
isn’t awake, or she settles back to sleep). To do this, I have a motion
sensor on the landing and in her room (via a D Link Omna camera) with a
rule stating that the lamp should only come on when there is motion
detected on the landing. If there is motion on the landing then I must
be outside of the room, therefore entering. If there’s motion in the
room, then I’m leaving so the rule doesn’t trigger again.
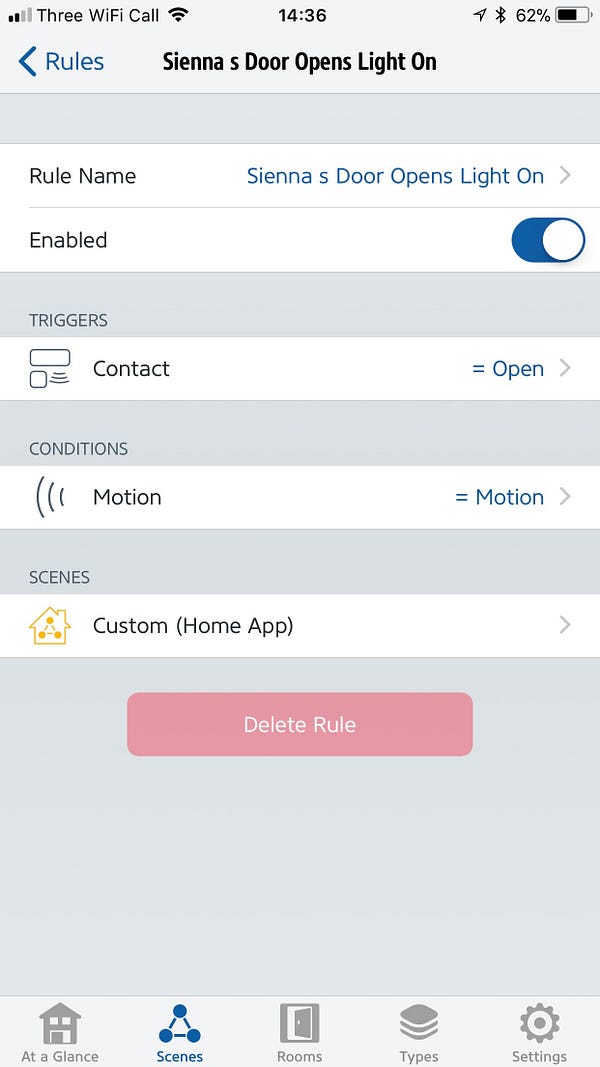
To
get the extra option I used the Elgato Eve app. Firstly setup the basic
automation rules in the Apple Home app, and then add the condition
using Eve.
So
far, I’m really impressed with the Xiaomi system and would certainly
consider adding more devices (although you can only add 30 per gateway)
to my setup.


